When you initiate a document, you will have to add all tags relevant to the document in the Tag Master. To do so, follow these steps:
1.On the Explorer, click DMS, click Document Management, and then click Tag Master. The Tag Master screen appears as shown in the figure:
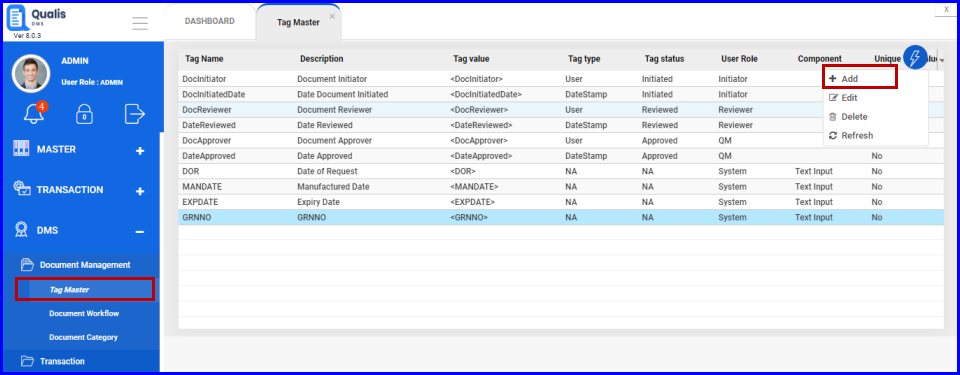
FIGURE: - Tag Master Screen
In the tag master screen you can see the list of tags added. Also options to add, edit and delete tags appear in the action menu as shown in the above figure.
2.Click action menu and then click Add. The Tag Entry dialog appears as shown in the figure
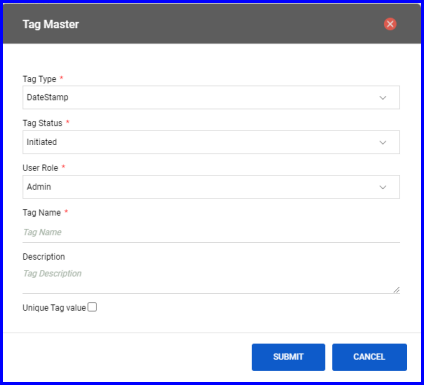
FIGURE: - Tag Master Dialog
3.n the Tag Type field, select the type you want to add from the following list:
If you select NA then you need to set tag value when you respond to a document request. All other tag type will be captured automatically.
4.In the Tag Status field, select the status.
5.In the User Role field, select the roles.
6.In the Tag Name field, type the tag name.
Note: Type the tag name without space. The Tag Name field does not accept space.
7.In the Tag Description field, type description for the tag.
8.Check the Unique Tag Value check field to make the tag unique. If this option is checked, then you cannot create another tag with the same tag name.
9.Click SUBMIT.
You can see the tag you just created listed in the tag master.
10.To edit a tag, in the tag master screen, select the tag, click action menu and then click Edit. In the Edit Tag dialog, do required changes and then click SUBMIT.
11.To delete a tag, in the tag master screen, select the tag, click action menu and then click Delete.
Workflow guides you through the steps and organizes the information required to complete the document management process. This may include selecting the reviewers and approvers to manage document in each stage of the document lifecycle.
Qualis DMS enables you to create custom workflows that meet your specific requirements.
To create a new workflow, follow these steps:
12.On the Explorer, click DMS, click Document Management, and then click Document Workflow. The Document Workflow screen appears as shown in the figure:
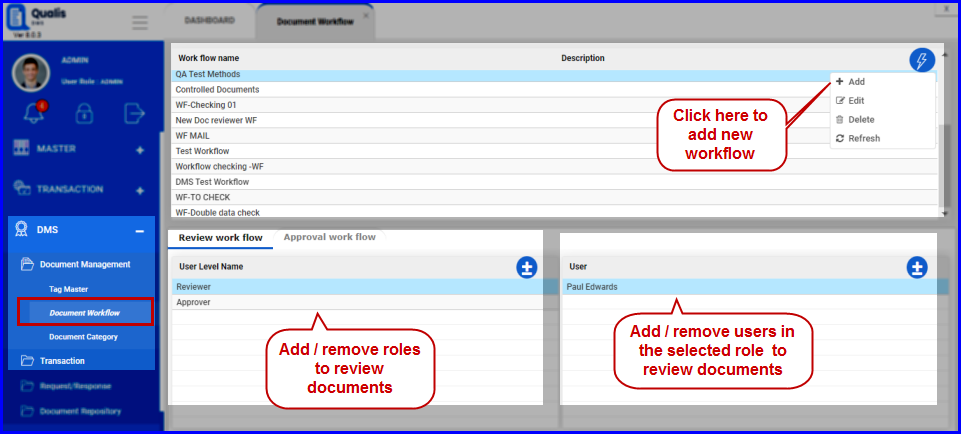
FIGURE: - Document Workflow Screen
13.In the Document Workflow screen, click action menu and then click Add. The Add Workflow Dialog appears as shown in the figure:
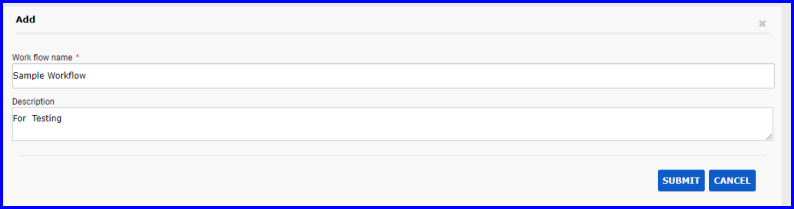
FIGURE: - Add Workflow Dialog
14.In the Work flow Name field, type name for the workflow you create.
15.In the Description field, type description for the workflow if any.
16.Click SUBMIT.
You can add user roles and then add users to review the documents in the workflow. To do so, follow these steps:
17.In the Document Workflow screen, under Work flow name, select the workflow you want to add role and user:
In the Review Workflow tab, click.  The Review Work flow add and remove role level dialog appears as shown in the figur
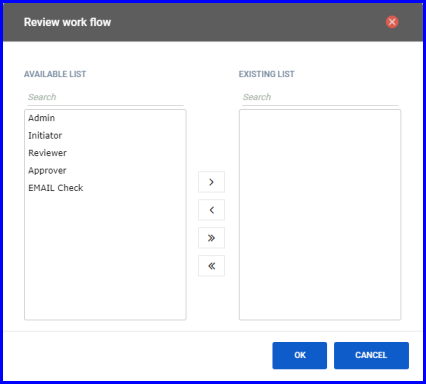
FIGURE: - Review Workflow - Add and Remove Role Level Dialog
19.You can see the list of available roles in the left side. Select a role and click to add it to the workflow. You can add multiple or all roles to the workflow as required.
20.Click OK.
21.For each role, to add users, select the role, in the User section click. The Review workflow add and remove users dialog appears as shown in the figure:
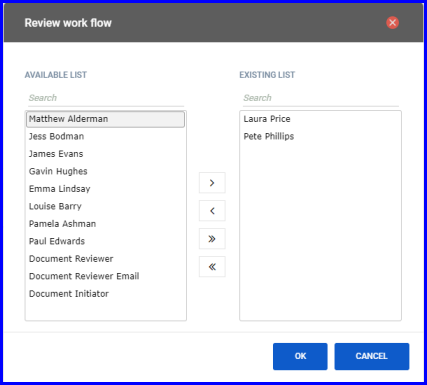
FIGURE: - Review Workflow - Add and Remove Users Dialog
22.You can see the list of available users in the left side. Select a user and click to add them to the workflow. You can add multiple or all users to the workflow as required.
23.Click OK. You can see the role and the users added to the review work flow as shown in the figure:
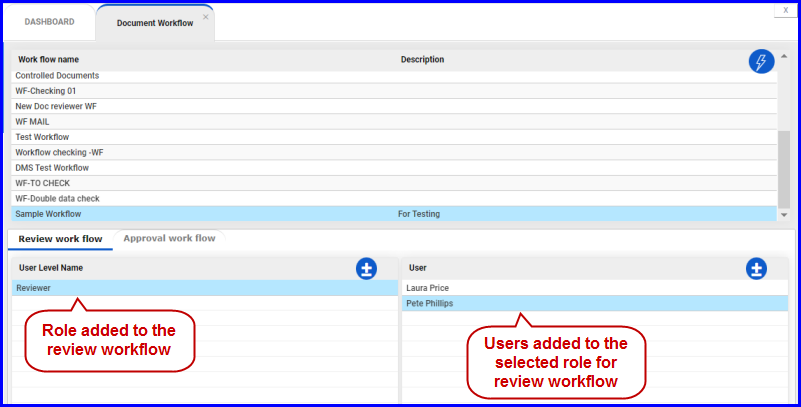
FIGURE: - Role and Users Added to the Review Workflow
You can add user roles and then add users to approve the documents in the workflow. To do so, follow these steps
24.In the Approval Workflow tab, click. The Approval work flow add and remove role level dialog appears as shown in the figure:
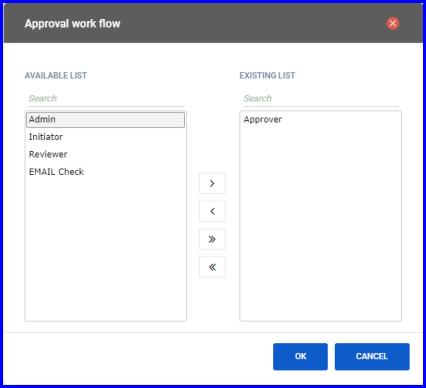
FIGURE: - Approval work flow - Add and Remove Role Level Dialog
25.You can see the list of available roles in the left side. Select a role and click  to add it to the workflow. You can add multiple or all roles to the workflow as required
26.Click OK. The roles added to the workflow appears as shown in the figure:

FIGURE: - Adding Step Code
You must add step code to each role here.
27.In the Step Code field type the level of approval for each role to define the sequence of approval in the workflow.
28.For each role, to add users, select the role and then click. The Approval work flow add and remove users dialog appears as shown in the figure:

FIGURE: - Adding User Role Screen
The Add User Role dialog appears as shown in the figure:

FIGURE: - Approval workflow - Add and Remove Users Dialog
29.You can see the list of available users in the left side. Select a user and click to add them to the workflow. You can add multiple or all users to the workflow as required.
30.Click OK. You can see the role and the users added to the approval work flow as shown in the figure:.
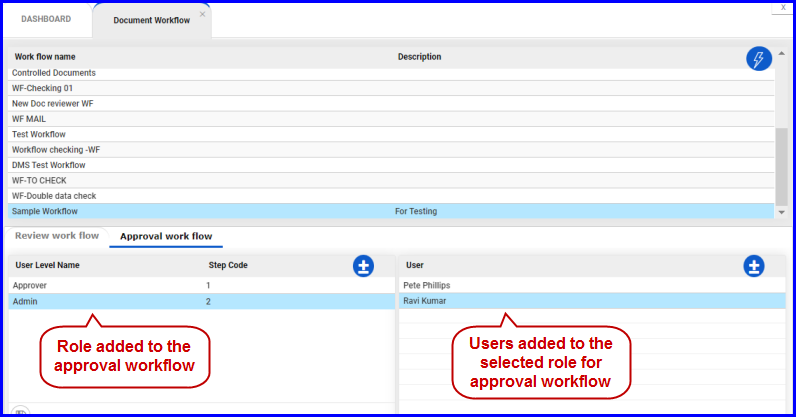
FIGURE: - Role and Users Added to the Approval Workflow
Document categories are created to categorize documents based on the document type, workflow and template involved. You can create a document category and map the workflow to the category.
To create a document category, follow these steps:.
31.On the Explorer, click DMS, click Document Management, and then click Document Category. The Document Category screen appears as shown in the figure:
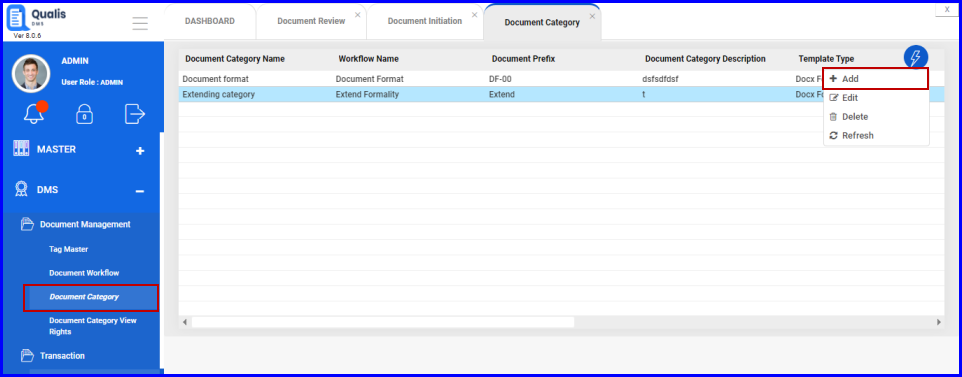
FIGURE: - Document Category Screen
You can see the list of document categories added and in the action menu you can see options to add, edit and delete document categories.
32.In the Document Category screen, click action menu and then click Add. The Add Document Category dialog appears as shown in the figure:
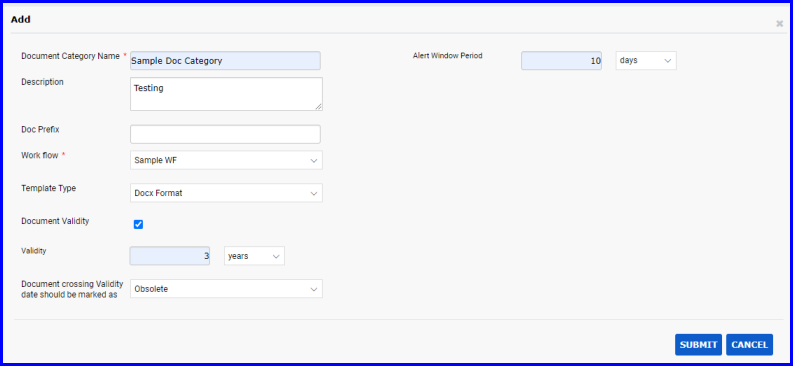
FIGURE: - Add Document Category Dialog
33.In the Document Category Name field, type name for the category you create.
34.In the Description field, type description if any.
35.In the Doc Prefix field, type the document extension type: .Docx/PDF.
36.In the Workflow field, select the workflow to map it to the category you create
37.In the Template Type field, select the template for the category
38.Click to enable the Document Validity option. If this option is enabled, then the following fields are enabled:
39.Click SUBMIT. The document category is added and appears in the list:
Document Category View Rights screen enables you to grant or revoke view permissions for document category based on section and user.
To define document category view rights, follow these steps:.
1.On the Explorer, click DMS, click Document Management, and then click Document Category View Rights. The Document Category View Rights screen appears as shown in the figure:

FIGURE: - Document Category View Rights Screen
Follow the on screen instructions to add or revoke permission for the selected document category.
1.To define document category rights based on section, follow these steps:
1.On the Explorer, click DMS, click Document Management, and then click Document Category View Rights. The Document Category View Rights screen appears as shown in the figure:
2.Under Section, select a section, under Document Category click . The Add and Remove Document Category dialog appears as shown in the figure:
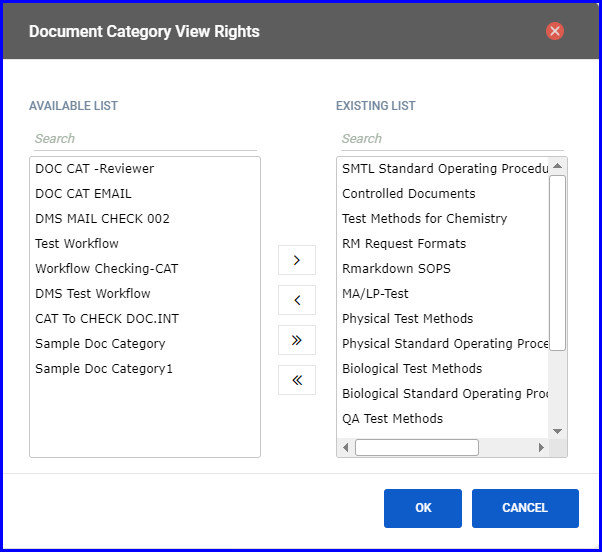
FIGURE: - Add and Remove Document Category Dialog
3.Select a category under AVAILABLE LIST and then click to add to the EXISTING LIST
4.Click OK. You can see the category added under Document Category. And the list of documents in the selected Document Category appears under Document Name.
To define document rights based on users, follow these steps:
1.On the Explorer, click DMS, click Document Management and then click Document Category View Rights.
Under Section select a section. You can see list of users in the selected section
3.Under User Name select a user you want to define rights. You can see list of categories the user has rights under Document Category.
4.Under Removed Document Name, click.  The Remove Document dialog appears as shown in the figure:
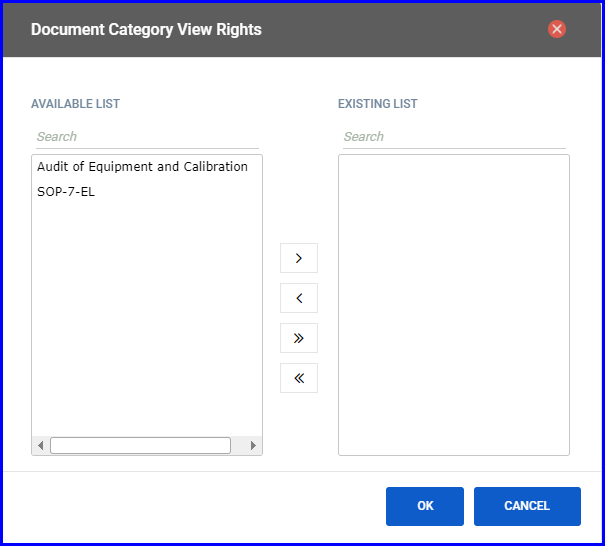
FIGURE: - Add and Remove Document Category Dialog
Select a document under AVAILABLE LIST and then click to add to the EXISTING LIST. The documents added to the EXISTING LIST are hidden from the user.
5. Click OK.
The documents added under EXISTING LIST appear under Removed Document Name and the user cannot view these documents.
