To approve documents, follow these steps:
1.On the Explorer, click DMS, click Transaction, and then click Document Approval. The Document Approval screen appears as shown in the figure:
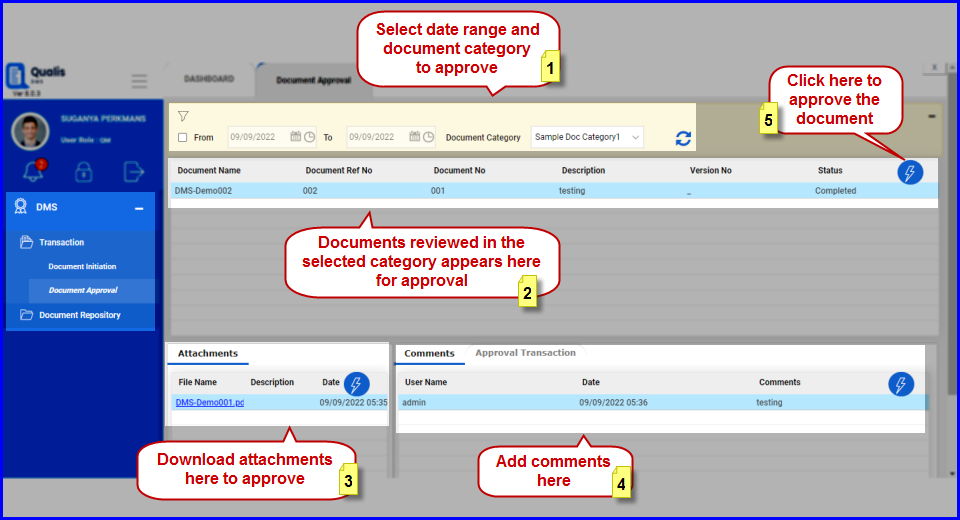
FIGURE: - Document Approval Screen
2.Select the date range and Document Category. Documents completed review would appear as shown in the above figure.
3.Click to select the document to approve.
4.In the Attachments tab, click action menu and then click View/Download to download the document for review and approve.
5.You can open the attached document in File Editor to review. Click action menu and then click File Editor.The attached file opens in ONLY OFFICE editor as shown in the figure:
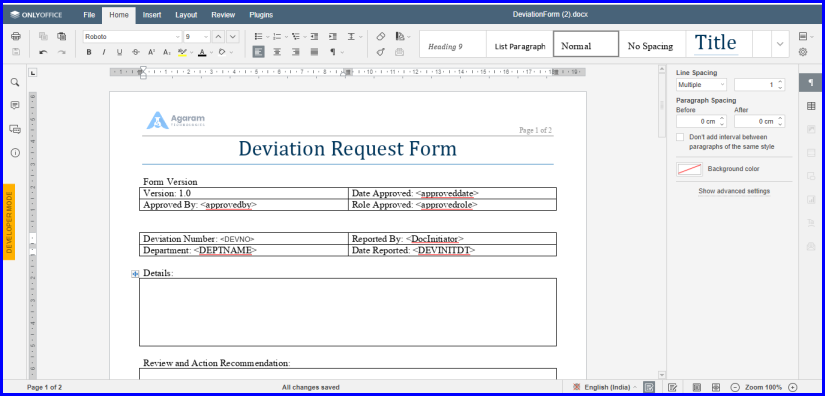
FIGURE: - File Editor
Note: If some other user is using i.e. opened / viewing the same file, then you will receive an alert saying the file is opened/being used by some other user.
6.Review the document.
7.In the Document section click action menu and then click Approve to approve the document. The document status is changed to “Approved” as shown in the figure:
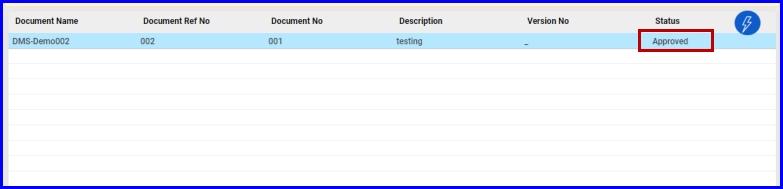
FIGURE: - Document Approval Screen Showing Approved Status
Note: The approver can reject the document if required. To reject a document, in the action menu select Reject.
The approved or rejected document goes to the initiator’s queue.
Note: All the approvers in the workflow should approve the document based on the step provided in the document workflow.
Now the approved document appears in the initiator’s queue. The initiator can set effective date for the approved document. To do so, follow these steps:
1.In the Document Initiation screen, select the approved document, click action menu and then click Effective Date as shown in the figure:
FIGURE: - Document Response Screen
2.Select Date, Section, Document Category and Status Filter..
3.Select the document you want to respond.
4.Click action menu and then click Tag Values. In the Tag Values dialog, type value for the tags as shown in the figure:
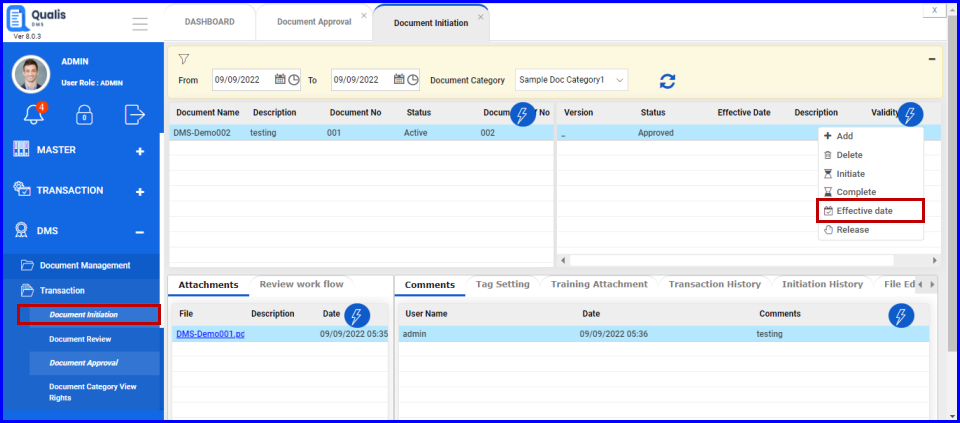
FIGURE: - Setting Effective Date
2. The Choose Effective Date dialog appears as shown in the figure
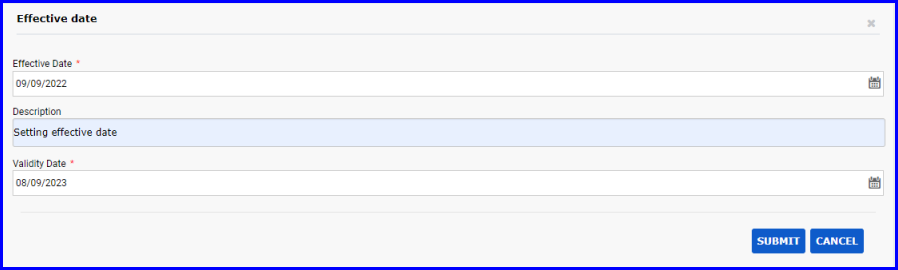
FIGURE: - Choose Effective Date Dialog
3.In the Effective Date field, select effective date for the document.
4.In the Description field, type description if any.
5.In the Validity Date field, select the date until the document is valid.
6.Click SUBMIT. The document will be available for document request for the users from the effective date. The effective date appears with the description as shown in the figure:
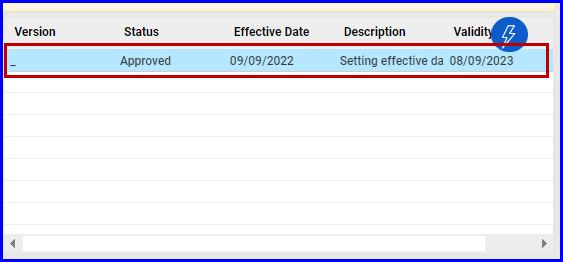
FIGURE: - Document Initiation Screen Showing Effective Date
After setting the effective date the document can be released. To release the document, follow these steps:
1.In the Document Initiationscreen, select the document click action menu and then click Release as shown in the figure:

FIGURE: - Releasing the Document
2.The status is changed to “Released” as shown in the figure:
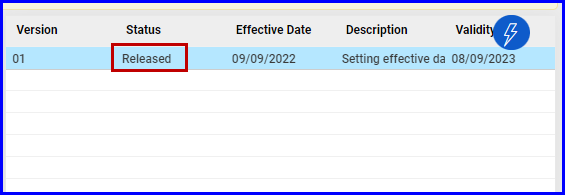
FIGURE: - Released Document
User can view the complete document initiation history in the Initiation History tab as shown in the figure
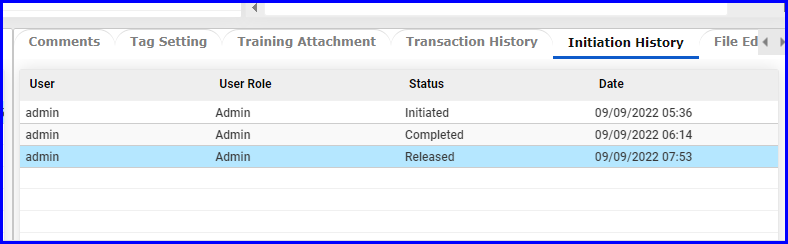
FIGURE: - Initiation History Tab
User can view the complete document transaction history in the Transaction History tab as shown in the figure:
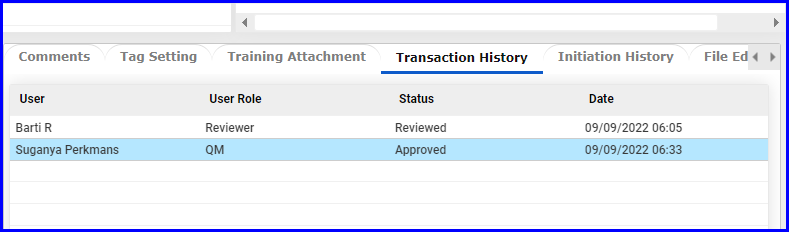
FIGURE: - Transaction History Tab
