Material master is used to add and manage materials.
On the Main menu, click  and then click Material Master. The Material Master screen appears as shown in the figure:
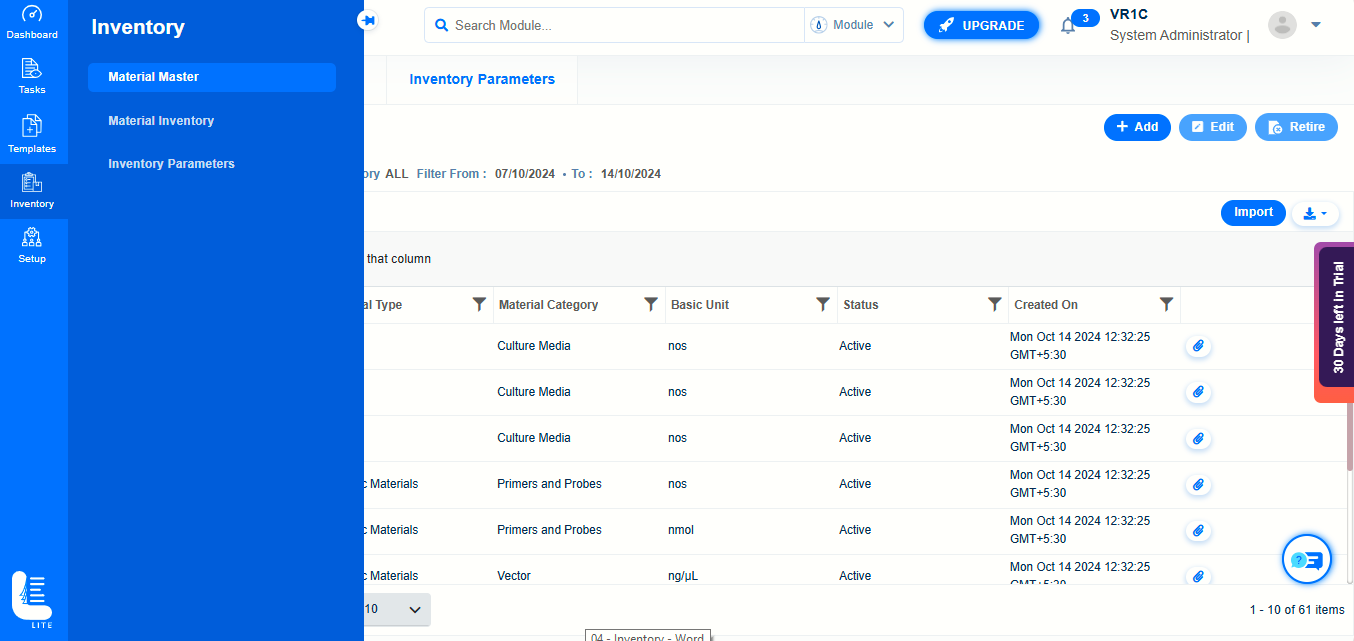
The list of pre-configured Material records are displayed.
To add a new materials, Click on ‘Material Master’ submenu and click on ‘Add’ button on Material Master page.
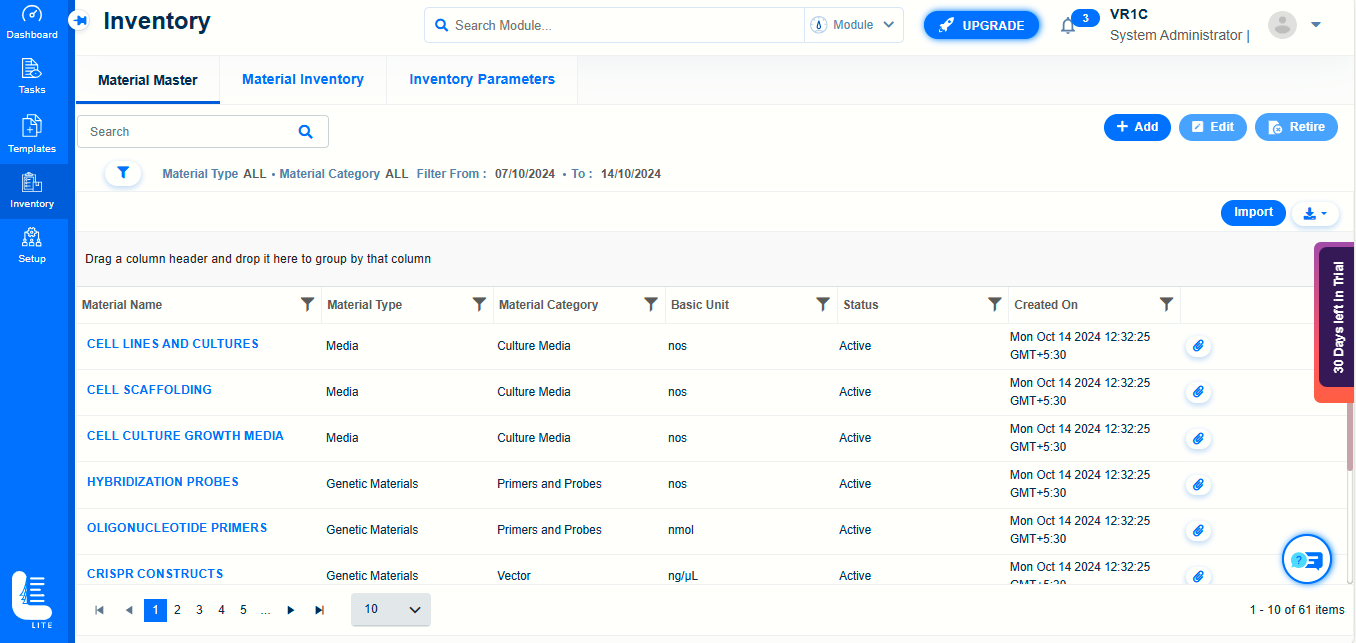
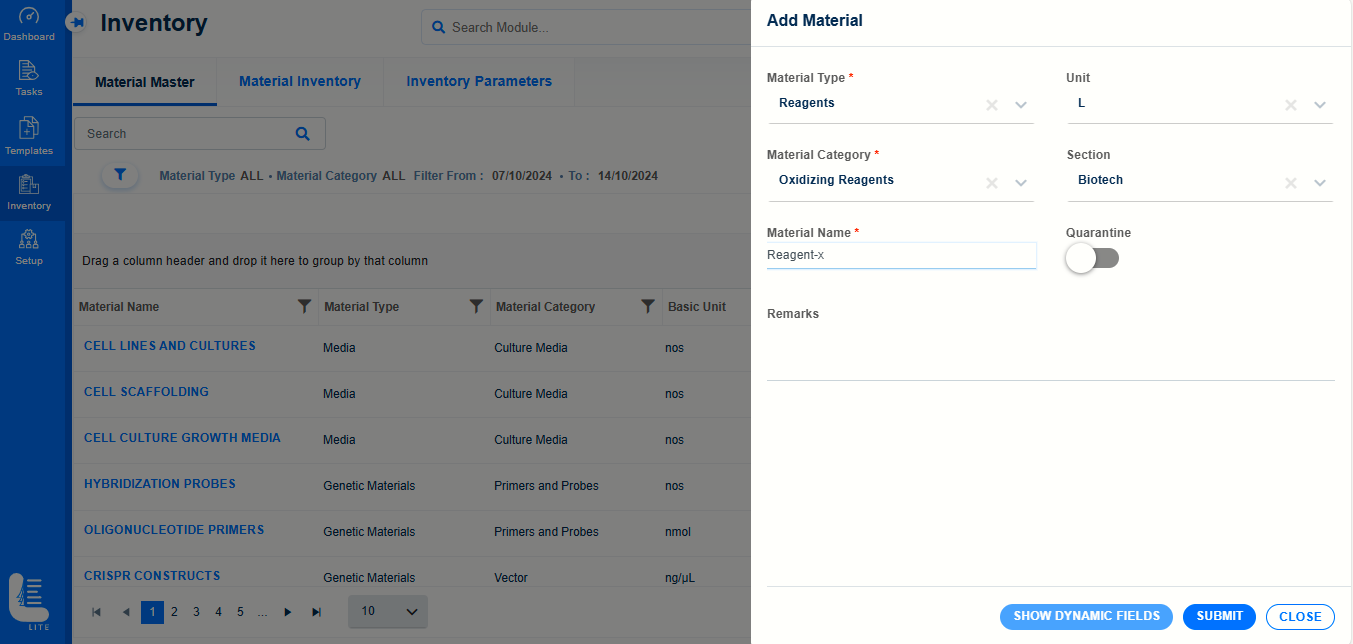
‘Add Material’ dialog window appears.
Enter or select valid values in Material Type, Unit, Material Category, Section, Material Name, Quarantine (Yes or No) and Remarks.
Click on SUBMIT button.
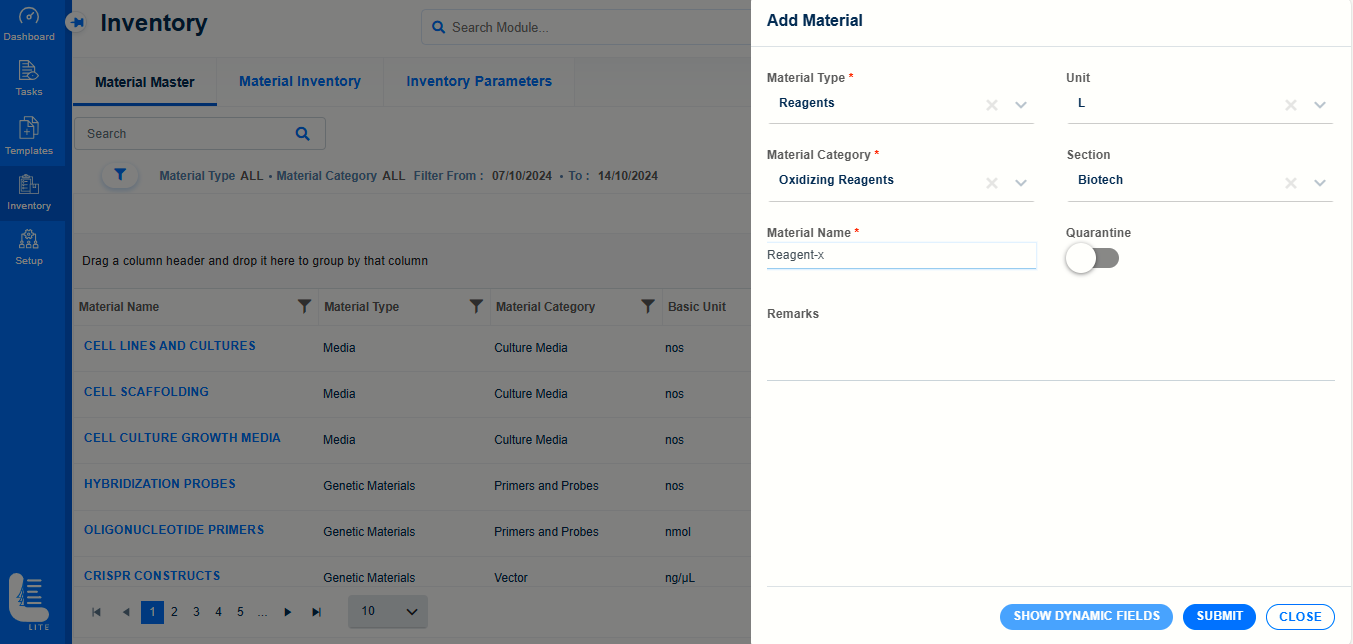
The newly-added material gets listed on Material Master page.
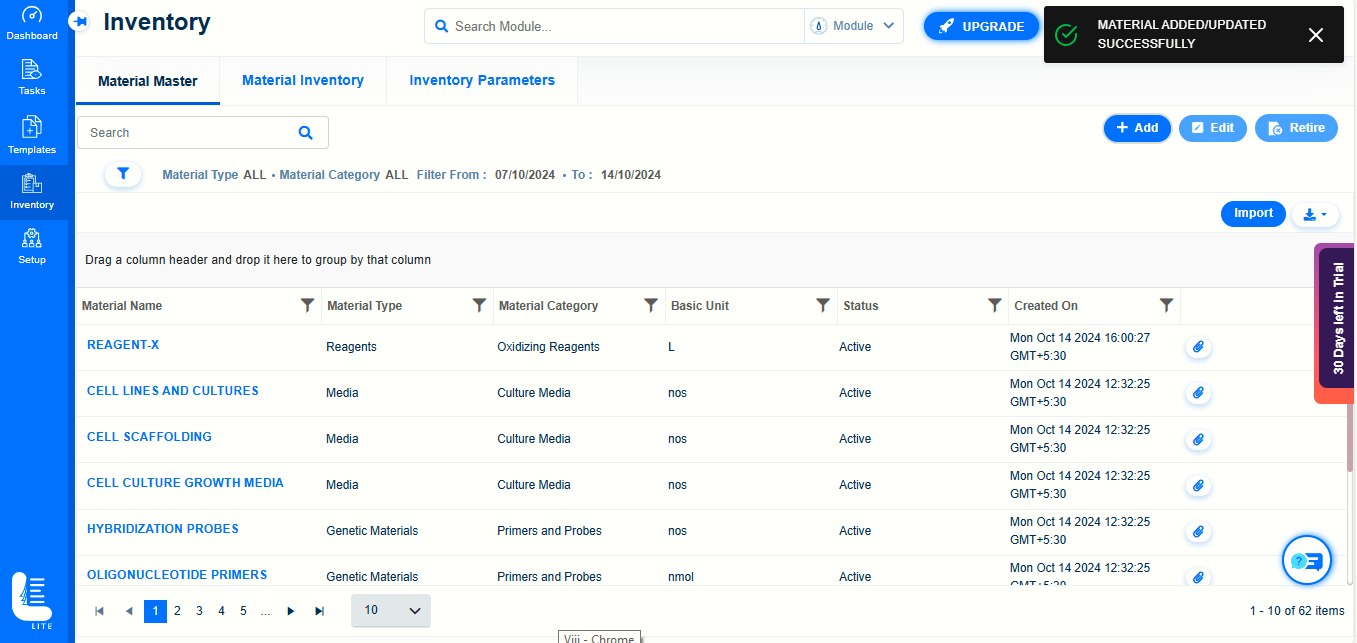
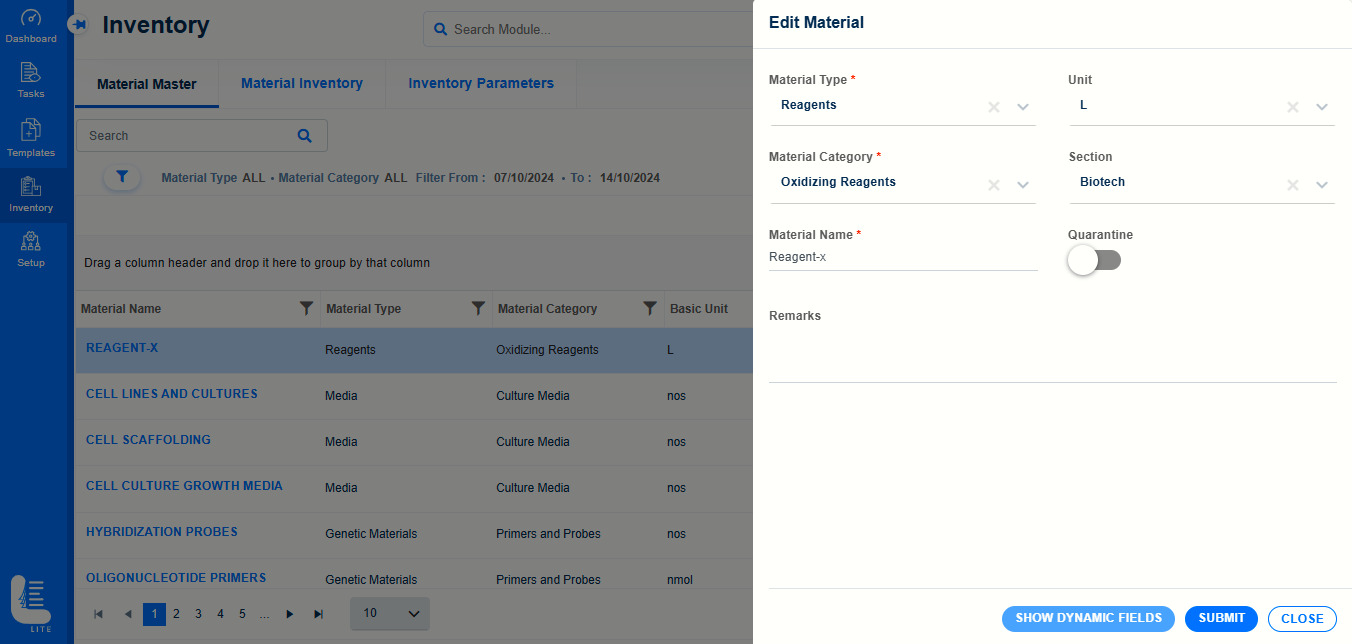
To edit, an existing material record, select the same and click on ‘Edit’ button.
On ‘Edit Material’ dialog window, modify the values in the fields and click on SUBMIT button.
Once the material is added to the Material master, you must add the material to the inventory. And then issue the material to use the material in transactions.
To add a material to the inventory, follow these steps:
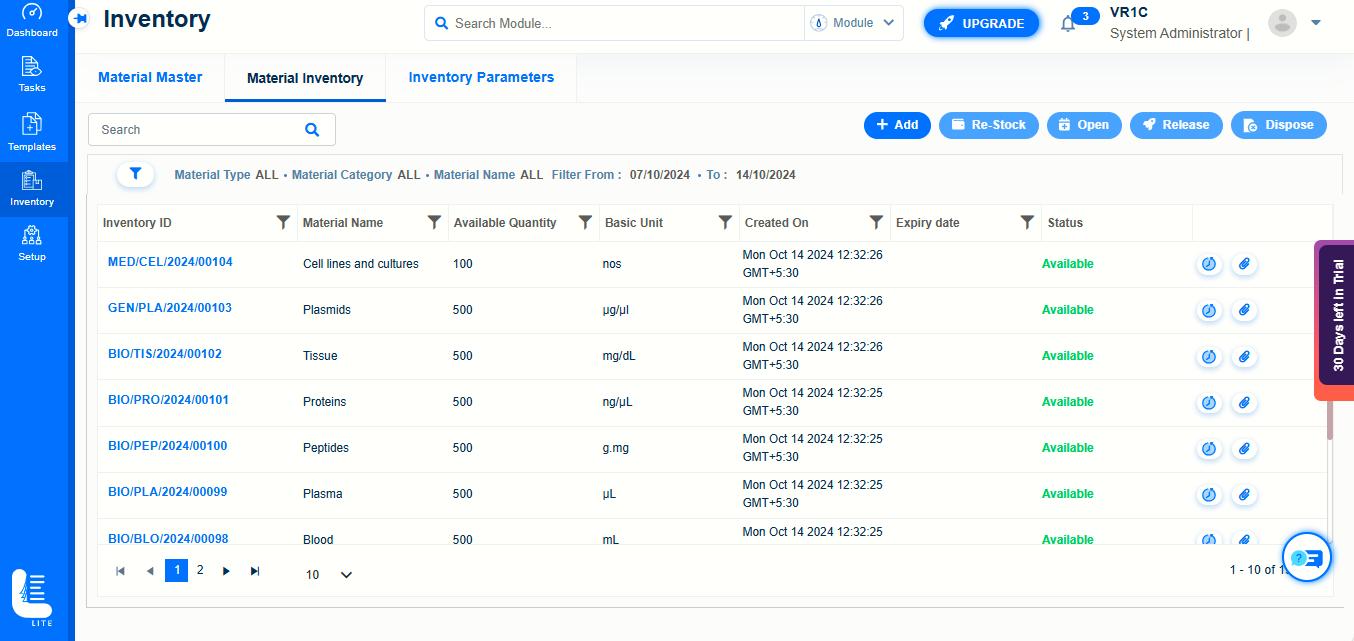
On the main menu, click  and then click Material Inventory. The Material Inventory screen appears.
The list of pre-configured Material Inventory records is displayed.
To add a new material inventory, click on ‘Add’ button.
‘Add Inventory’ dialog window appears.
Enter or select valid values in the fields such as Material Type, Material Category, Material Name, Quantity, Unit, Batch/Lot No. and Re-Order Level.
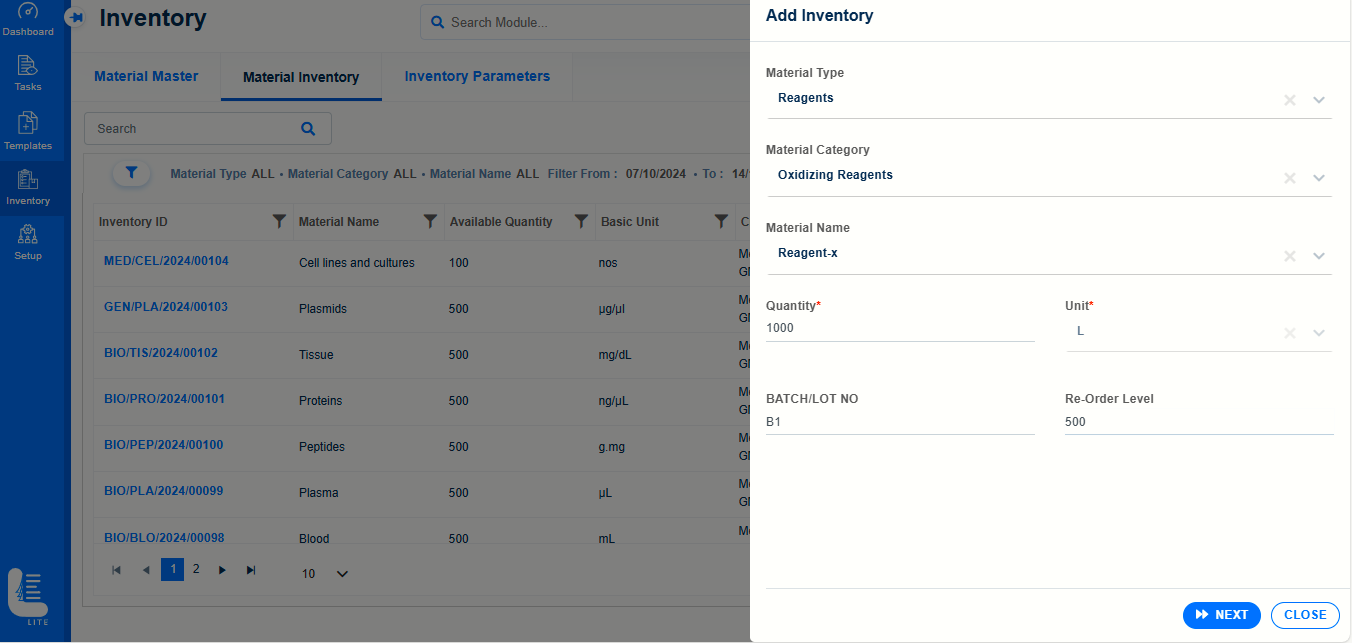
After entering the values click on ‘NEXT’ button.
In the 2nd part of ‘Add Inventory’ dialog window, select/enter the values for Section, Date of Manufacturing, Date of Receipt and Remarks.
Click SUBMIT button.
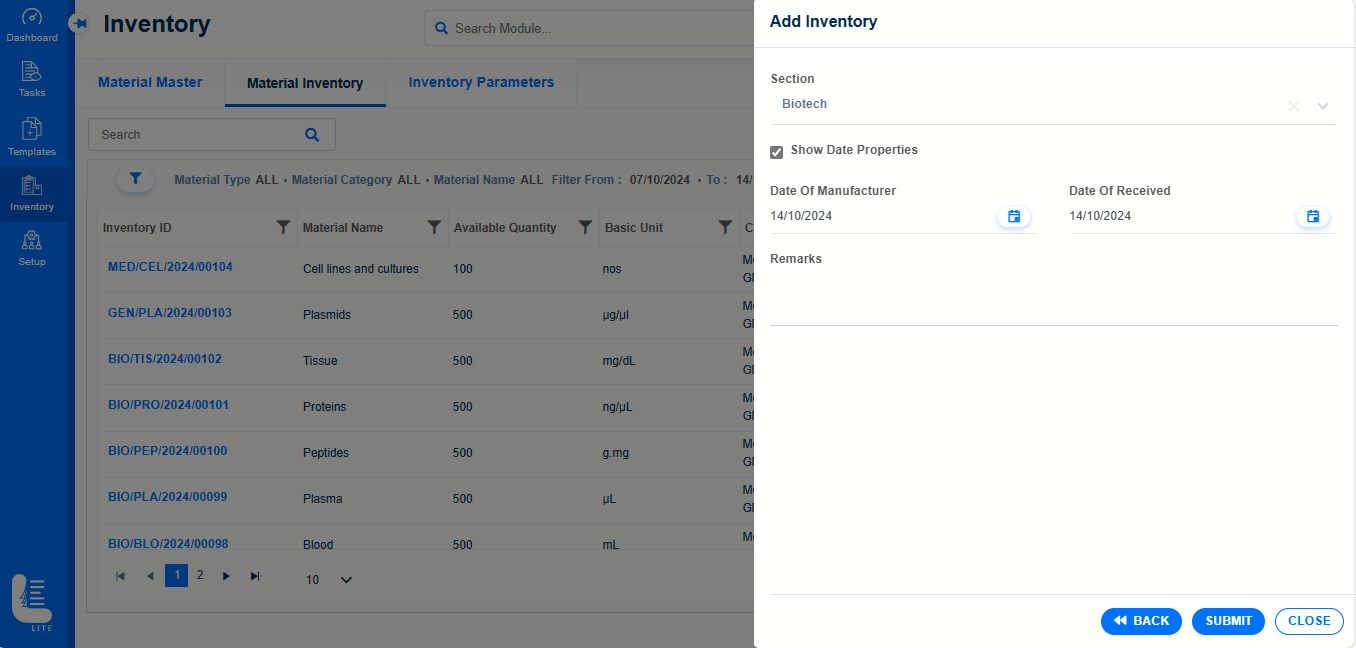
The newly-added inventory record gets saved and listed on Material Inventory page.
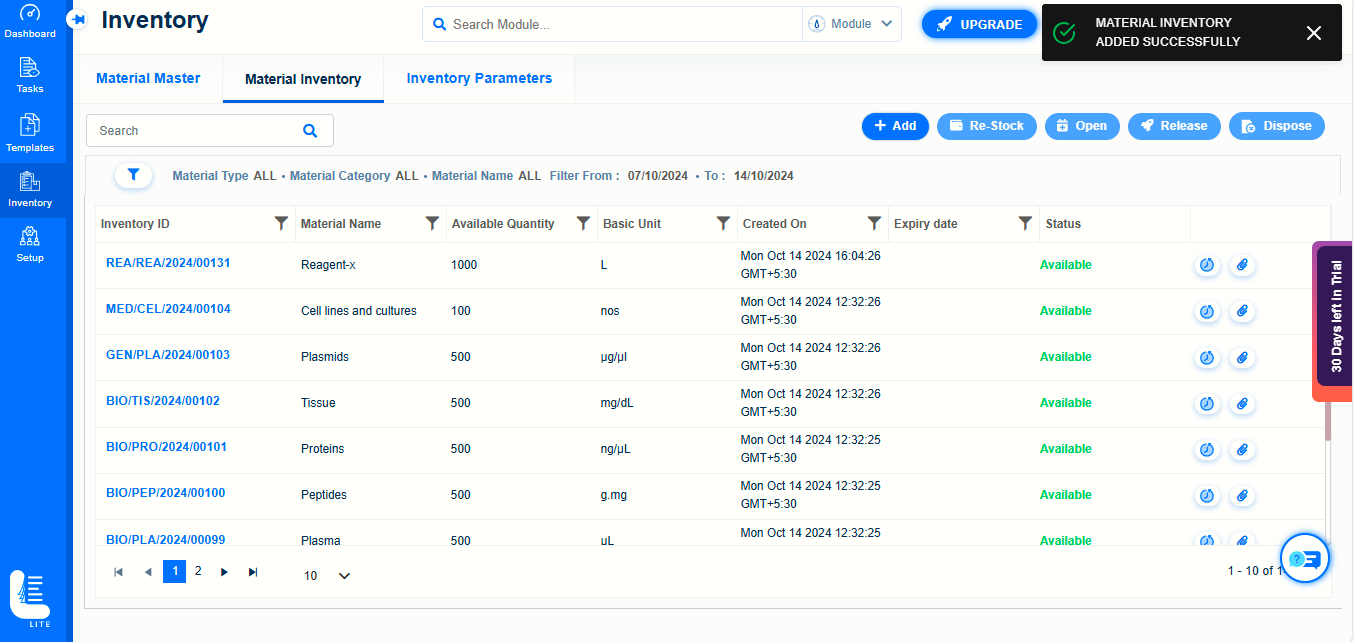
Material Type
Material Type master consists of Pre-configured material types defined. You can select a material type and add fields.
To add fields to the material type, follow these steps:
On the main menu, click  and then click Inventory Parameters submenu followed by Material Type subtab. The Material Type master screen appears as shown in the figure:
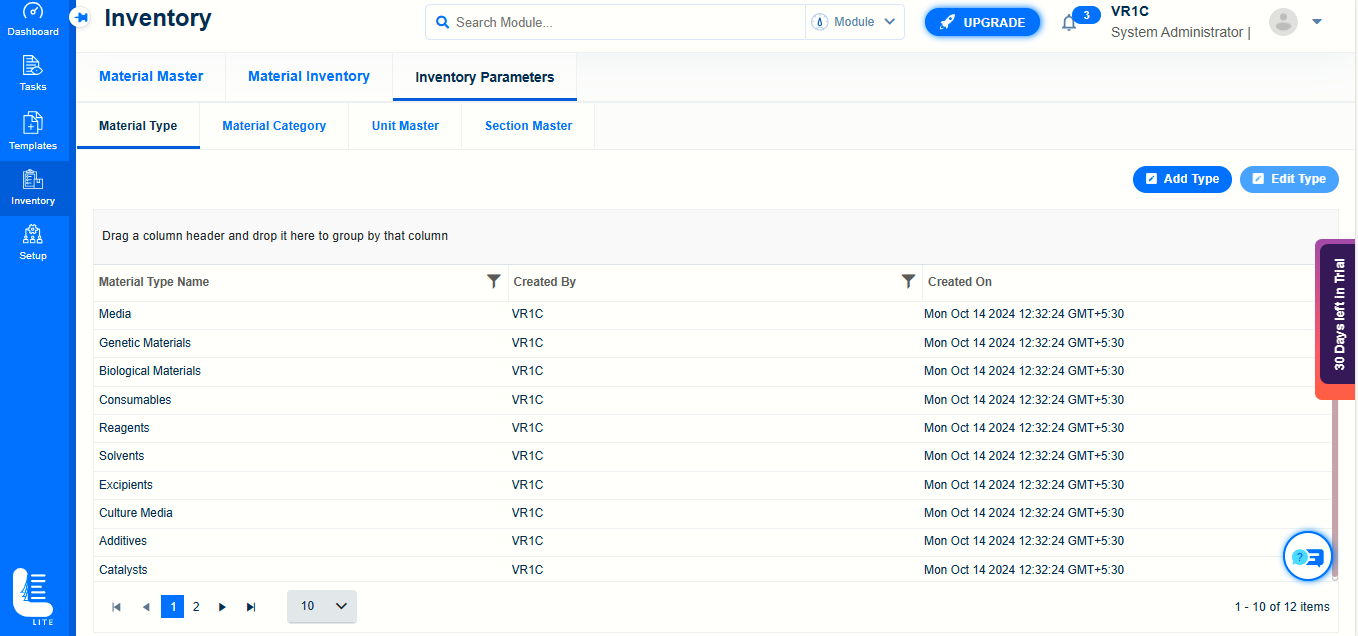
You can see four predefined material type. Select a material type to add fields. The Add Field option is enabled.
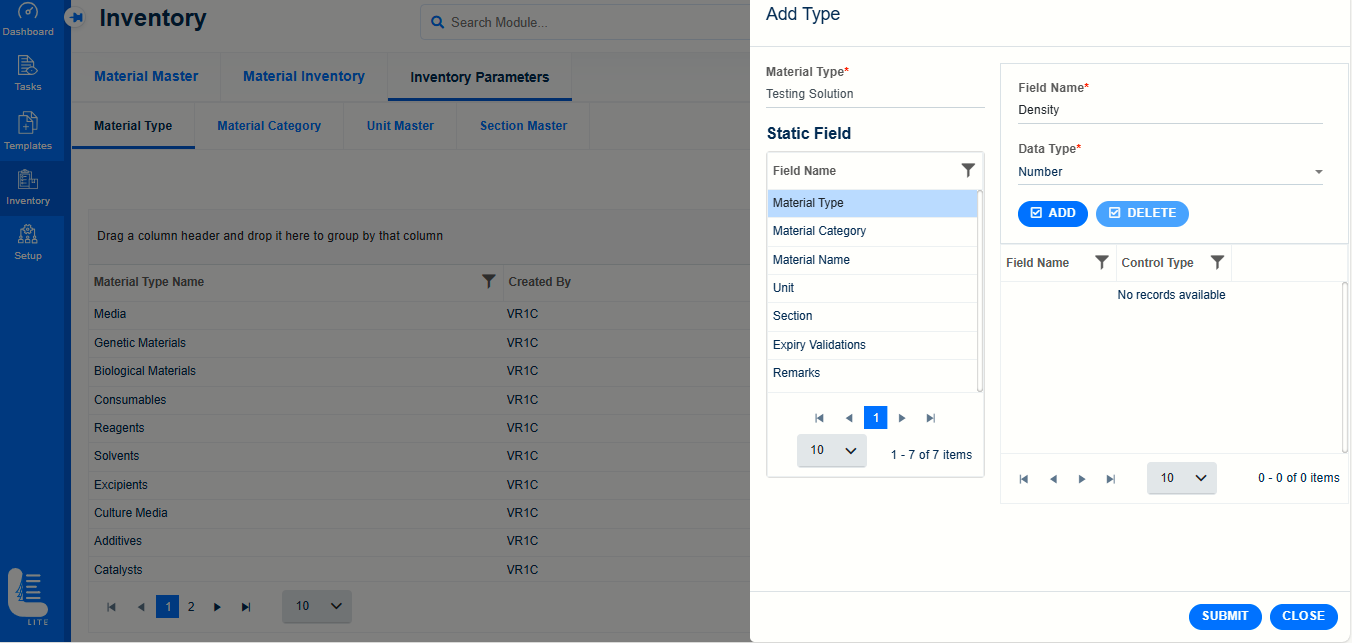
Click Add Type button. The Add Type dialog appears as shown in the figure:
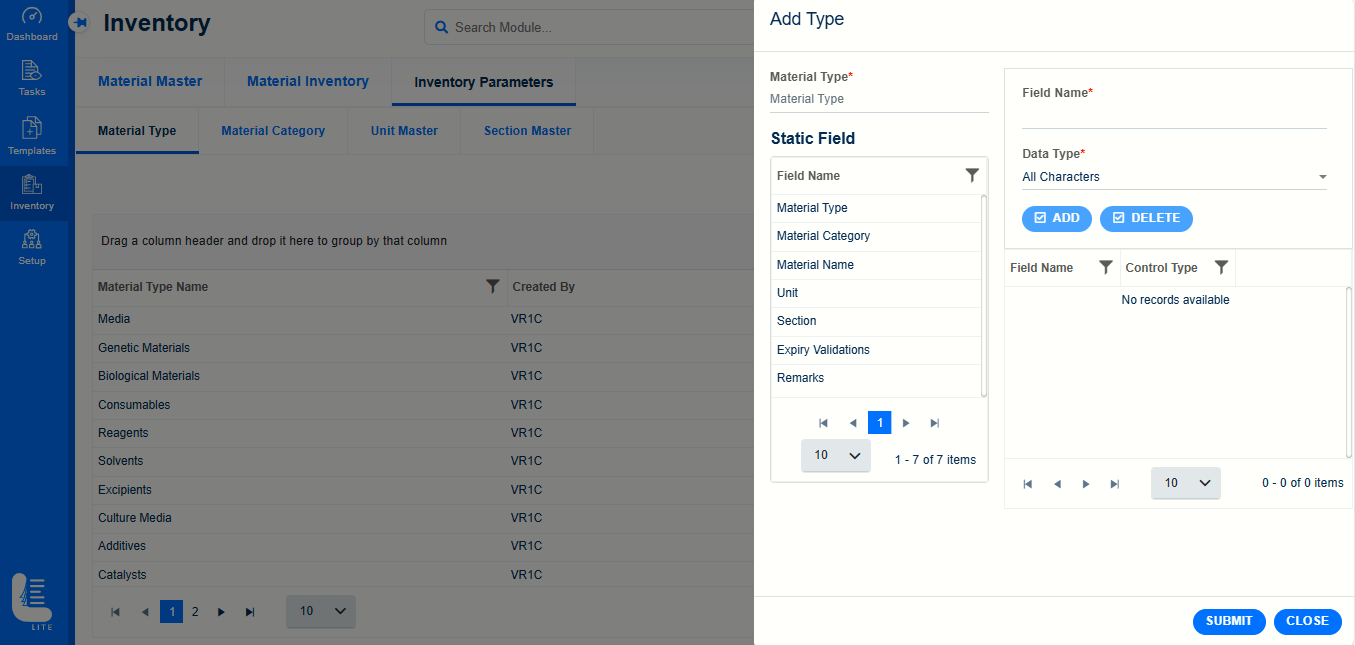
On the left side you can see list of static fields added to the material type. To add a dynamic field, follow these steps:
Material Category
Material Category master is used to add and manage material categories. Material category is used in various forms and masters to group materials.
To create a new material category, follow these steps:
On the main menu, click  and then click Inventory Parameters submenu followed by Material Category subtab. The Material Category master screen appears as shown in the figure.
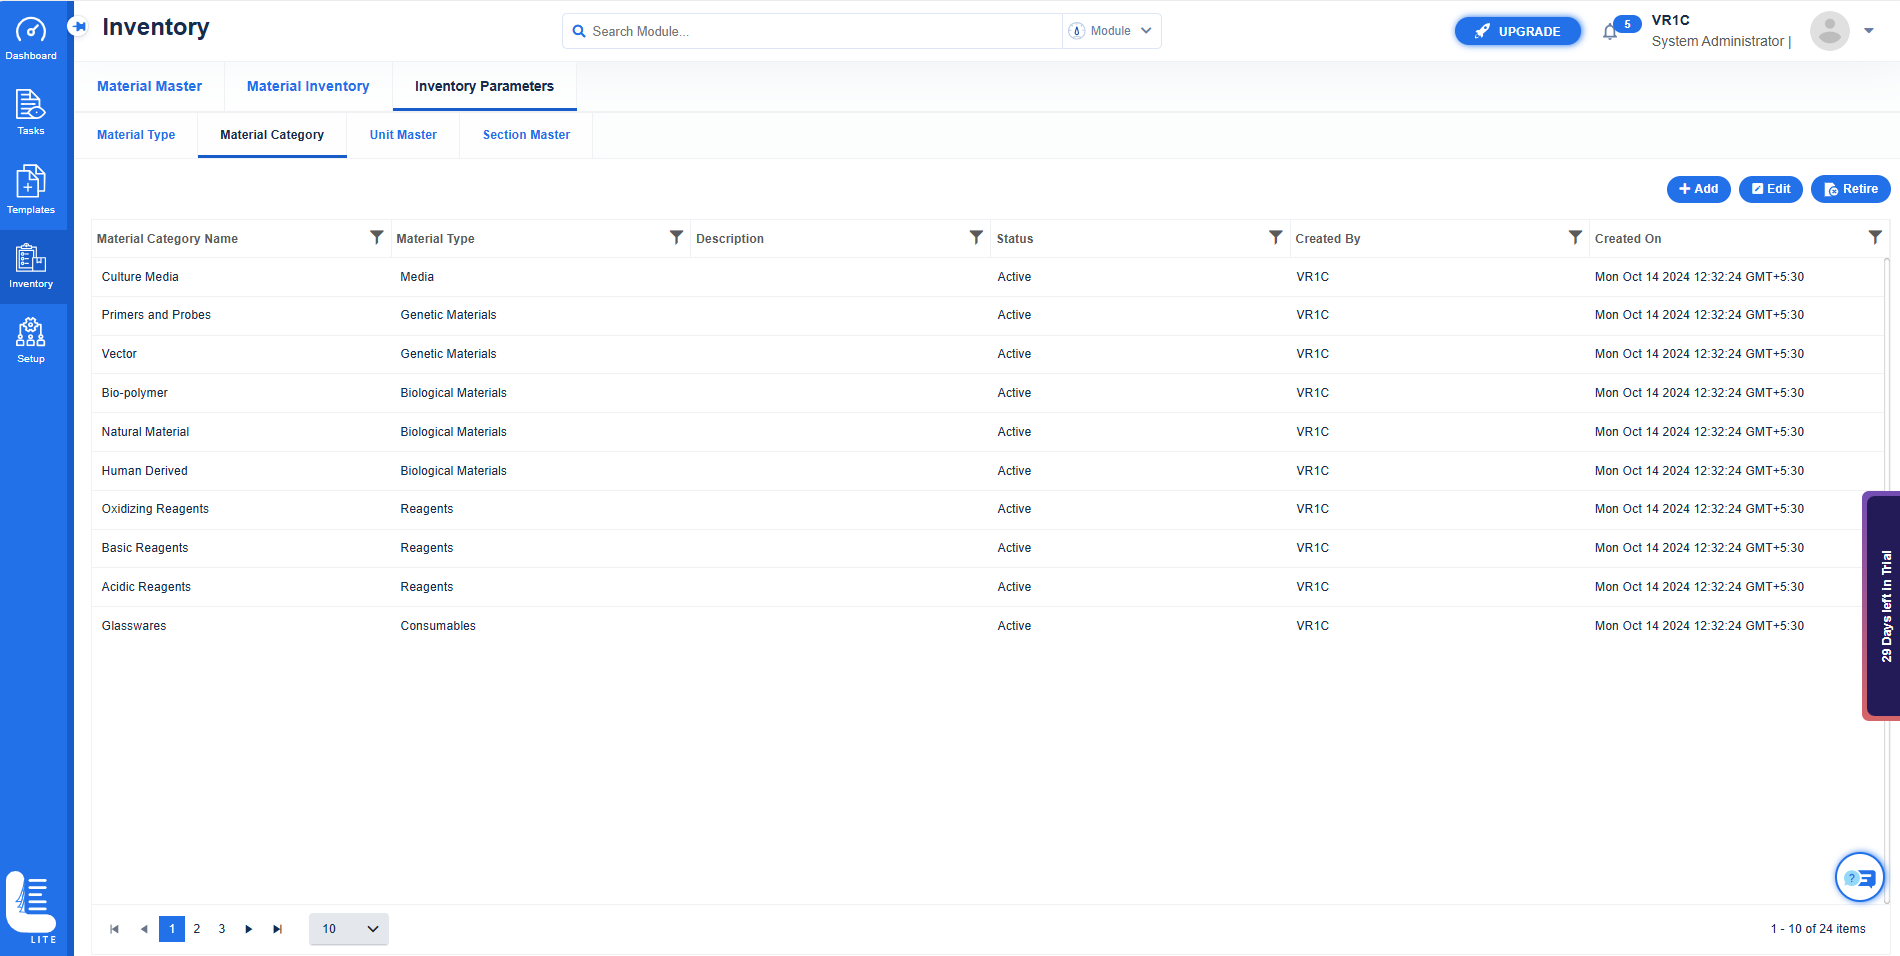
Click on ‘Add’ button.
‘Create Material Category’ dialog window appears.
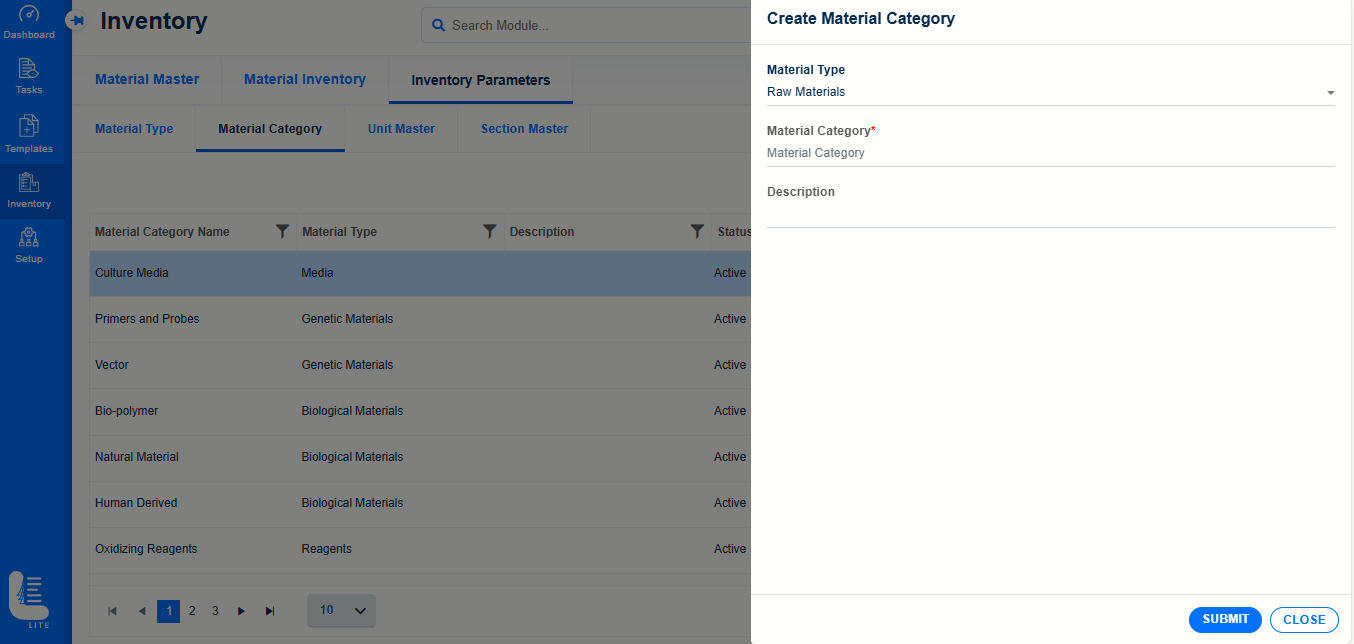
Enter valid values in Material Category field after selecting appropriate Material Type.
Enter description in Description field.
Click on SUBMIT button.
Unit Master
Unit master is used to create and manage units that are used to measure samples/material etc.
On the main menu, click and then click Inventory Parameters submenu followed by Unit Master subtab. The Unit Master screen appears as shown in the figure.
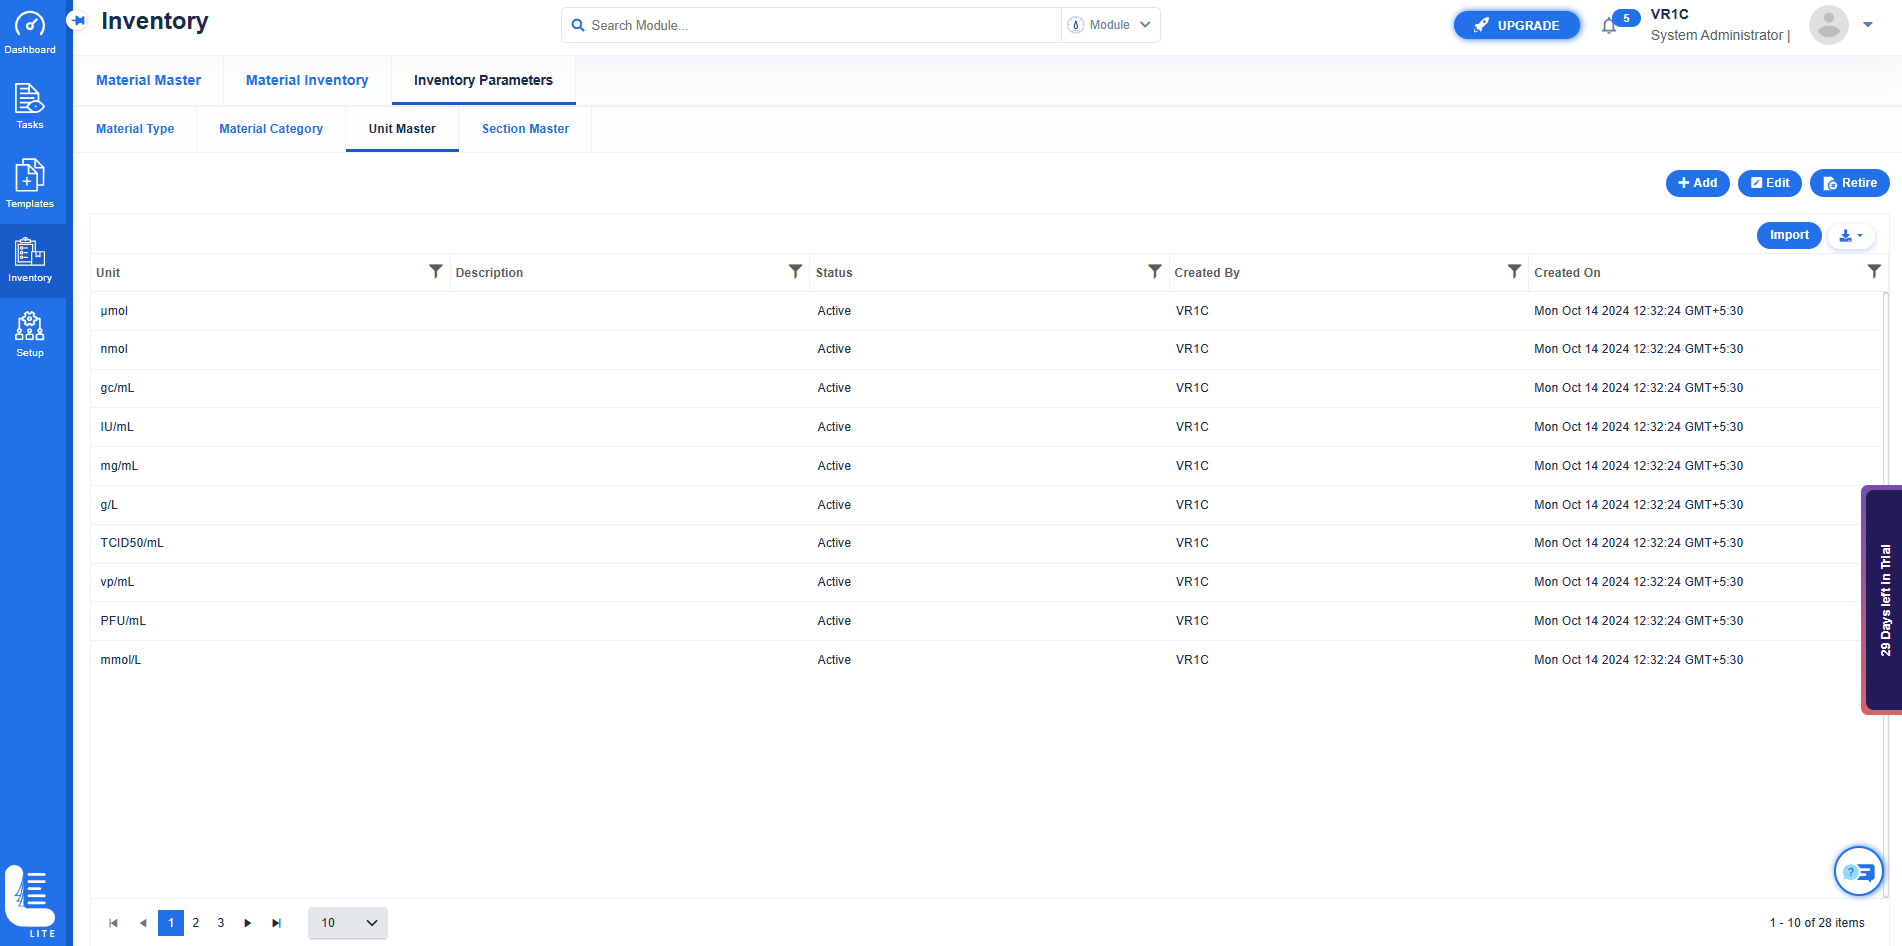
Click on ‘Add’ button.
‘Create Unit’ dialog window appears.
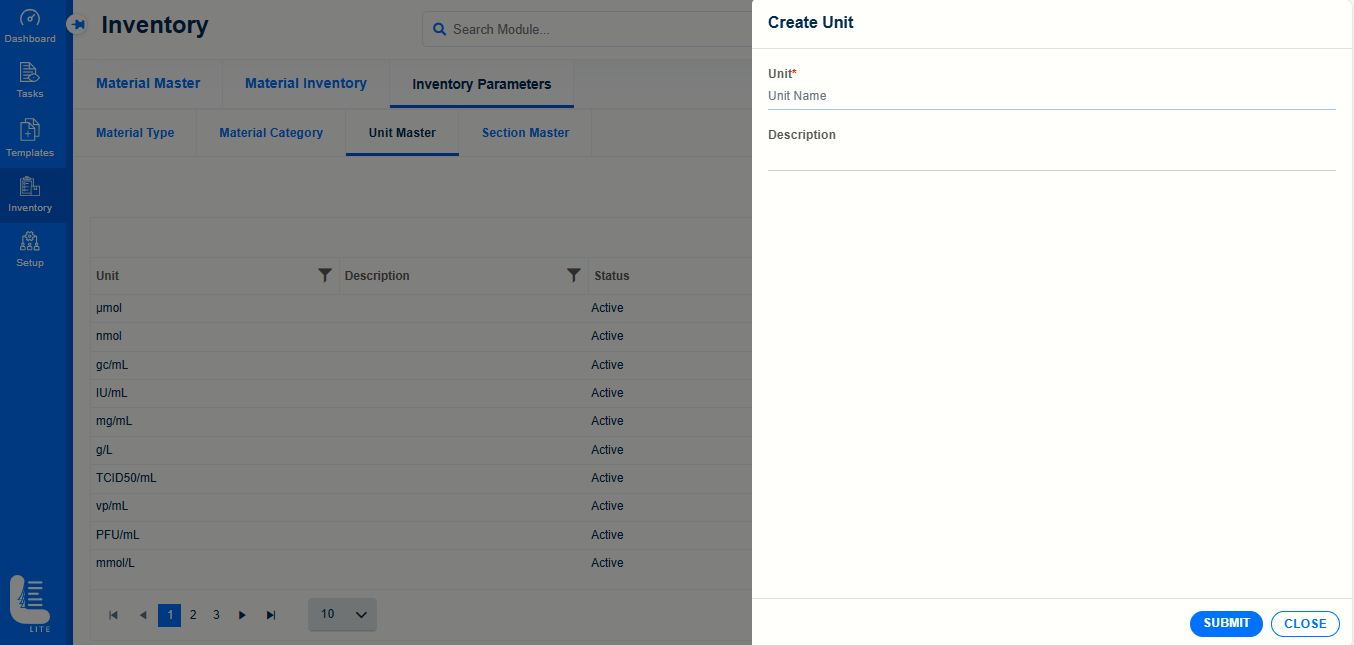
Enter valid values in Unit and Description fields.
Click SUBMIT button.
By clicking Edit button, the existing records can be edited.
By clicking Retire button, the existing records can be retired.
By clicking Import button, the data from the local system file can be imported.
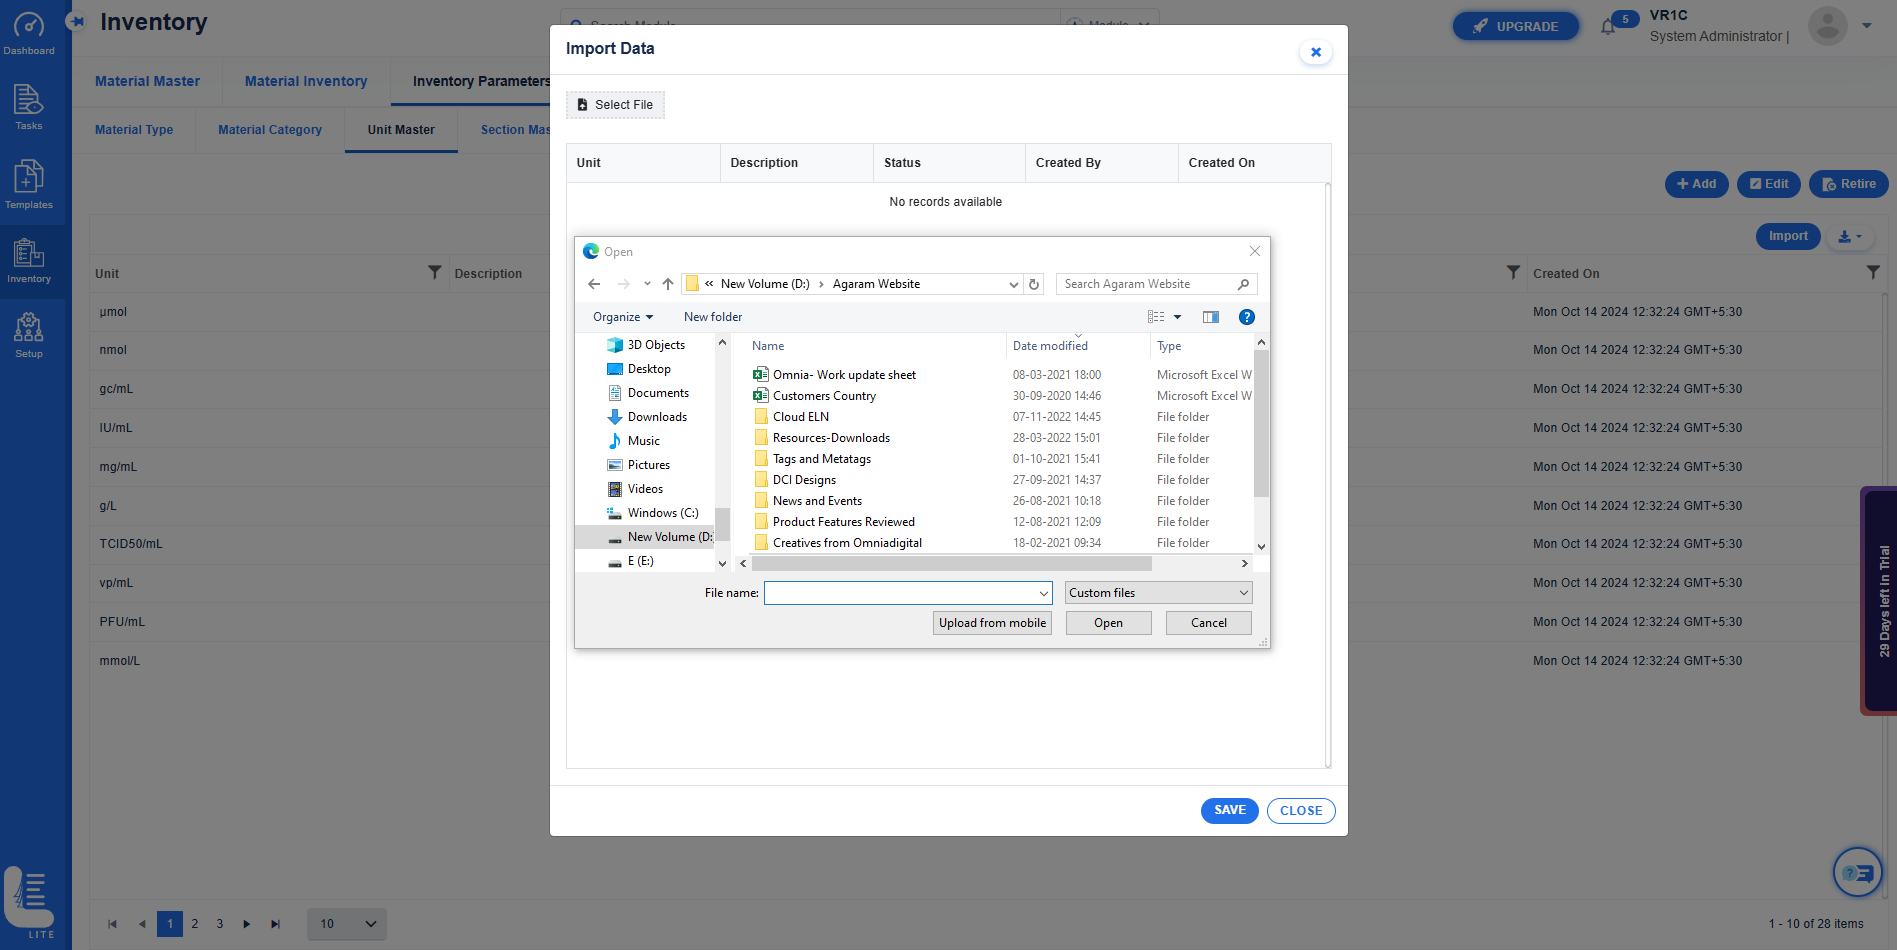
By clicking Export icon, the data can be exported in Excel, PDF and CSV format files to the local system.
Section Master
Section master is used to add and manage sections. Sections are used to divide materials based on different department in the organization.
On the main menu, click  and then click Inventory Parameters submenu followed by Section Master subtab. The Section Master screen appears as shown in the figure.
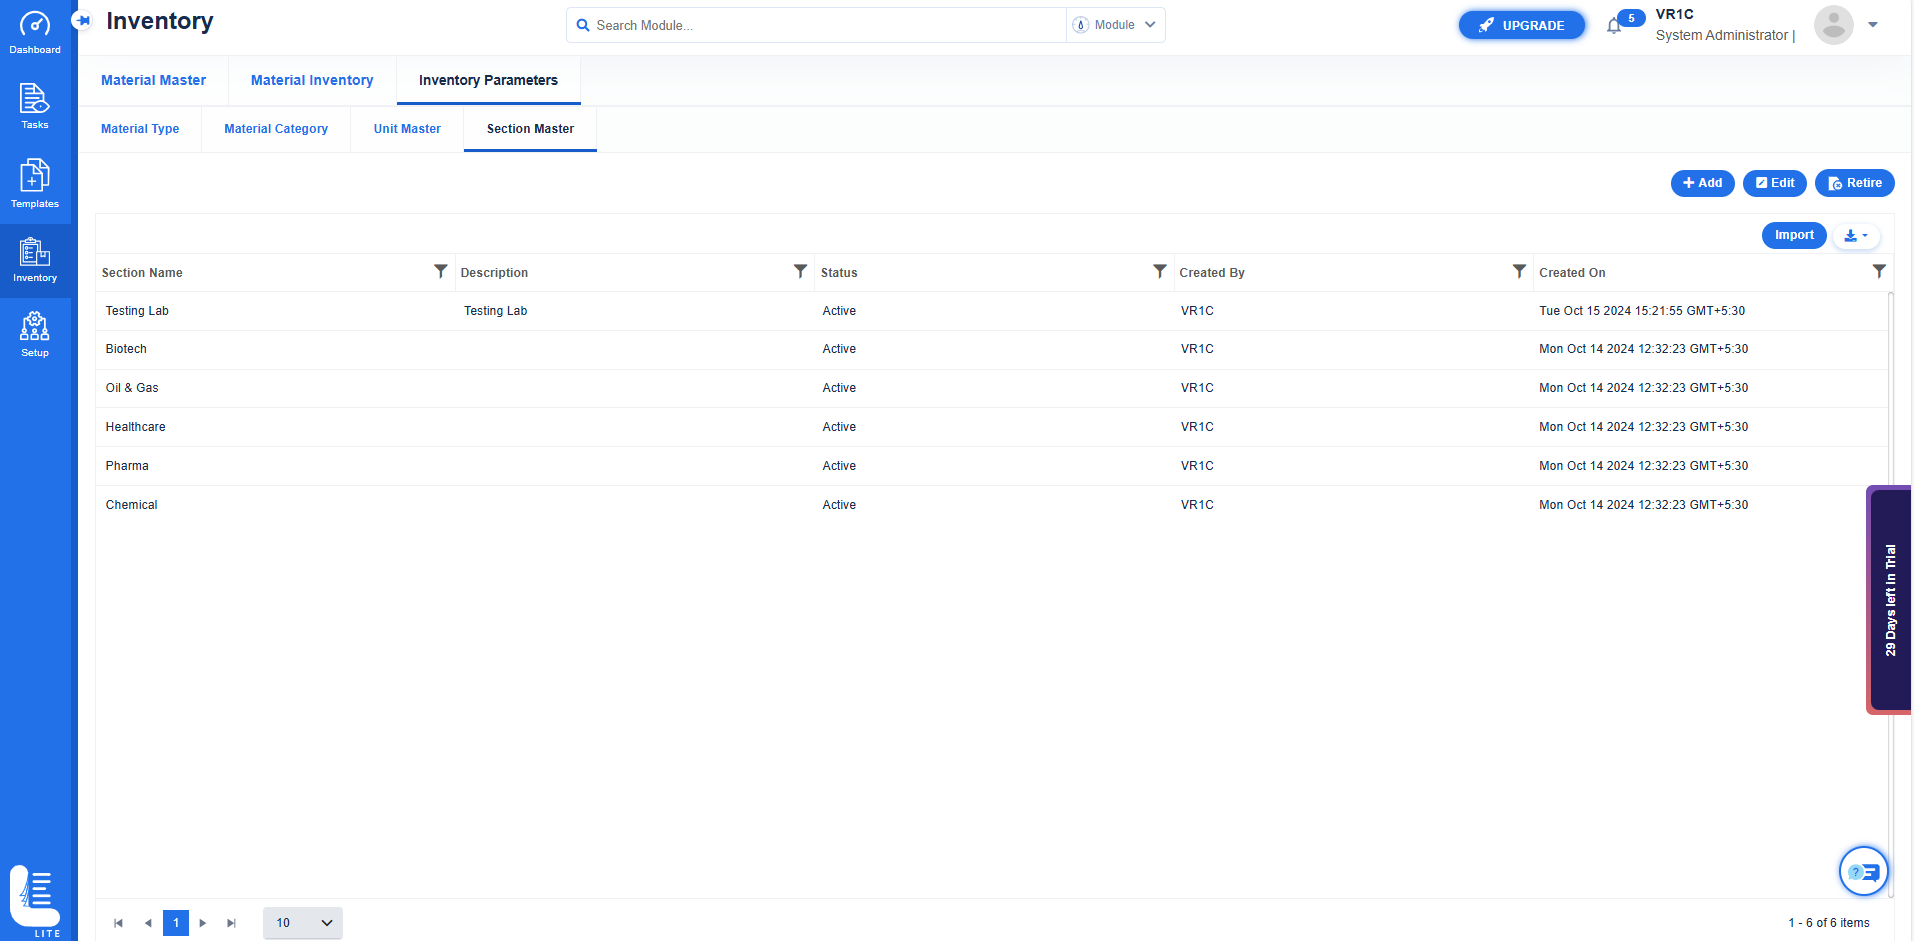
Click on ‘Add’ button.
‘Create Section’ dialog window appears.
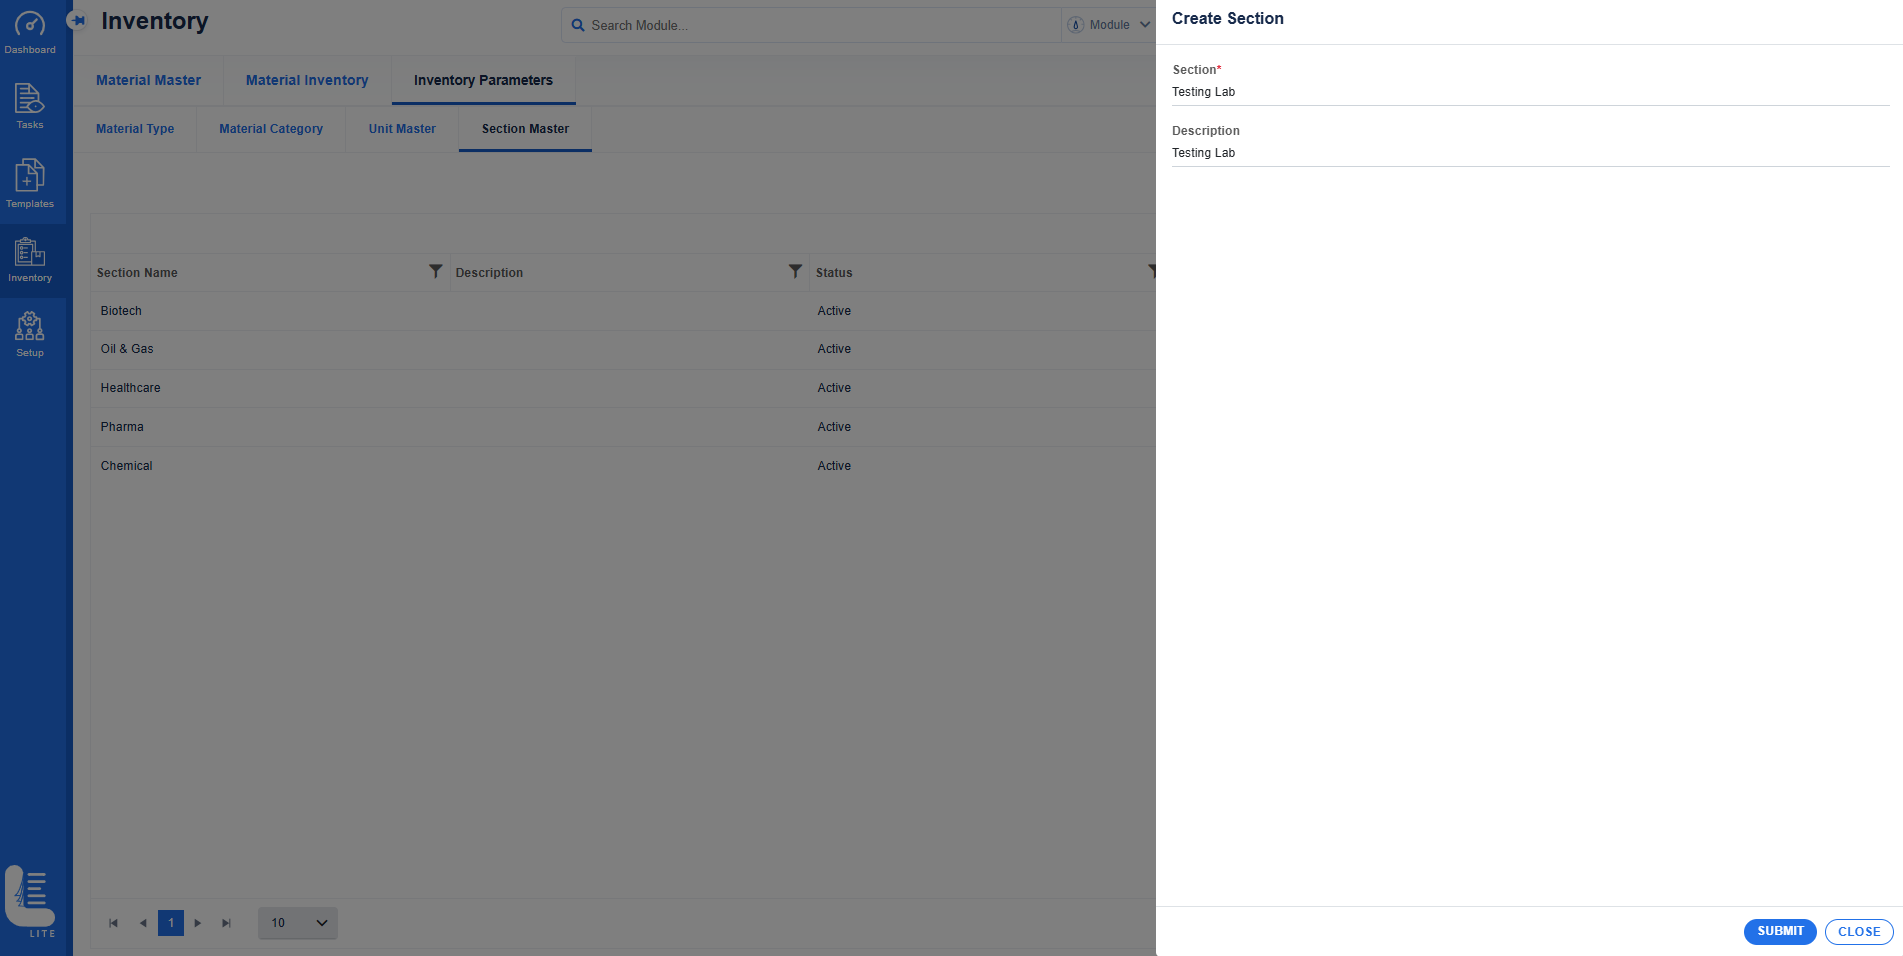
Enter valid values in Section and Description fields.
Click SUBMIT button.
The newly-created section gets listed in Section Master page with confirmation message.
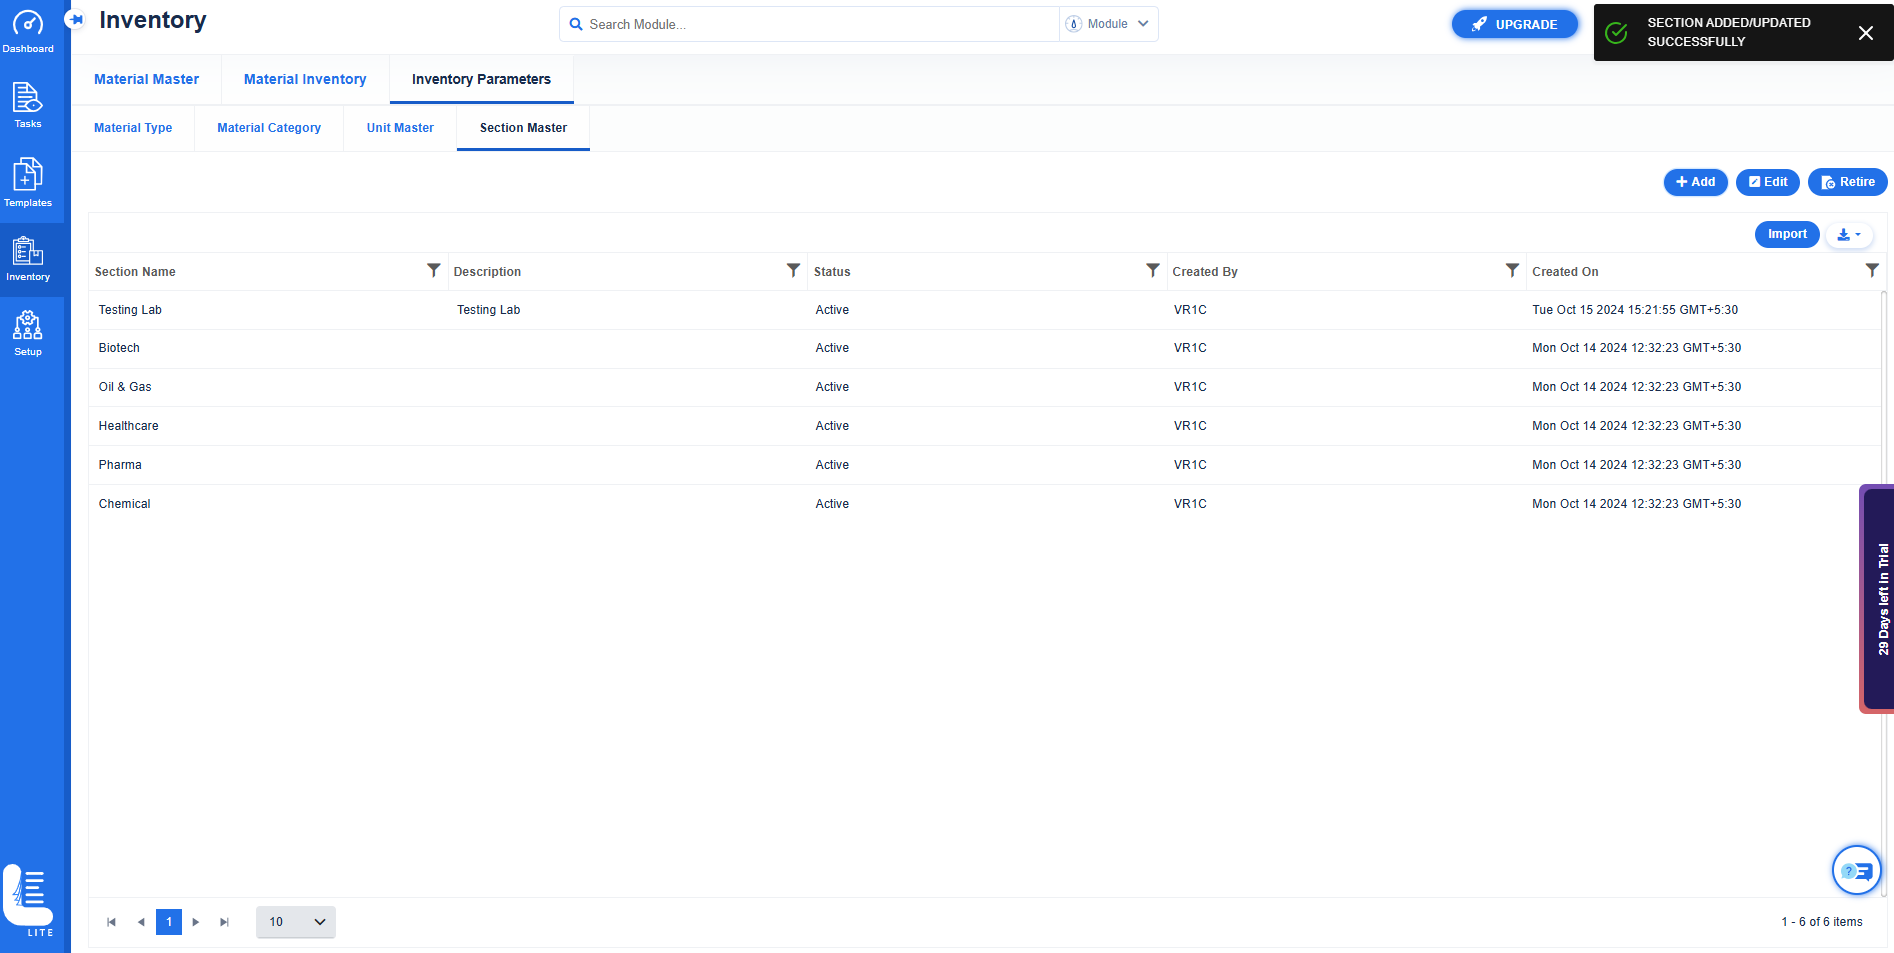
By clicking Edit button, the existing records can be edited.
By clicking Retire button, the existing records can be retired.
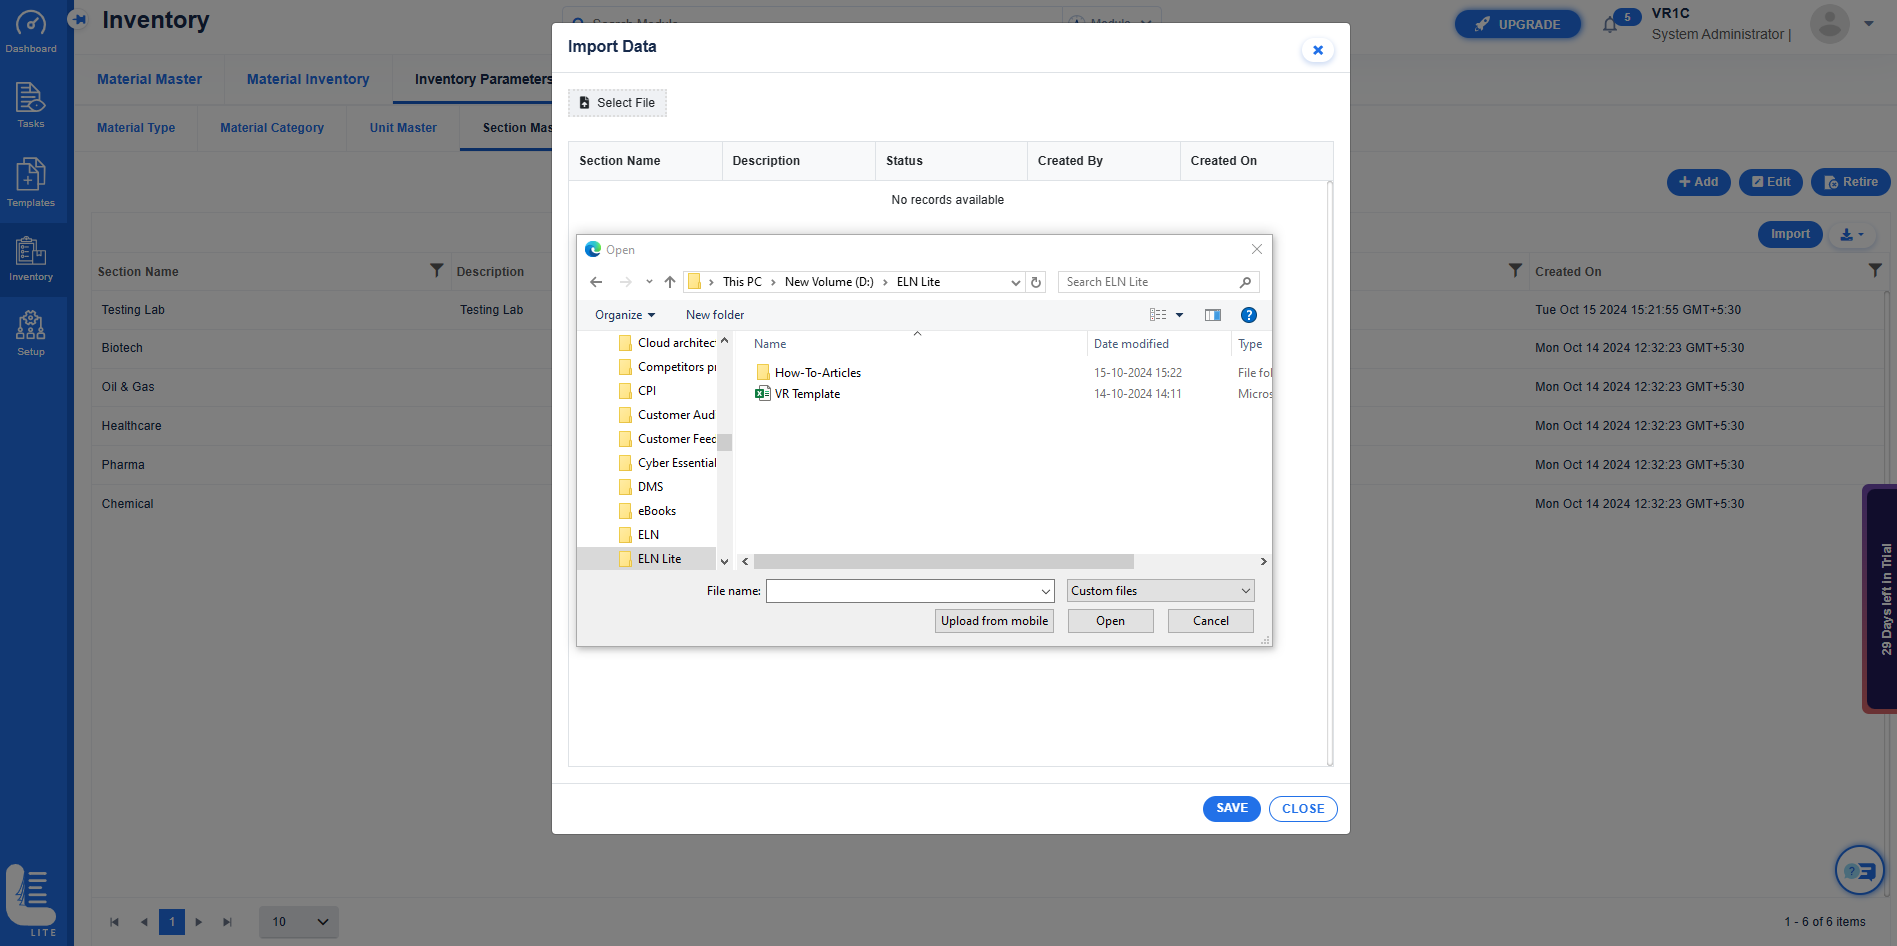
By clicking Import button, the data from the local system file can be imported.
By clicking Export icon, the data can be exported in Excel, PDF and CSV format files to the local system.
