Setup module helps the administrator of Corporate Account and Academic Users account to create and manage users. Project and workflows. This setup is not applicable for single user and hence it will not available for single user login case.
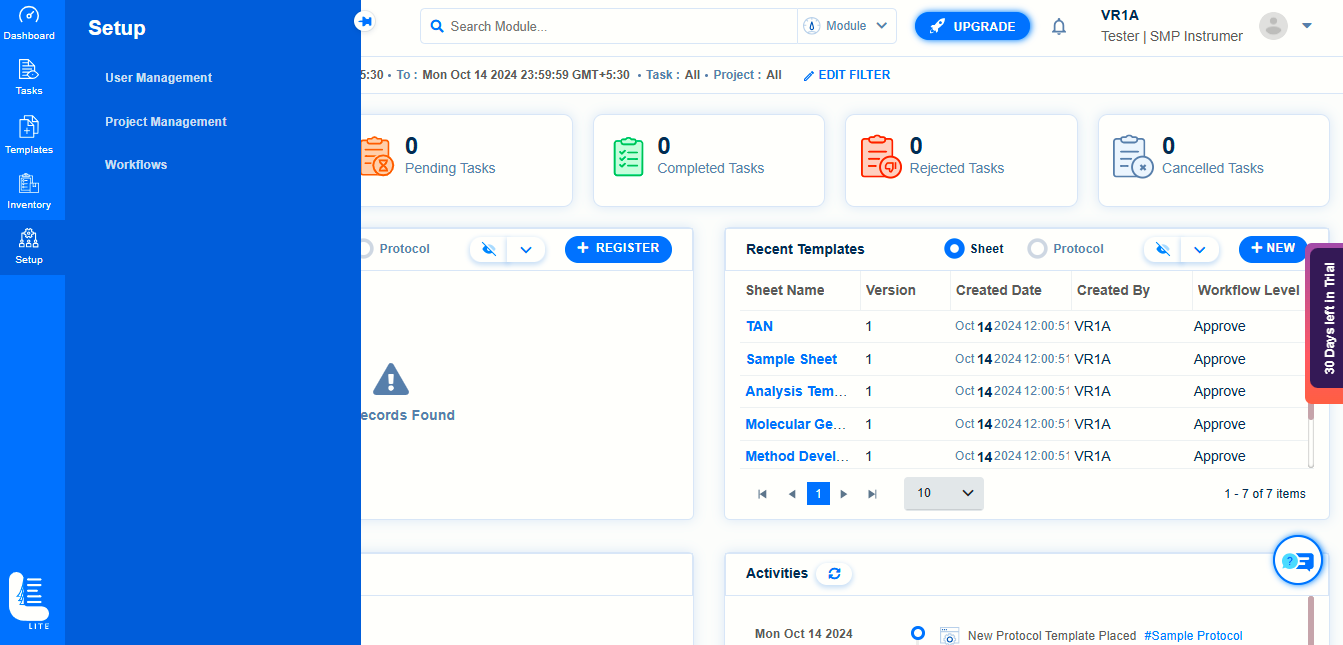
User master enables us to create and manage user accounts.
To navigate to User Management page, click on ‘Setup’ module, followed by clicking on ‘User Management’ submenu.
To create a new user account, follow these steps:
 and then click User Management. The User Master tab appears as shown in the figure:
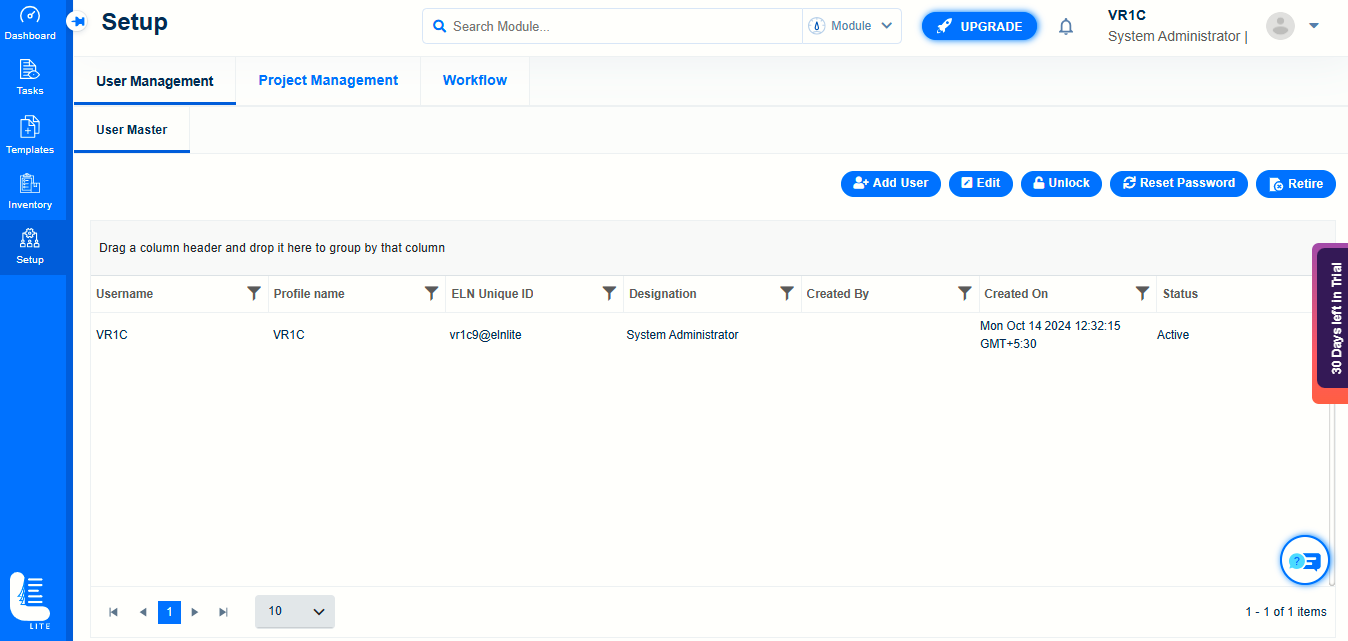
In the User Master page, you can see the list of users created. Also, options to add, edit, reset password and retire users appears as shown in the above figure.
Click Add User. The Create New User dialog appears as shown in the figure:
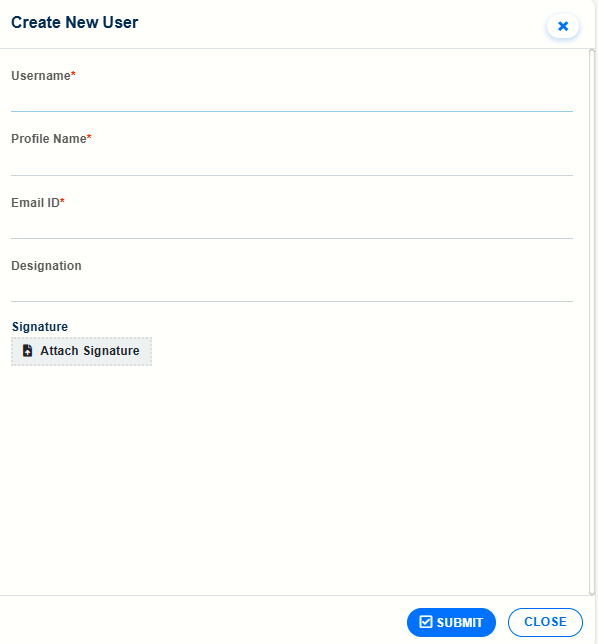
Enter a unique Username.
Enter Profile name to identify the user.
Enter a unique Email id.
Enter Designation and Attach Signature optionally.
Click SUBMIT button.
Once the user is added, the following page will be displayed in which the confirmation message will show up. The newly added user will get listed.
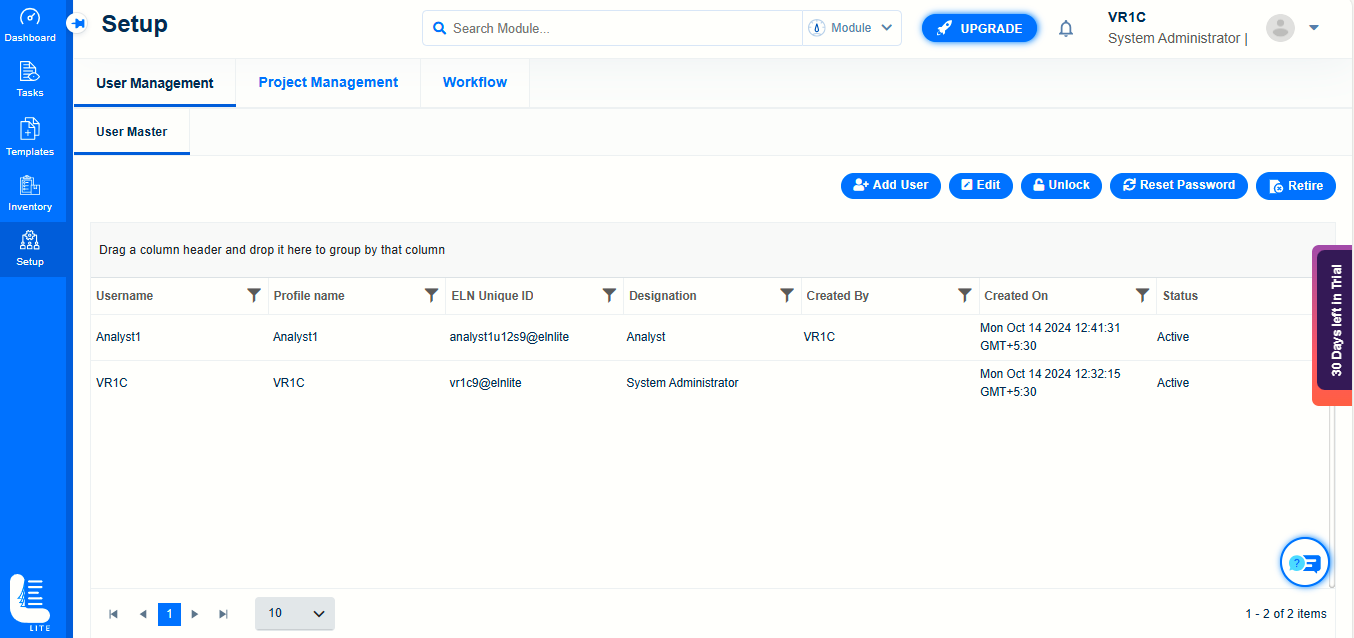
To edit the existing user details, click on ‘Edit’ button.
‘Edit User’ dialog window will be displayed.
Fields such as Profile Name, Email ID, Designation and Signature can be modified.
Once completed, click on SUBMIT button to save the changes.
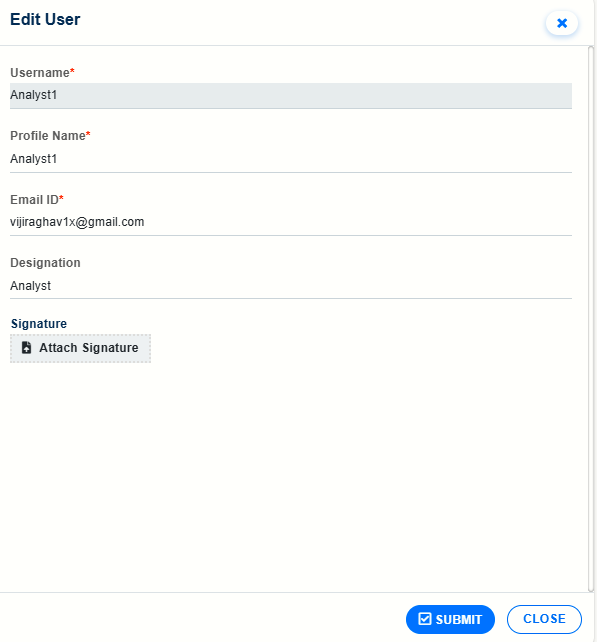
USERNAME UPDATED SUCCESSFULLY message will get displayed.
To unlock the locked user, click on ‘Unlock’ button.
To reset the password, click on ‘Reset Password’ button.
To retire the existing Active user, select the user and click on ‘Retire’ button.
Click ‘Yes’ button to confirm in the confirmation dialog window.
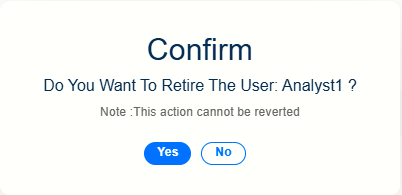
Once the user is retired, the same cannot be used.
In order to manage projects in Logilab ELN lite, from the Setup Main menu, navigate to Project Management submenu page
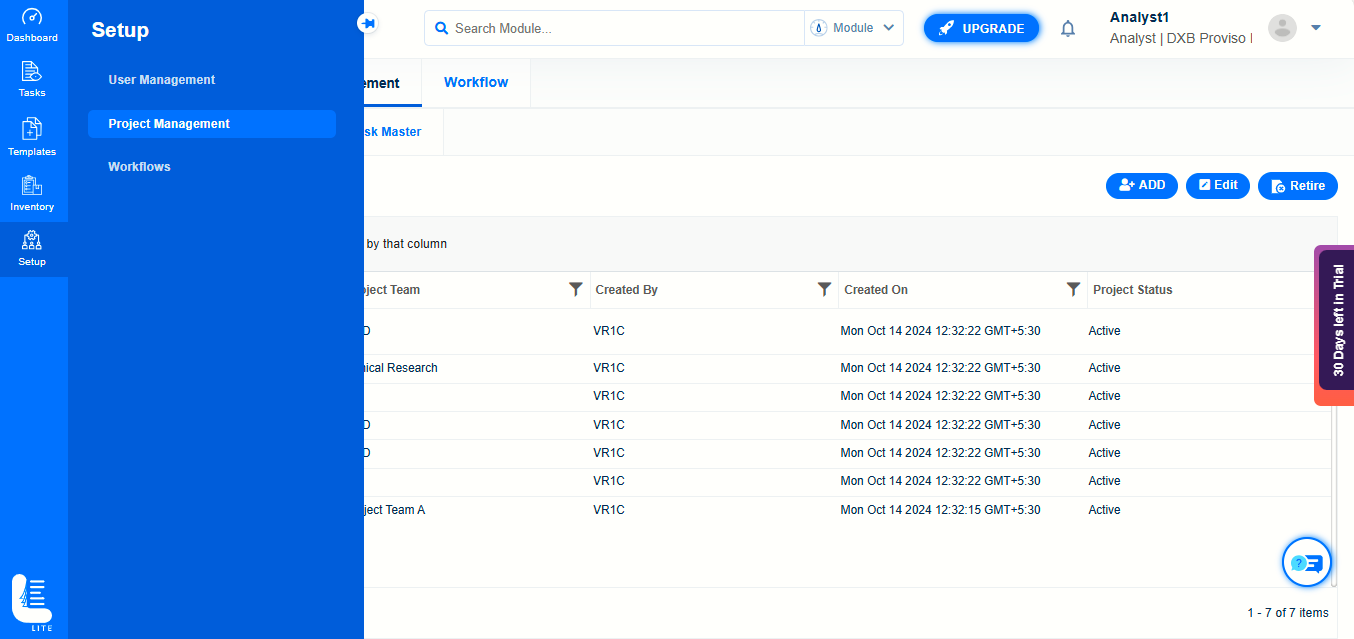
On the Project Management Tab, there are 3 subtabs namely Project Master, Project Team and Task Master.
Project Master
The pre-configured Projects will be displayed.
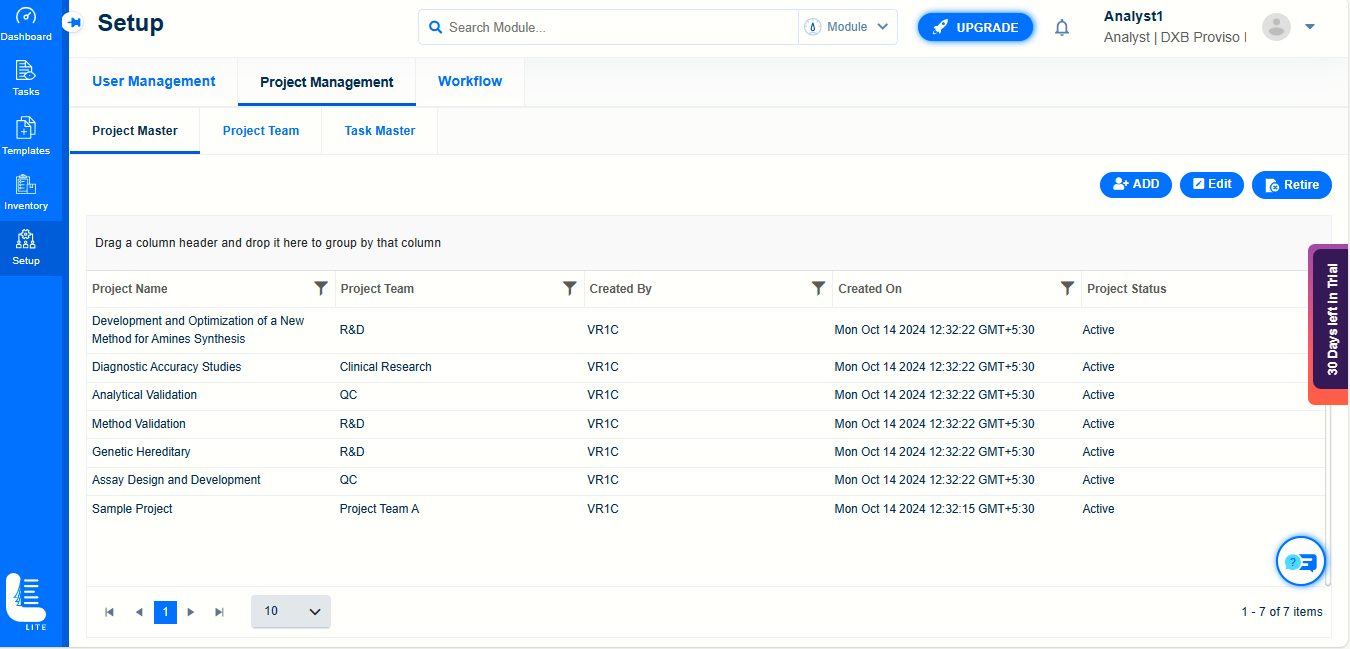
The user can optionally use any of these projects.
In order to create a new project, click on ‘ADD’ button.
‘Add New’ dialog window appears.
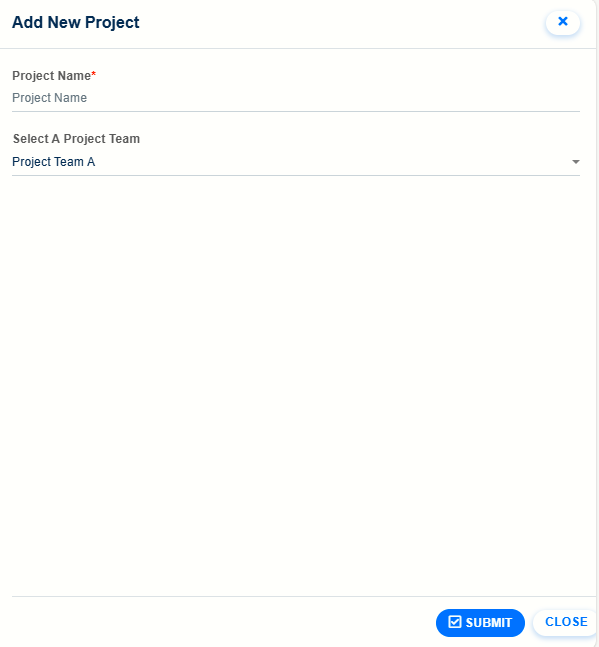
Enter Project Name and Select the Project Team.
Click on ‘SUBMIT’ to save the newly created-project record.
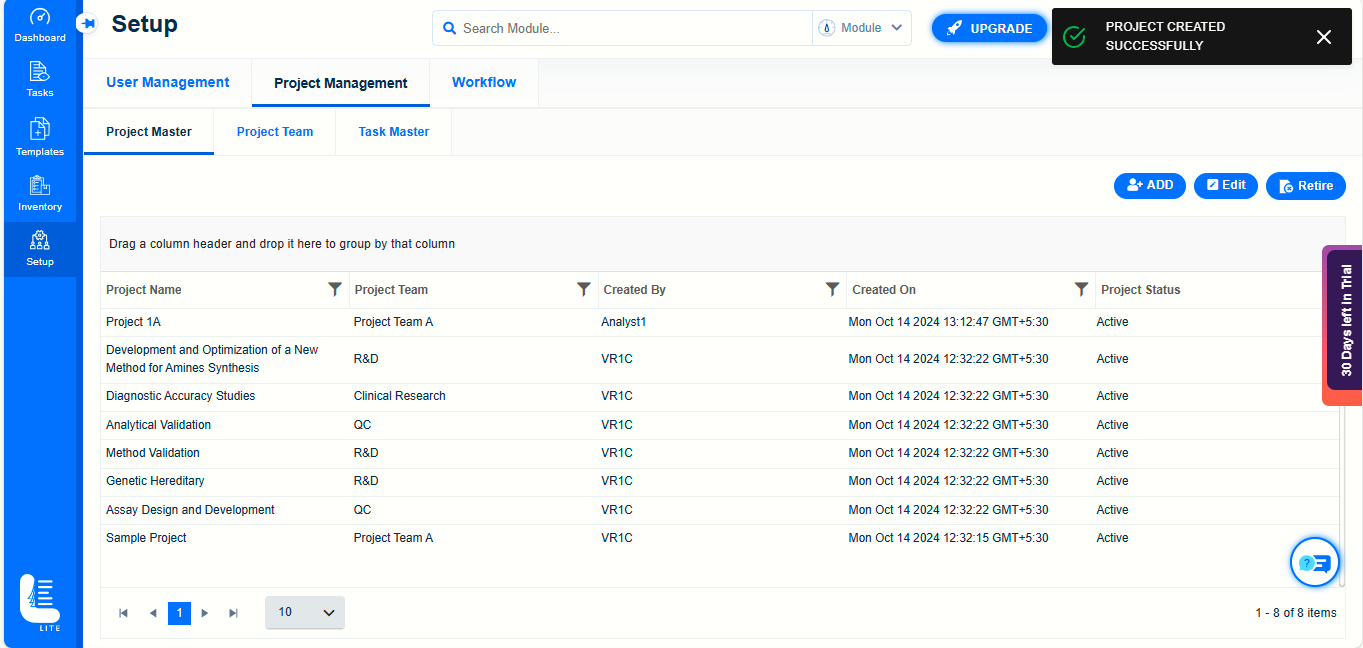
The newly-created project details get displayed on the project Master page along with the confirmation message.
Project Team
In order to create a configure project team, navigate to Project Team page by clicking on ‘Project Team’ subtab.
Project Team page will be displayed in which the list of existing project teams will be displayed on the left side panel.
On the right- side panel, you have the option to select and add the users to the project team.
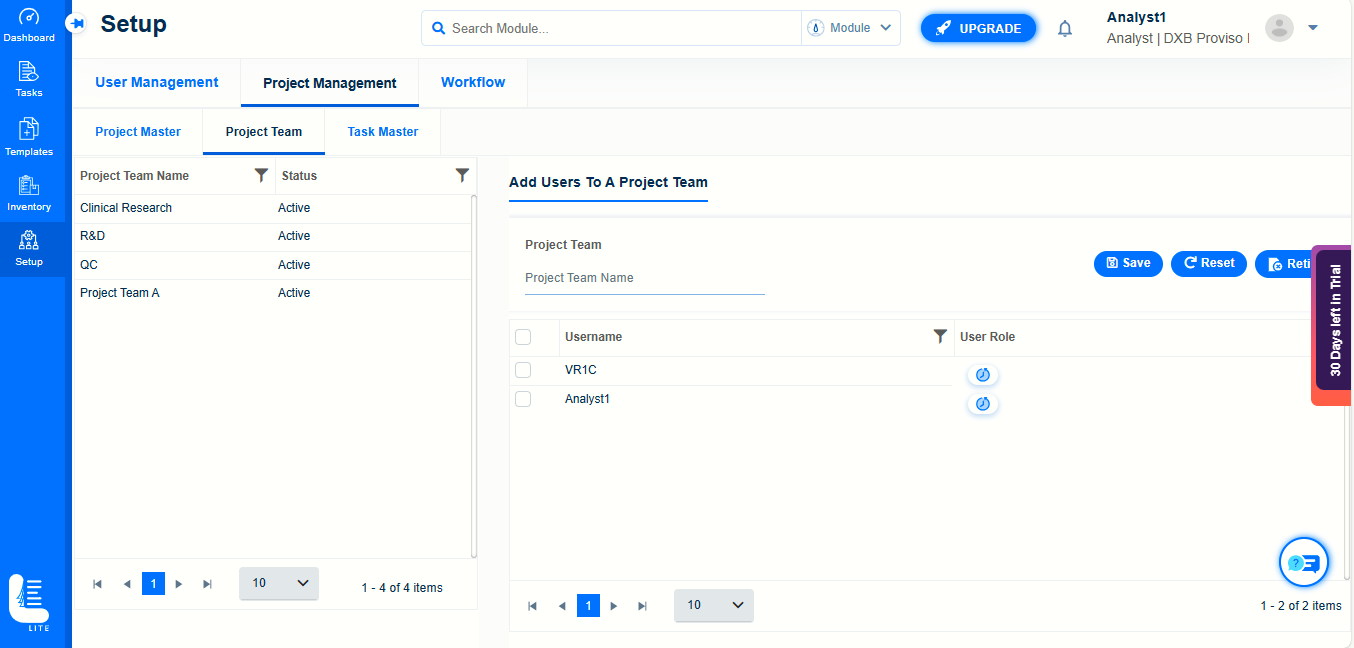
Select the project team name on the left side panel followed by selecting the user name (by selecting the checkboxes).
Click on ‘Save’ button to save the changes.
The confirmation message will get displayed.
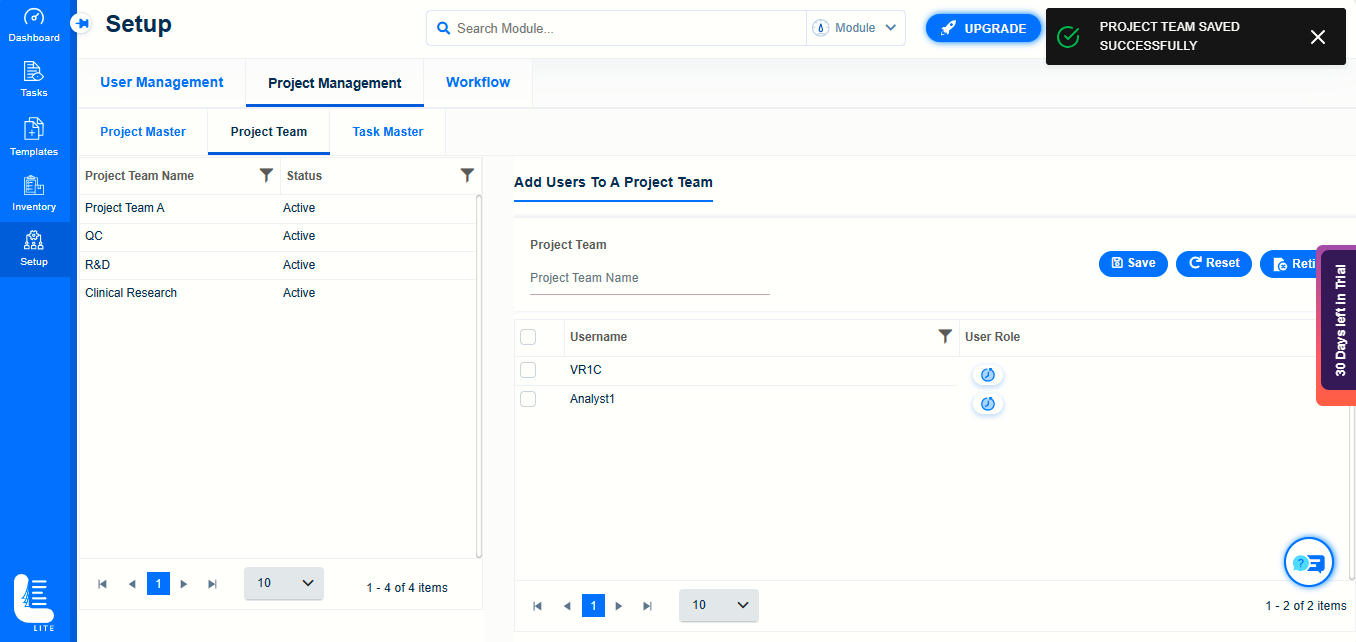
To retire the project team permanently, click on ‘Retire’ button after selecting the project team.
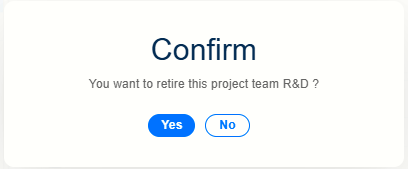
Click ‘Yes’ on the confirmation dialog window to complete the retire action.
Task Master
To add a new task, click on Task Master subtab, which will navigate to Task Master page.
The list of preconfigured Tasks will be displayed.
The user either can use the existing tasks or choose to create a new task.
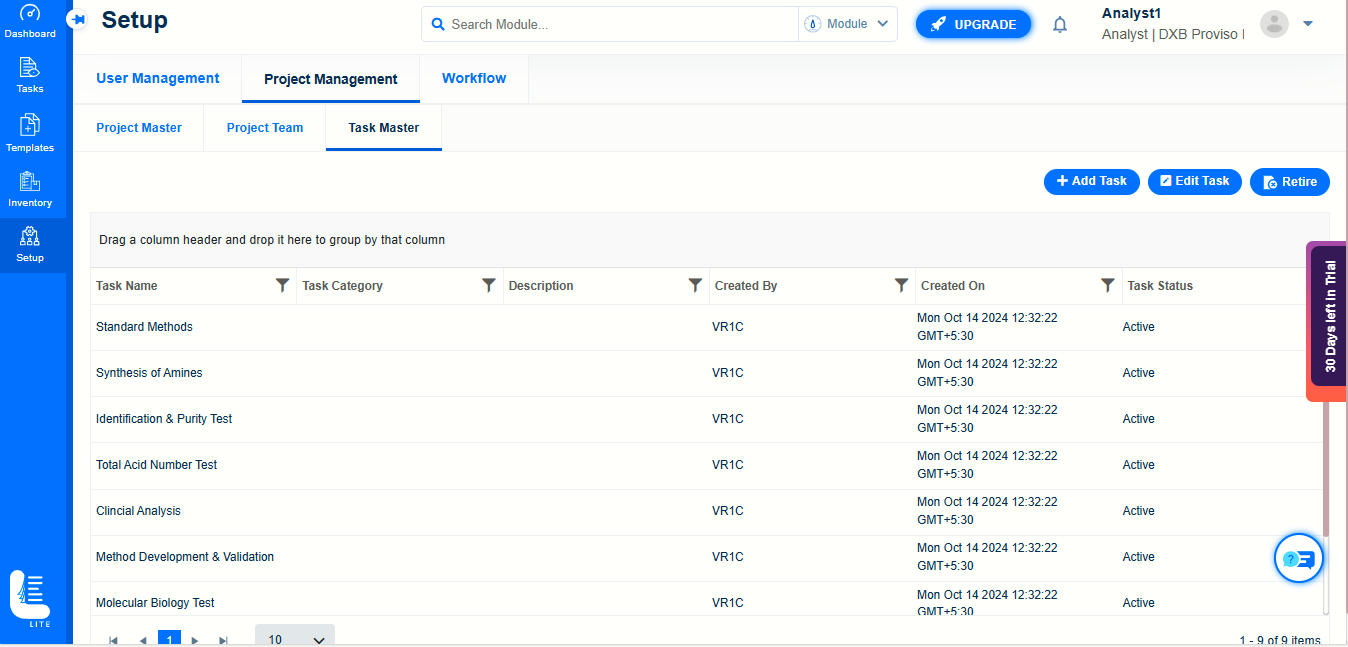
In order to create a new task, click on ‘Add Task’ button.
‘Create New Task’ dialog window will be displayed.
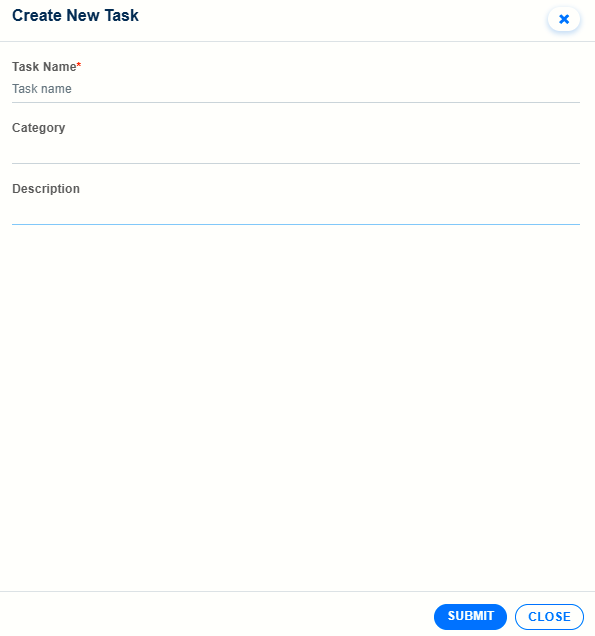
Enter valid values in the Task Name, Category and Description fields.
Click on ‘SUBMIT’ button to confirm the creation of new task record.
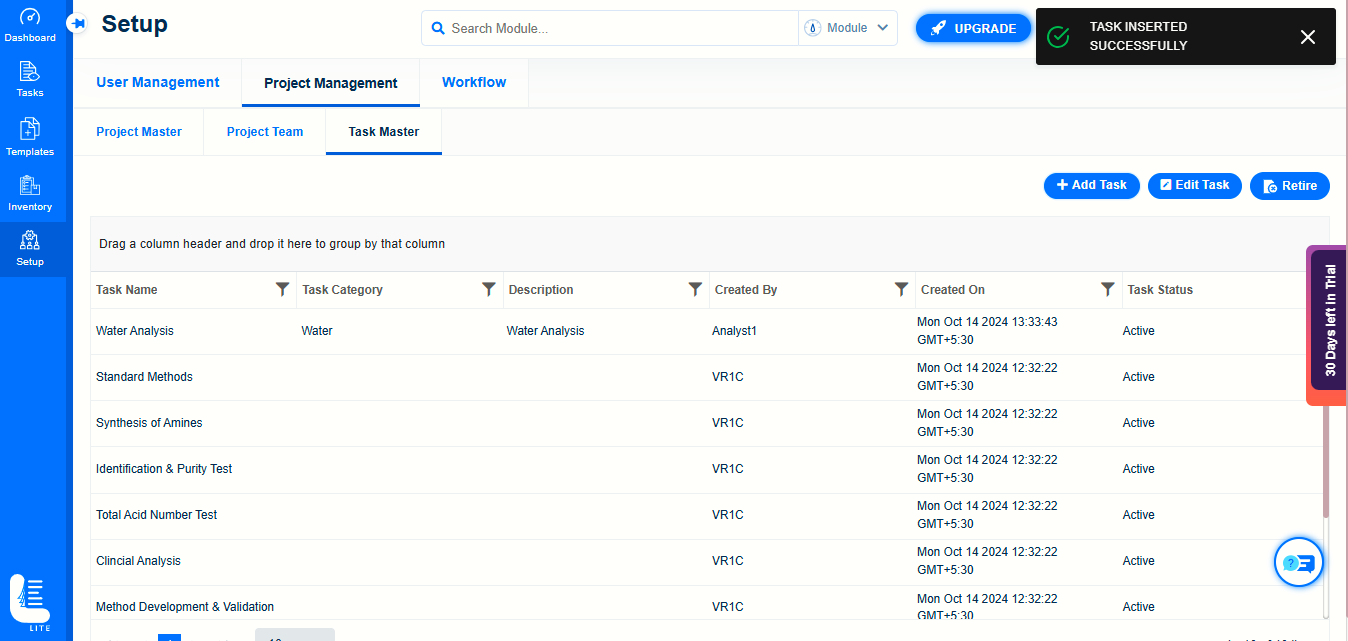
The newly-created task record gets displayed on ‘Task Master’ page.
To edit the existing task, select the same and click ‘Edit task’ button.
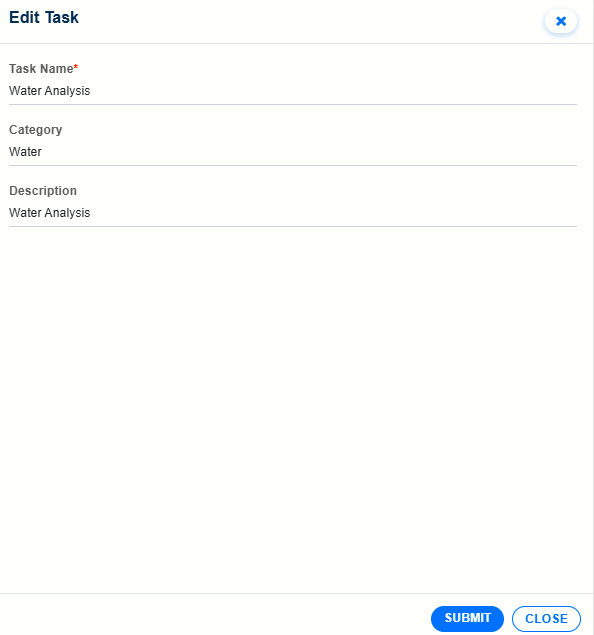
‘Edit Task’ dialog window will be displayed.
Edit the required fields to modify the values.
Click on SUBMIT button on completing the edit.
To retire the existing task, click on ‘Retire’ button on ‘Task Master’ page.
Confirmation dialog window will appear. Click on ‘Yes’ button to confirm the retire action.

This will permanently retire the tasks.
Workflow screen helps you to create workflows for sheet orders and protocol orders.
Workflows can be designed based on logic in each step. For example, the order created shall pass through the following steps in a workflow:
| Workflow Step | Role Mapped | Workflow Status |
|---|---|---|
| Initiate | Analyst | Completed |
| Review | Reviewer | Reviewed |
| Approve | Approver | Approved |
Each step in the workflow is mapped to a role. Once the sheet pass through a step, the status of the order is changed to the next step. The order should pass through all the steps in the workflow to successfully complete.
You can design work flow by adding user roles to each work flow step. To do so follow these steps:
Click on ‘Setup’ main menu, followed by clicking on ‘Workflows’ submenu.
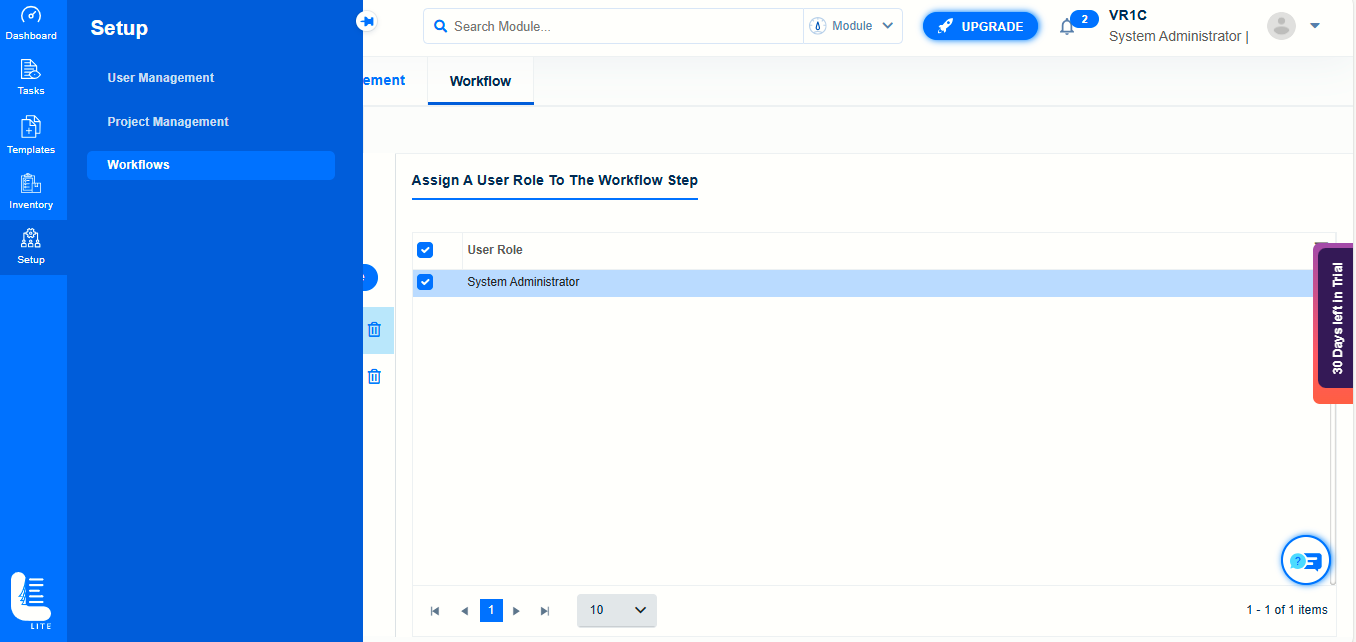
The Task workflow page will be displayed. You can see the list of existing work flow steps on the left panel.
To create a new task work flow step, follow these steps:
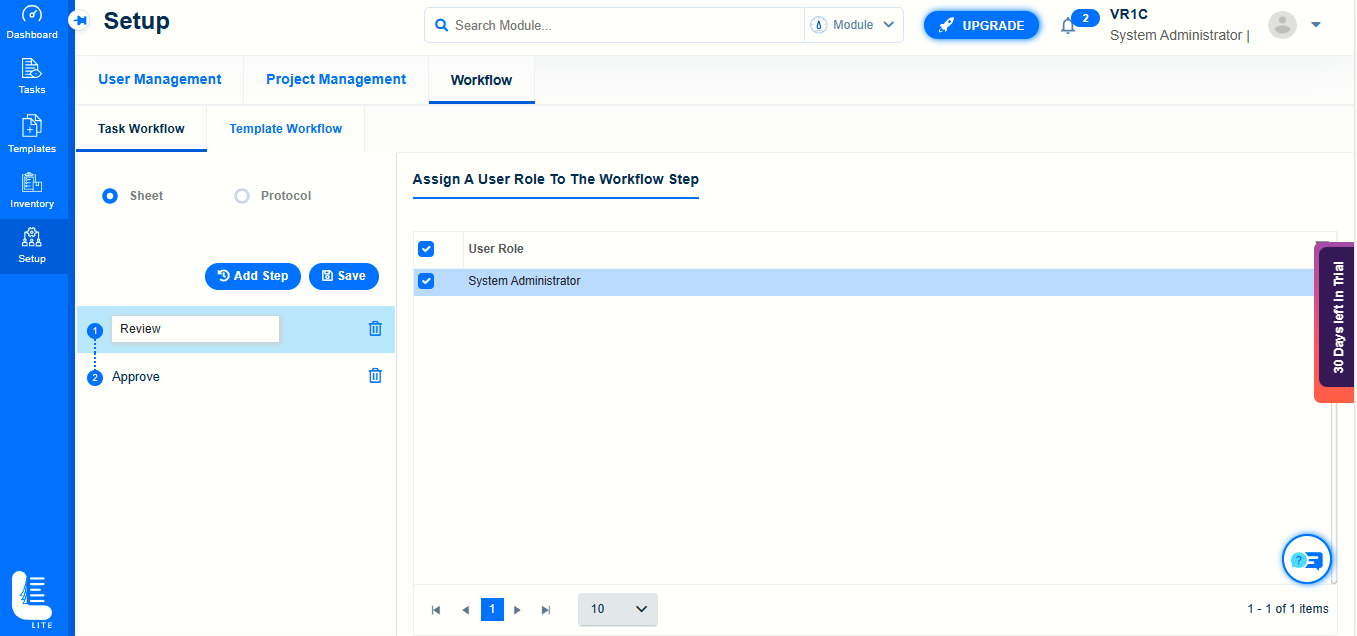
Click Add Step. You can see a new step created and prompts for the name.
Type the workflow step name you want to create.
Under Assign a User Role to the Workflow Step, click to select the user role for the selected work flow step. You can select multiple user roles for the step.
Click Save. You will see a success message as shown in the “Workflow Updated Successfully”
The workflow step is created. Same way, you can add maximum 3 steps to the workflow.
Note: By following the same above steps, the template workflows can be configured by navigating to Template Workflows page, followed by either ‘Sheet Template’ workflow or ‘Protocol Template’ workflow by selecting the type accordingly.
Sheet Template workflow page
On the Workflow page, choose Template Workflow followed by Sheet radio button option
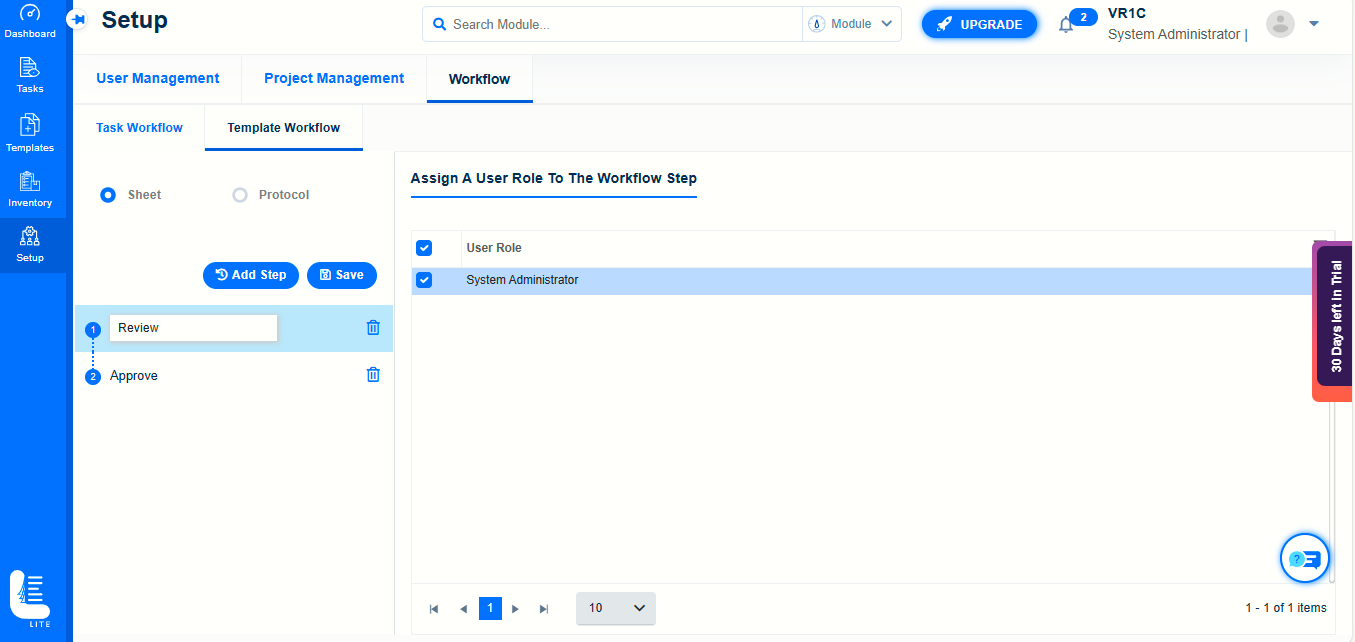
The setup of Sheet workflow is exactly same as in the case of Task workflow.
Follow the same steps as mentioned for Task workflow.
Protocol Template Workflow page
On the Workflow page, choose Template Workflow followed by Protocol radio button option
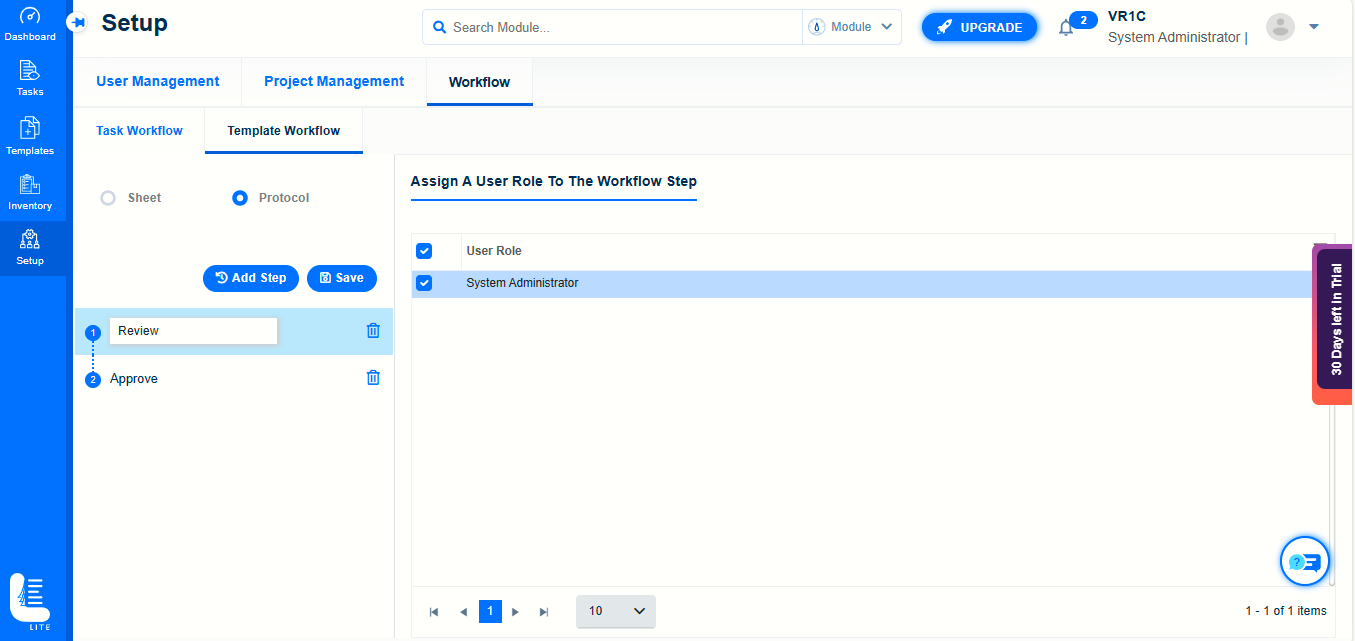
The setup of protocol workflow is exactly same as in the case of Sheet workflow.
Follow the same steps as mentioned for Sheet workflow.