1.1 Audit Trail History
Audit Trail History menu helps you to view audit trail log. Also enables you to filter records based on specified duration, audit type, username and screen name. You can export records to excel file, create archive and open archive to view.
Note: For administrators the Site field will appear. Hence, administrators can view site specific audit trail log.
To view audit trail log, follow these steps:
- On the main menu, click
 and then click Audit Trail History. The screen appears as shown in the figure:
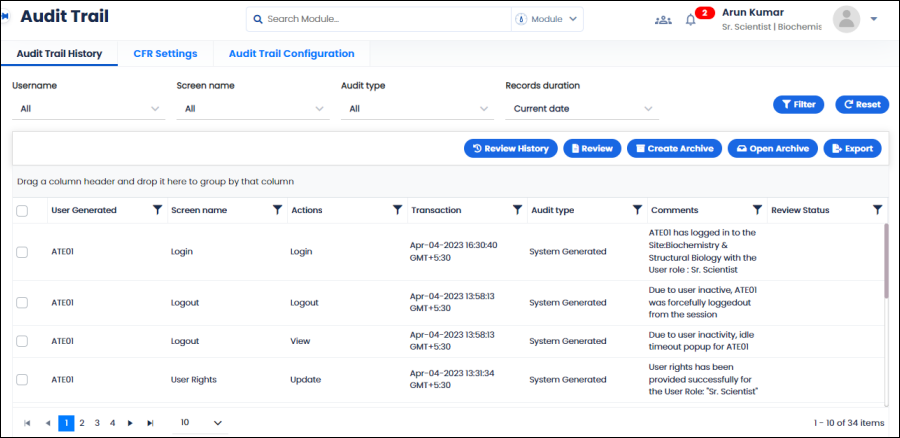
FIGURE: Audit Trail History Screen
You can filter records based on anyone or all the following options:
- Username: From the Username field, select the user and then click Filterto filter records based on the specified user.
- Screen name: From the Module Name field, select the module name and then click Filterto filter records based on the specified module.
- Audit type: In the Audit Type field, select the audit type: User Generated / System Generated and then click Filterto filter records based on the specified Audit Type.
- Records duration: Select the record duration and then click Filterto filter records based on the specified time frame.
- All: Includes all the above criteria to filter.
 Use the arrows to navigate to the next, previous, first and last pages. Click the dropdown arrow and select the number of records to display on the screen.
1.1.1 Create Archive
- In the Audit Trail Historyscreen, click Create Archive. The confirmation dialog saying “Do you want to move all the records to a separate archive? “Appears. Click Yes. The audit trail records up to date and time is archived. You will see a success message.
1.1.2 Open Archive
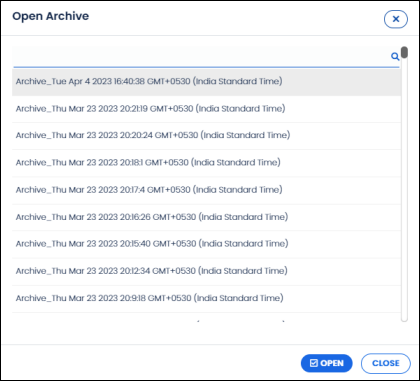
- In the Audit Trail Historyscreen, Click Open Archive. The Open Archive dialog appears as shown in the figure:
FIGURE: Open Archive Dialog
- Click to select the archive from the list and then click OPENto view the details.
1.1.3 Exporting Audit Trail History
You can export selected audit trail history records. You can select required records or select all records to export.
To export audit trail history to Excel, follow these steps:
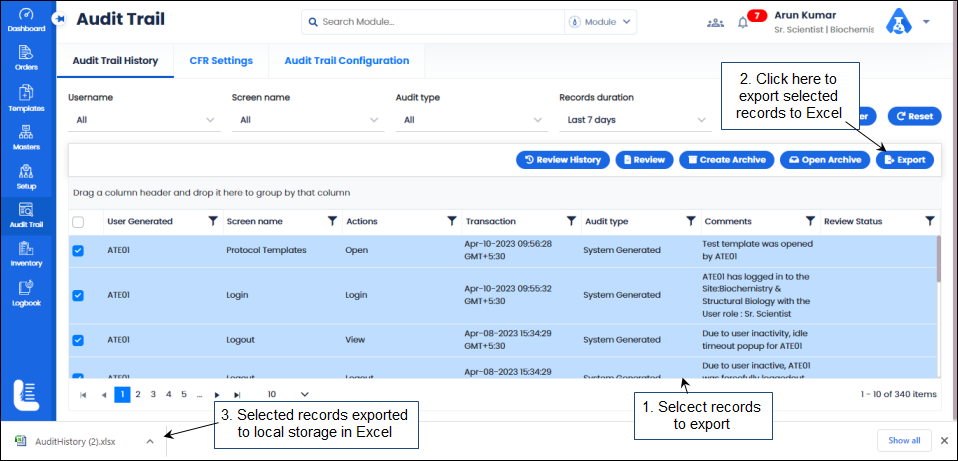
- In the Audit Trail Historyscreen, select the records to export and then click Export as shown in the figure:
FIGURE: Exporting Audit Trail History
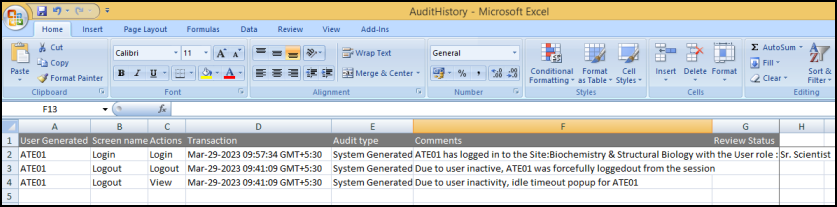
- The Excel file is downloaded. The audit trail log records are exported to the Excel sheet and the Excel sheet appears as shown in the figure:
FIGURE: Exported Audit Trail Records in Excel Format
1.1.4 Review Audit
You can review an audit on the Audit Trail History screen. To do so, follow these steps:
- In the Audit Trail Historyscreen, click to select the audit trail records and then click Review . You will see a success message "AUDIT RECORDS REVIEWED SUCCESSFULLY".
1.1.5 View Audit Review History
You can view review details of the audit records in the Audit Trail History screen. To do so, follow these steps:
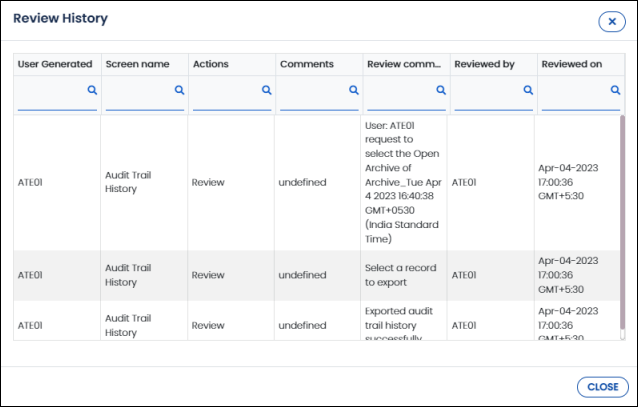
- In the Audit Trail Historyscreen, select records or select all record and then click Review History. The Review History dialog appears as shown in the figure:
FIGURE: Review History Dialog
- You can see the list of audit trail records reviewed with details. Click CLOSE to close the Review History
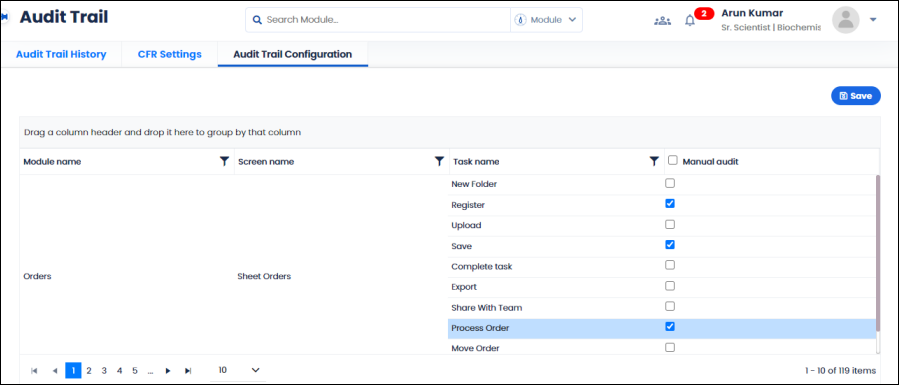
1.3 Audit Trail Configuration
Audit Trail Configuration screen helps you to enable audit trail feature for the selected tasks. List of modules, screens in each module and tasks in each screen will appear in the Audit Trail Configuration screen. You can click to check the check box in the Manual Audit column against the task to enable audit.
- On the main menu click and then click Audit Trail Configuration. The Audit Trail Configuration tab appears as shown in the figure:
FIGURE: Audit Trail Configuration Screen
- Click the Manual Audit check box against the task name to enable manual audit. If you enable manual audit option, the Audit Trail dialog prompts for valid password, reason and comments to complete that task.
- Click to uncheck the Manual Audit checkbox to disable manual audit for a particular task.