You can create your own folder and sub folders in ELN.
To create a new folder, follow these steps:
1.On the Sheet Ordersscreen, click New Folder. The Create New Folder dialog appears as shown in the figure:
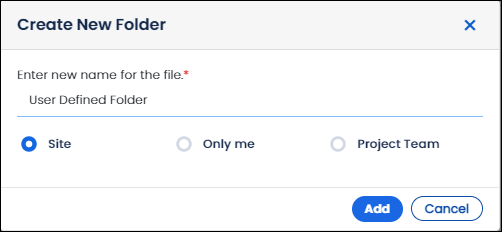
FIGURE: Create New Folder Dialog 1
2.In the Enter new name for the filefield, type a name for the folder you want to create.
3.Set the folder visibility to Site/ Only me / Project Team.
4.Click Add. The following dialog appears:
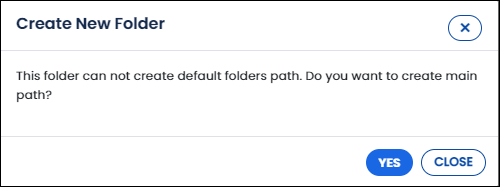
FIGURE: Create New Folder Dialog 2
5.Click YES. The new folder is created and appears as shown in the figure: You can also create subfolders inside the user defined folder as shown in the figure:
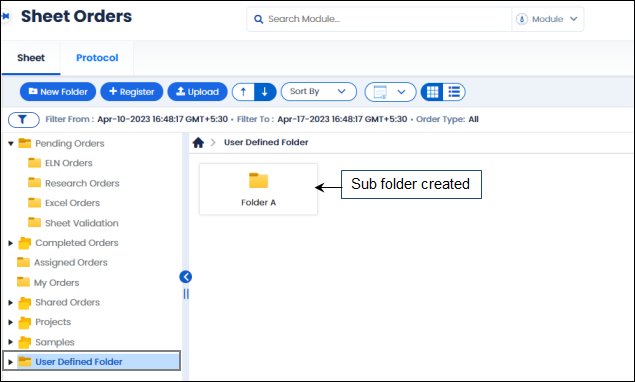
FIGURE: User Defined Folder and Sub Folder Created
5.Inside the user defined folder, you can upload files and attachments. Select the folder and then click Uploadto upload files.
Logilab ELN allows you to change views between Grid and List.
By default, the folder / grid view appears. If you want to switch to the List view, then click. The List View appears as shown in the figure:
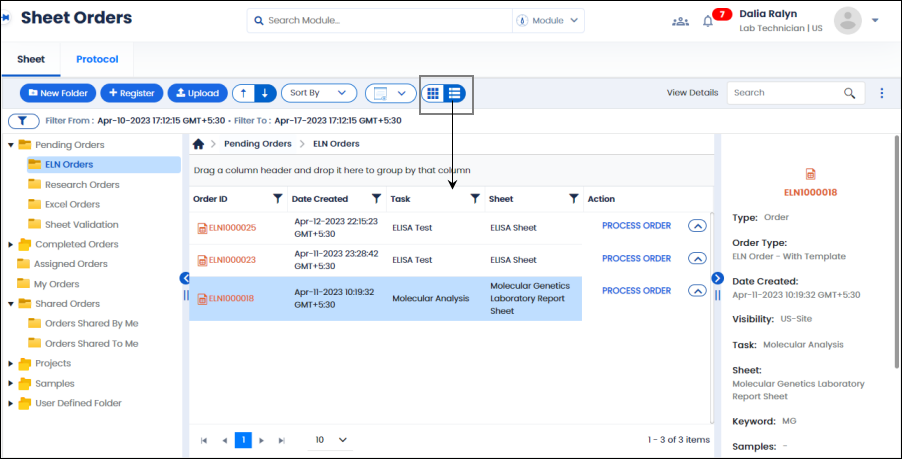
FIGURE: Changing Views: Grid View / List View
Logilab ELN allows you to add more fields to the grid/list in the Sheet Order screen.
By default, the Order ID, Date Created, Task and Action fields appears. If you want to add more fields clickand then click to check the fields to add as shown in the figure:
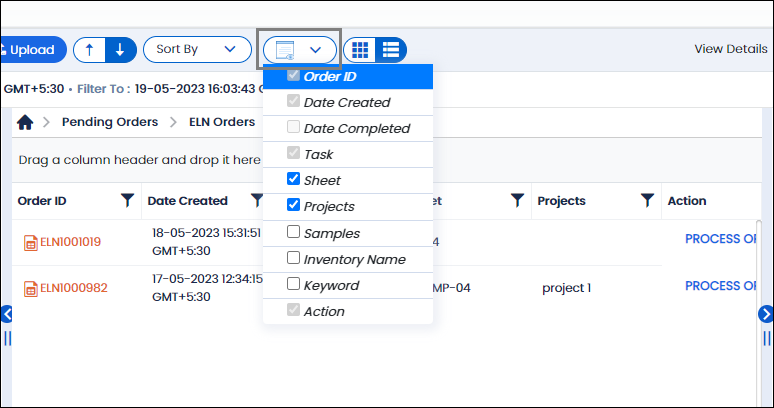
FIGURE: Adding More Fields to the Grid/List
You cannot remove default fields.
Logilab ELN allows you to sort records based on a selected field in the Sheet Order screen.
To sort records, clickand then select a field as shown in the figure:
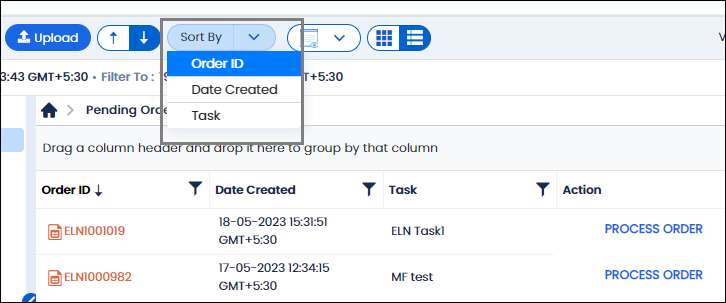
FIGURE: Sorting Records by selected Field
The order records are sorted based on the selected field.
You can also use to sort records in ascending / descending order.
Logilab ELN enables you to upload files to user defined folders/dynamic folders.
Note: You cannot upload files to default / system folders.
To upload a file, follow these steps:
Go to the user defined folder where you want to upload files and then click Upload as shown in the figure:
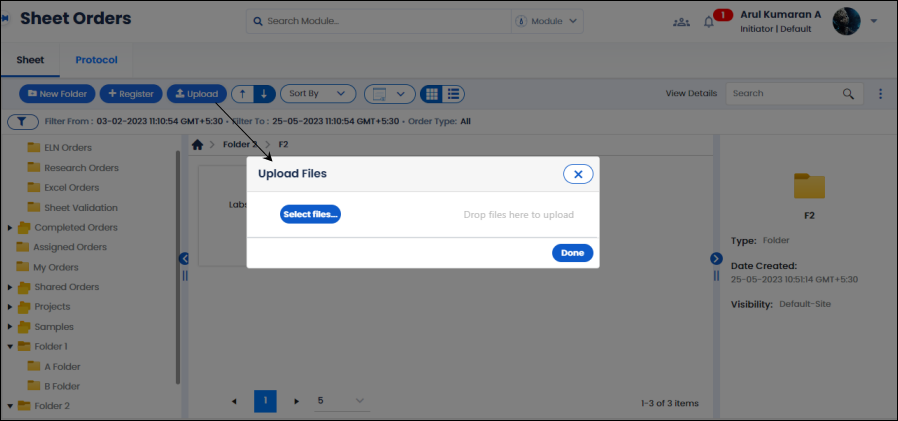
FIGURE: Uploading Files to the User Defined Folders
The Upload Files dialog appears as shown in the above figure.
Click Select Files, in the Open dialog navigate and choose the file to upload and then click Open.
The selected file will upload. Once done, on the Upload Filedialog, click done. The file is uploaded and appears as shown in the figure:
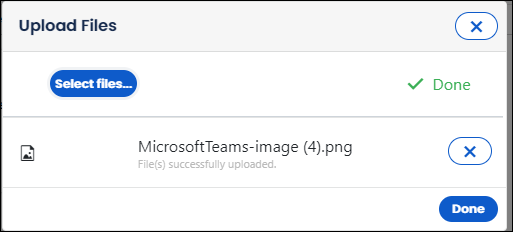
FIGURE: Upload Files Dialog
If required, you can clickthat appears next to the file uploaded to remove the attached file.
Click Done. The file is uploaded to the selected user defined folder and appears as shown in the figure:
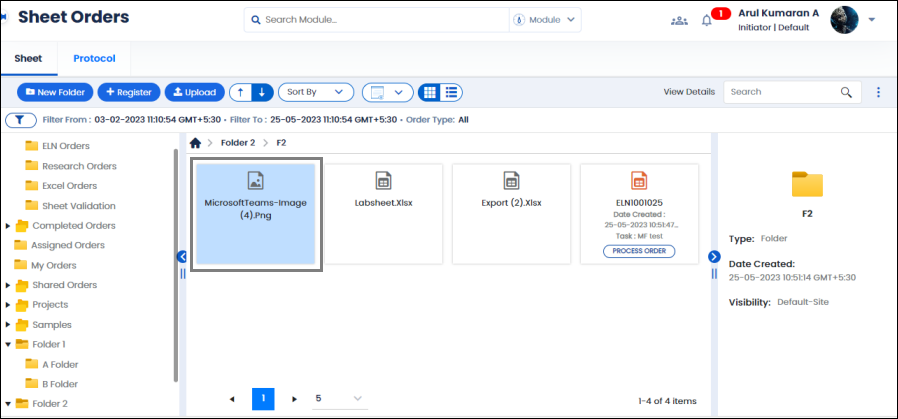
FIGURE: File Uploaded
Right-click a file or folder and then click Move to move a folder. The Move dialog appears as shown in the figure:
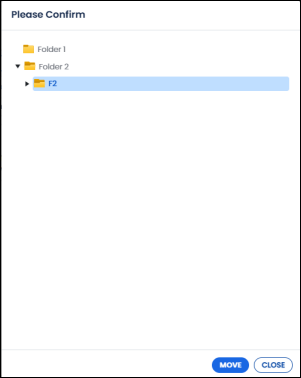
FIGURE: Move Dialog
The dialog displays the user defined folders. Select a folder t o move the selected file/folder and then click MOVE. The file/folder is moved to the selected destination folder.
Right-click a file/folder and then click deleteto delete the file/folder.
Logilab ELN enables you to move multiple files / folders /orders from user defined folders to other user defined folders.
Note: You cannot move files/folders/orders from and to default folders.
To move multiple files, follow these steps:
Go to the user defined folder where you want to select files to move.
Click and then click Select Files as shown in the figure:
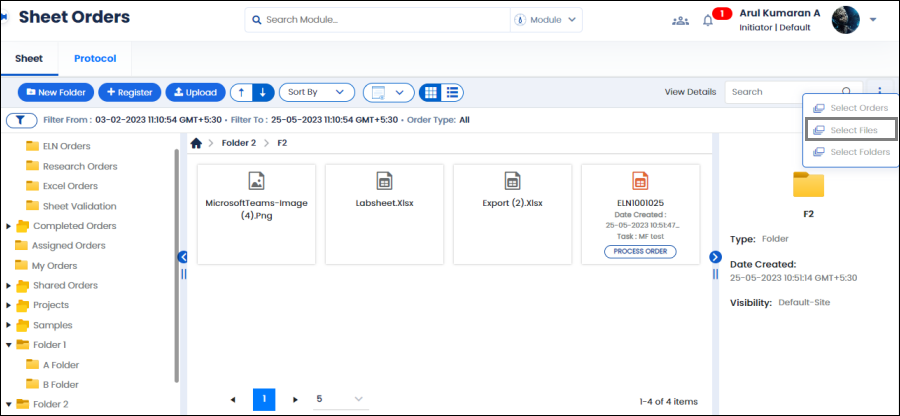
FIGURE: Uploading Files to the User Defined Folders
You can see a check box appears in every file to select. Click to select the files to move / delete as shown in the figure:
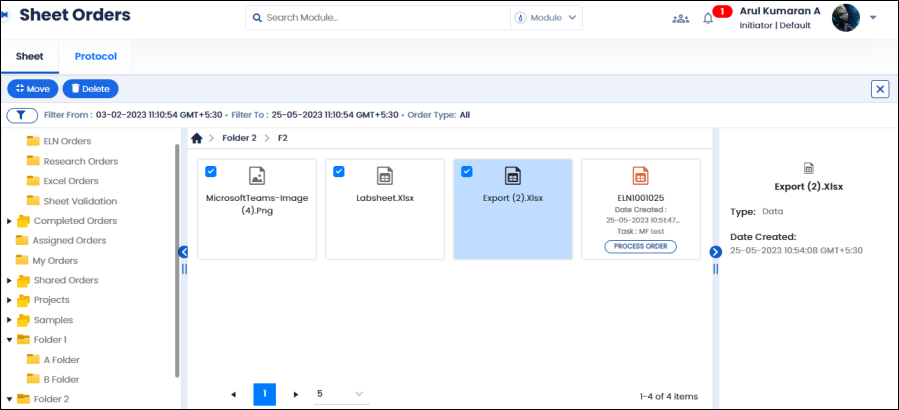
FIGURE: Selecting Files to Move / Delete
Note:
If you have selected Select Folders, the folders will appear with check boxes to select.
If you have selected Orders, the orders will appear with check boxes to select.
Click Delete to delete selected files if required.
Click Moveto move the selected files. The Move dialog appears as shown in the figure:
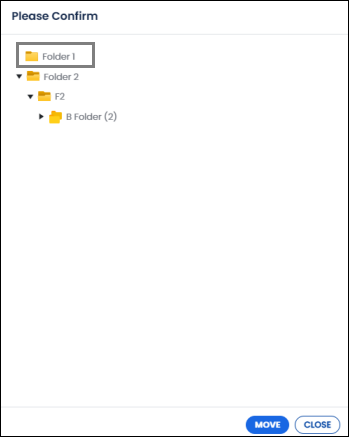
FIGURE: Move Dialog
The dialog displays the user defined folders. Select a folder t o move the selected files and then click MOVE. The files are moved to the selected destination folder and appears as shown in the figure:
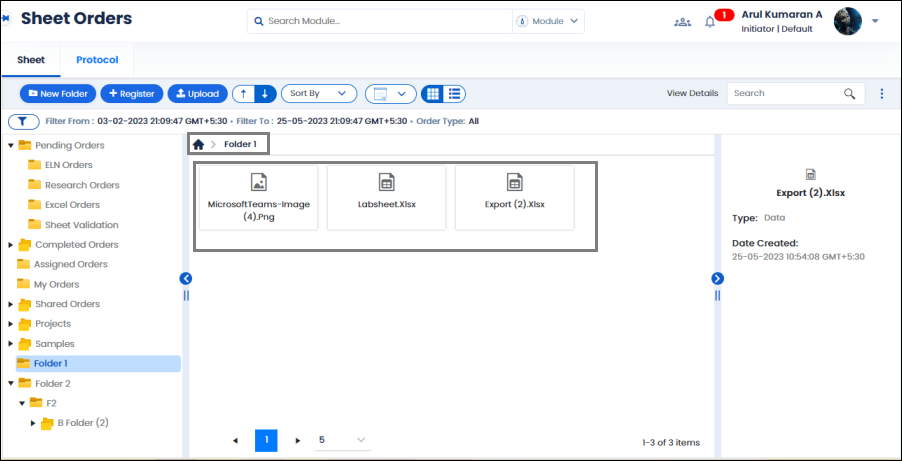
FIGURE: Moved Files in the Destination Folder
