1.1 Instrument Category
Instrument Category master is used to create and manage instrument categories that are used in the Instrument master.
1.1.1 Creating a New Instrument Category
To create a new instrument category, follow these steps:
- On the main menu, click
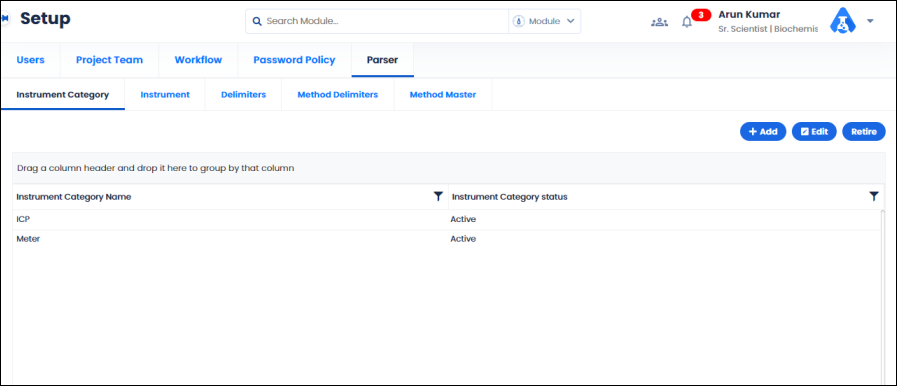
 and then click Instrument Category. The Instrument Categorymaster screen appears as shown in the figure:
FIGURE: Instrument Category Master Screen
In the Instrument Category master screen, you can see the list of instrument categories added. The option to add, edit and retire instrument categories appears.
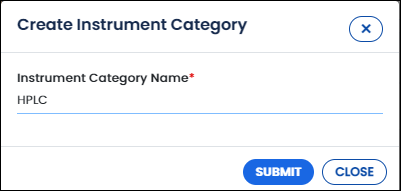
- Click Add. The Create Instrument Category screen appears as shown in the figure:
FIGURE: Add Instrument Category screen
- In the Instrument Category Name field, type instrument category name you want to add.
- Click SUBMIT.
You can see the instrument category you created listed in the Instrument Category master.
1.1.2 Editing Instrument Category Details
To edit instrument category details, follow these steps:
- In the Instrument Category master screen, select an instrument category to update and then click Edit The selected record opens for edit.
- In the Edit Instrument Category screen do required changes and then click Submit.
1.1.3 Retiring Instrument Category Record
- To retire an instrument category, in the Instrument Category master screen, select an instrument category and then click The instrument category is retired, and the status appears as Retired.
1.2 Instrument
Instrument master is used to add and manage instruments.
1.2.1 Adding a New Instrument
To add a new instrument, follow these steps:
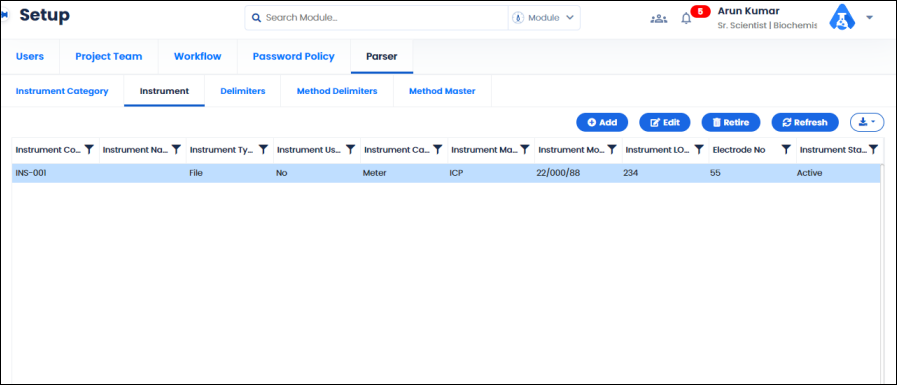
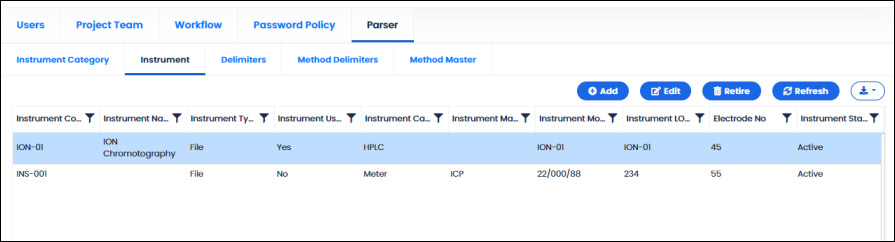
- On the main menu, clickand then click Instrument . The Instrument master screen appears as shown in the figure:
FIGURE: Instrument Master Screen
In the Instrument master screen, you can see the list of instruments added. The option to add, edit and retire instruments appears. Also, options to export the instrument master details to PDF / Excel / CSV appear.
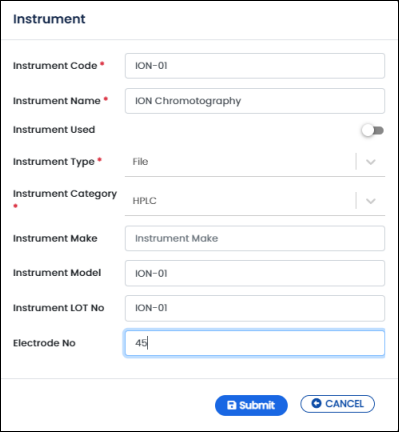
- Click Add . The screen appears as shown in the figure:
FIGURE: Add Instrument screen
- In the Instrument Code field, type the instrument code you want to add.
- In the Instrument Name field, type instrument name you want to add.
- Click to enable the Instrument Used Only if this option is enabled, the instrument will be visible on other screens.
- In the Instrument Type field, select instrument type.
- In the Instrument Category field, select instrument category.
- In the Instrument Make field, type the instrument make / manufacturer name.
- In the Instrument Model field, type model of the instrument.
- In the Instrument LOT No field, type LOT number of the instrument.
- In the Electrode No field, type the electrode number of the instrument.
- Click Submit.
You can see the instrument you added listed in the Instrument master as shown in the figure:
FIGURE: New Instrument Added
1.2.2 Editing Instrument Details
To edit instrument details, follow these steps:
- In the Instrument master screen, select an instrument to update and then click Edit. The selected record opens for edit.
- In the Edit screen do required changes and then click Submit.
1.2.3 Retiring Instrument
- To retire an instrument, in the Instrument master screen, select an instrument to retire and then click The instrument is retired, and the status appears as Retired.