Method master screen helps to add, edit and retire methods. You can select instrument for the method and add the raw data file to be parsed.
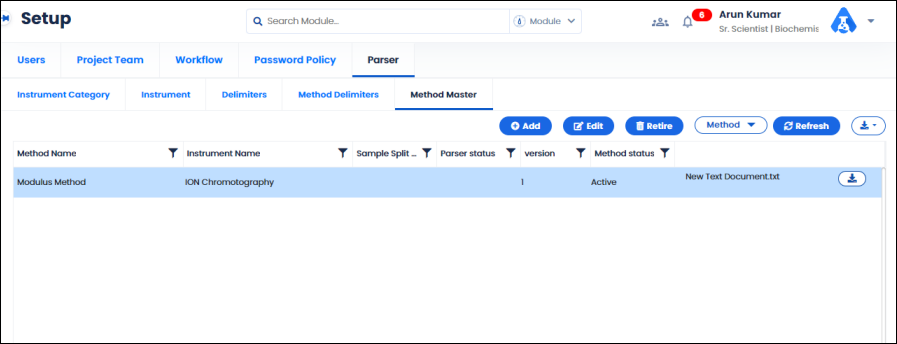
FIGURE: Method Master Screen
In the Method master screen, you can see the list of methods added.
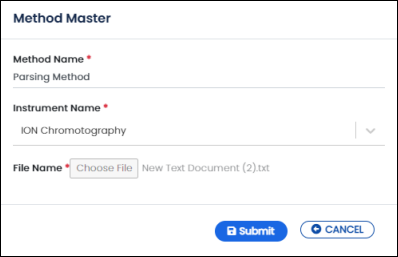
FIGURE: Add Method Screen
The method is added to the method master. Once you add the method you can see that the Sample Split and Parser Setup fields appear as blank until you setup sample split and parser setup using the options as shown in the figure:
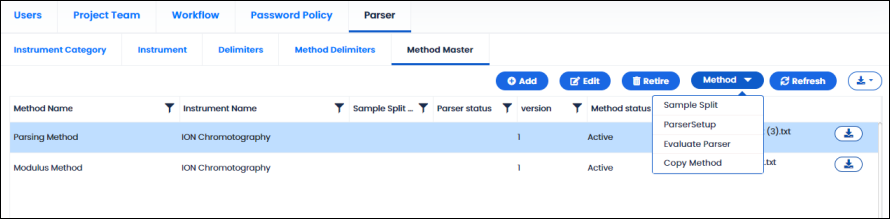
FIGURE: Method Master Sample Split and Parser Setup Options
Sample split option enables remove or exclude unwanted data / data blocks from the raw data to enable parsing. You can mark header and footer, remove unwanted data blocks and extract required data from the raw data file.
To sample split the raw data, follow these steps:
FIGURE: Using Sample Split Option
The Sample Split screen appears as shown in the figure:

FIGURE: Sample Split Screen
The raw data is loaded from the file. You can use the following options to mark header, footer, remove unwanted data/blank space, mark data blocks etc.
Header: Define the header. Select data for header.
Footer: Define the footer, Select data for footer.
Remove: Remove unwanted data/data blocks from raw data
Extract: Mark data blocks to enable parser setup.
You can mark header / Footer / data to be removed and data to be extracted in the raw data file using any one of the following methods:
 switch between header/footer/removed data/extracted data as shown in the figure:
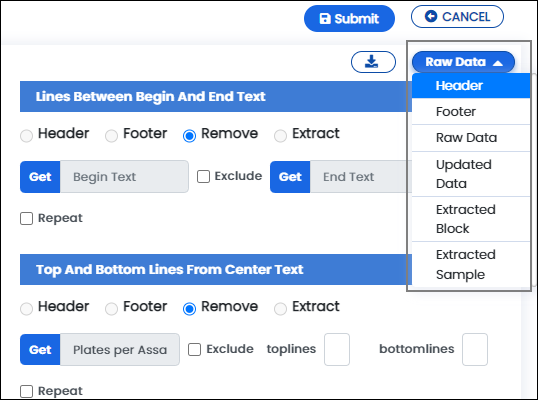
FIGURE: Switch between Header / Footer / Raw Data / Removed Data
Follow the onscreen instructions to mark header in the raw data:
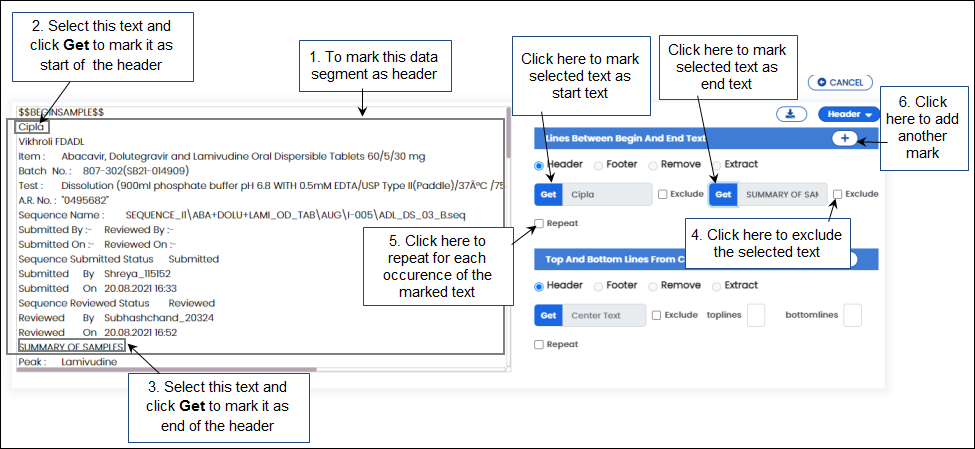
FIGURE: Sample Split – Marking Header
Follow the onscreen instructions to mark footer in the raw data:
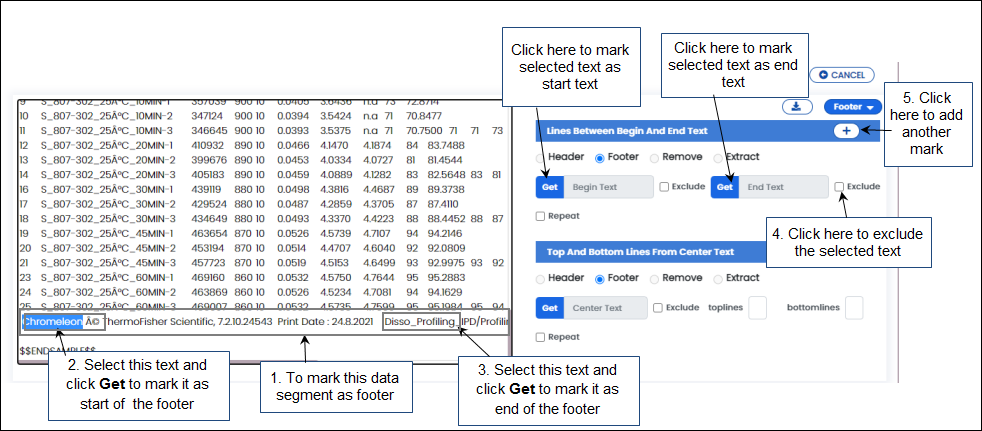
FIGURE: Sample Split – Marking Footer
You can remove unwanted data and blank lines from the raw data. To do so, follow these steps:
FIGURE: Removing unwanted Data and Blank Lines 1
Follow the onscreen instructions:
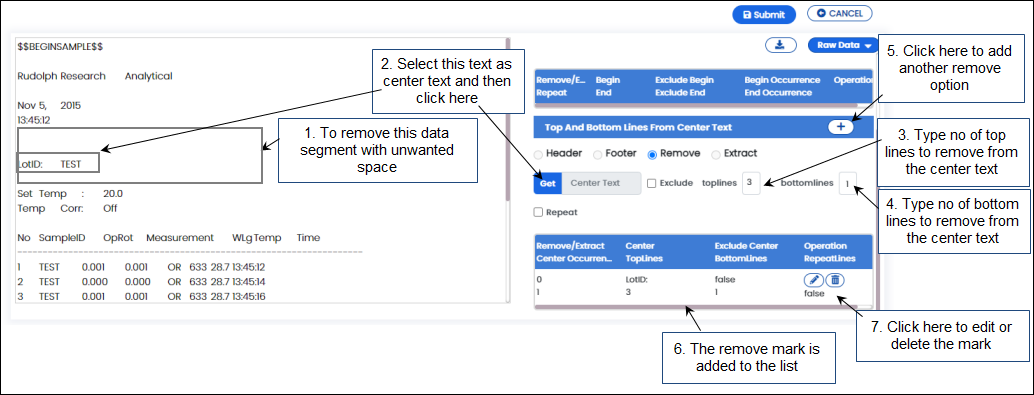
FIGURE: Removing unwanted Data and Blank Lines 2
 and then select Updated Data. Data after removing the unwanted data and blank lines appears.
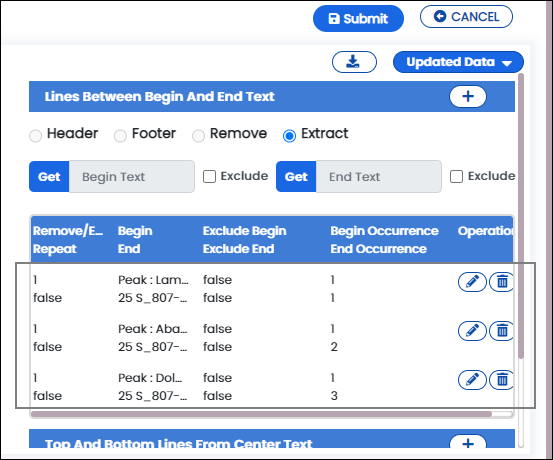
FIGURE: Marking Data Blocks
 and then click Extracted Block. The data blocks extracted appears as shown in the figure:
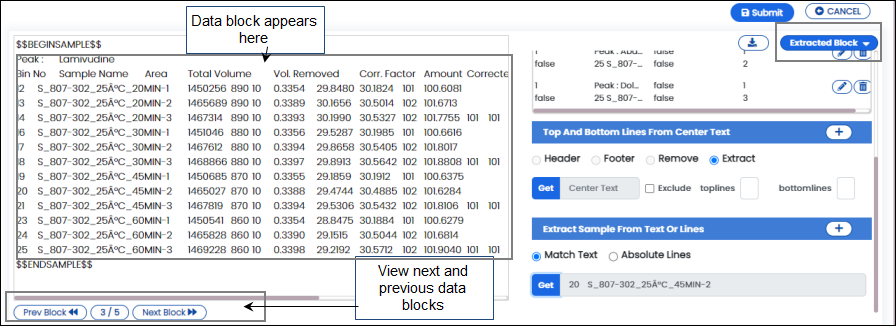
FIGURE: Viewing Extracted Data Block
Sample blocks are marked inside the extracted blocks. Select an extracted block and then mark the sample block.
To mark a sample block, follow these steps:
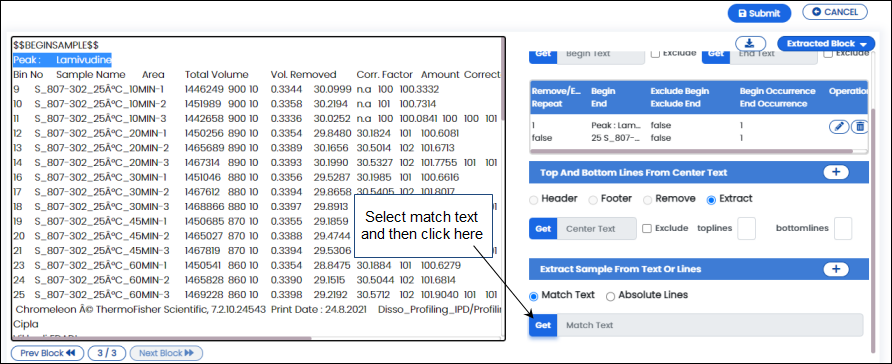
FIGURE: Marking Sample Block Using Match Text
Or you can split the data block into equal parts by typing the number of lines in the Absolute Lines field.

FIGURE: Marking Sample Block Using Absolute Lines Option
A sample block is added starting from the match text with the number of lines specified in the absolute lines field.
Same way, you can add more sample blocks in the data block as shown in the figure:

FIGURE: Sample Blocks Added
 and then click Extracted Sample as shown in the figure:
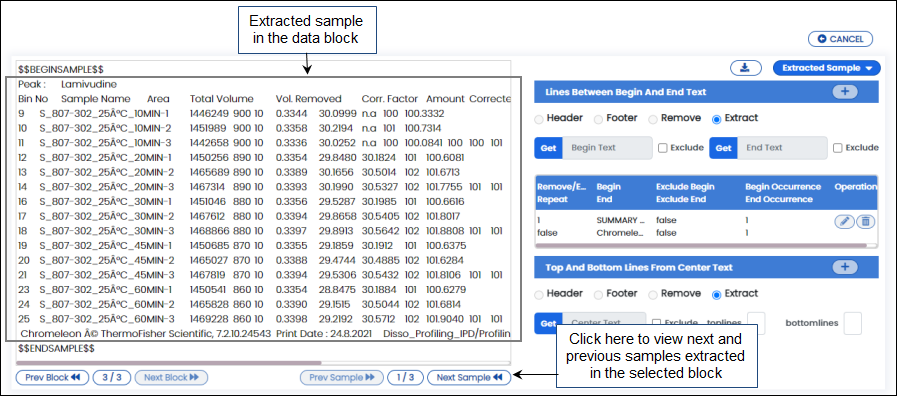
FIGURE: Viewing Extracted Sample
Once sample split is done, the Sample Split field value in the Method Master appears as “ Done” as shown in the figure:
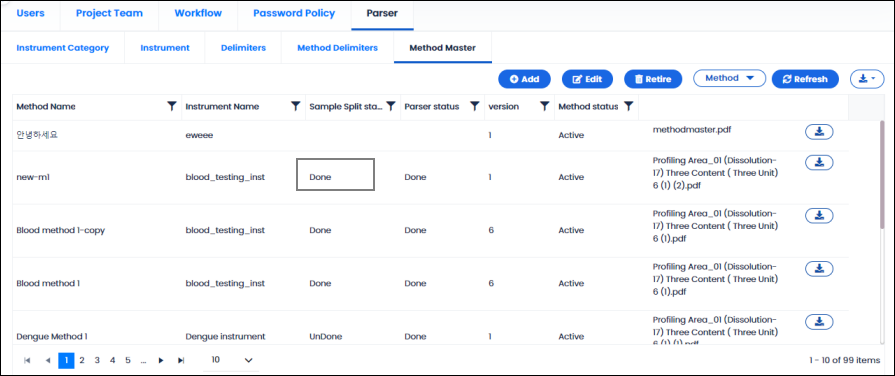
FIGURE: Sample Split Field Appears as “Done”
