Parsing is interpreting/compiling that breaks data into its structured elements for easy translation. The files that are uploaded to the computer are split into parts; data is extracted and imported into the computer.
Once Sample Split is done, you can set up parser. To do so, follow these steps:
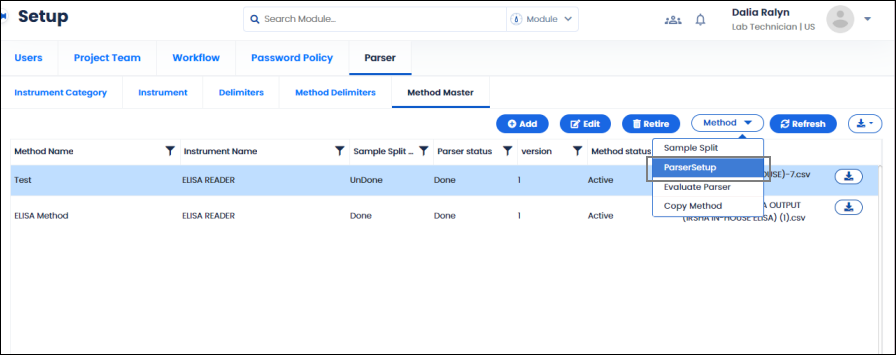
FIGURE: Parser Setup
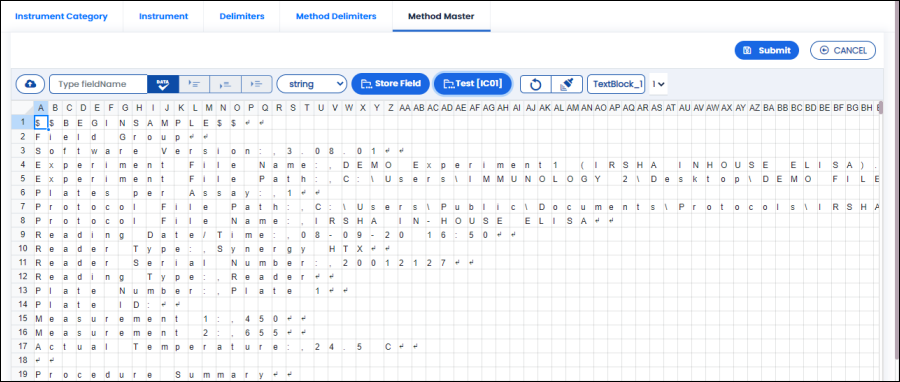
FIGURE: Parser Setup Screen
Controls and their use in the Parser Setup screen:
 Select to extract the data. Select the data you want to parse and then clickto extract the data.
 Mark beginning of the data block.
 Mark end of the data block
 Mark column end of the data block
 Click to save the field marked.
 Method Name – Click to view list of fields added. You can view, edit or delete the fields.
 Click to clear the parser marking and reset and refresh the screen.
 Click to open Store Field Techniques screen where you can merge/split/shift fields with the selected delimiter.
 Click to save the fields in the database table.
In the Parser Setup screen, you can mark required data and map it to a field name. You can also mark beginning and end data blocks to precisely identify the required data block.
To mark required data, follow these steps:
Note: Always select required data until the end mark.
;as shown in the figure: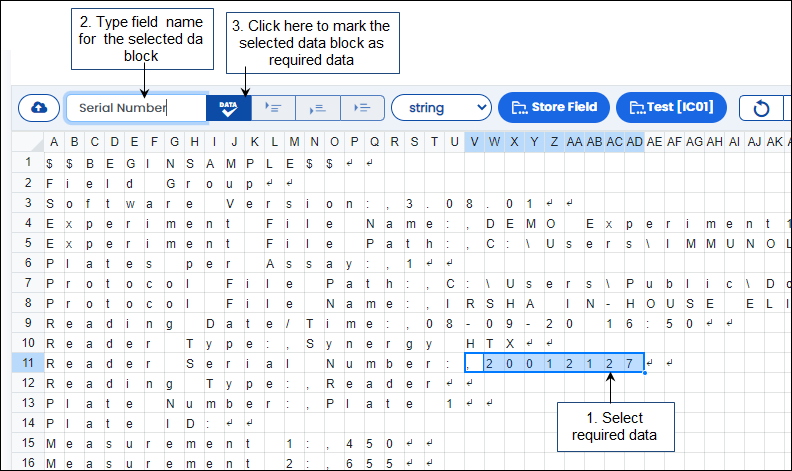
FIGURE: Parser Setup – Marking required Data Block
The required data is highlighted in green as shown in the figure:

FIGURE: Parser Setup –Required Data Block Marked
Once you mark required data, you need to mark beginning of the data block. You can mark the beginning of the data block either on the left side of the data block or on top of the data block whichever is available. In this example, we do not have data at the left-side, but we do have data at the top. So we can mark the beginning of the data block at the top.
as shown in the figure:
FIGURE: Parser Setup – Marking Beginning of the Data Block
Once you mark the beginning of the data block, you need to mark the end of the data block. You can mark the end of the data block either on the right-side of the data block or on bottom of the data block whichever is available. In this example, we do not have data at the right-side, but we do have data at the bottom of the required data. So we can mark the end of the data block at the bottom.
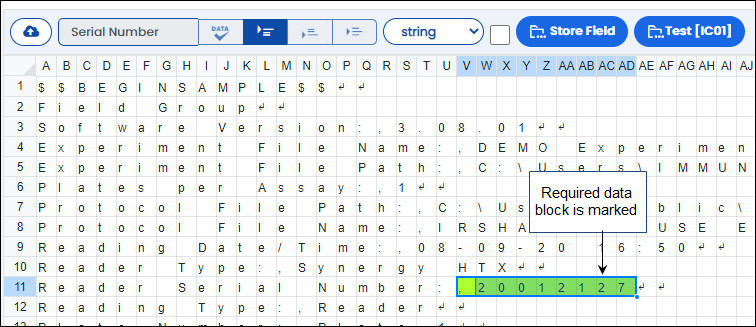
FIGURE: Parser Setup – Marking End of the Data Block
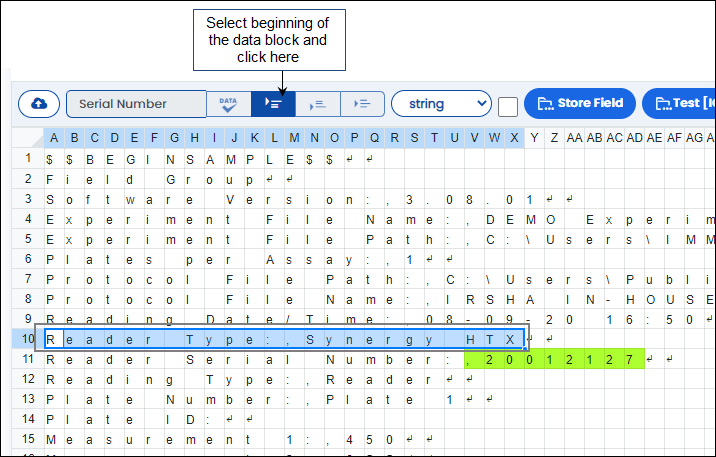
FIGURE: Parser Setup – Marking Column End of the Data Block
The marked column end appears in yellow as shown in the figure:
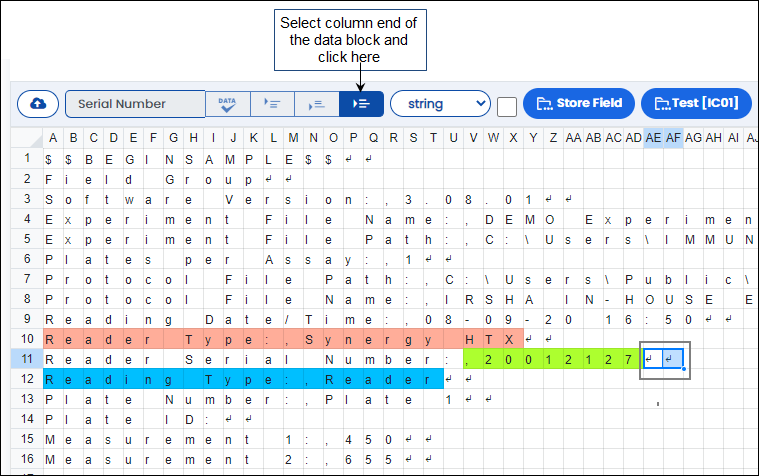
FIGURE: Parser Setup – Marked Column End of the Data Block
Even if you don’t type a field name for the selected data block, the parser will save the data block with default field name as Field 1, Field 2 etc.
To parse multi field values, follow these steps:
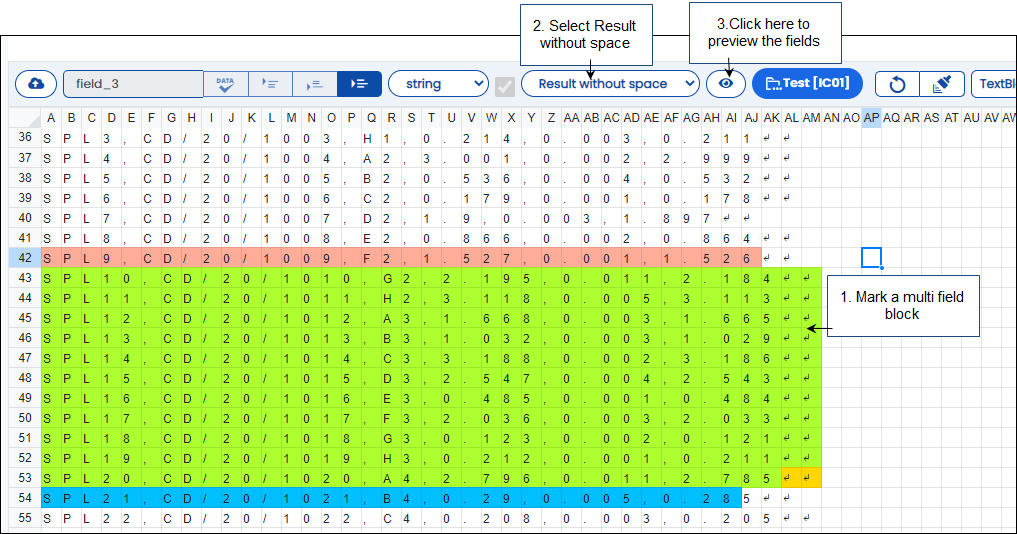 to preview the fields. The screen appears as shown in the figure:
FIGURE: Store Field Technique Screen
To split the columns, follow these steps:
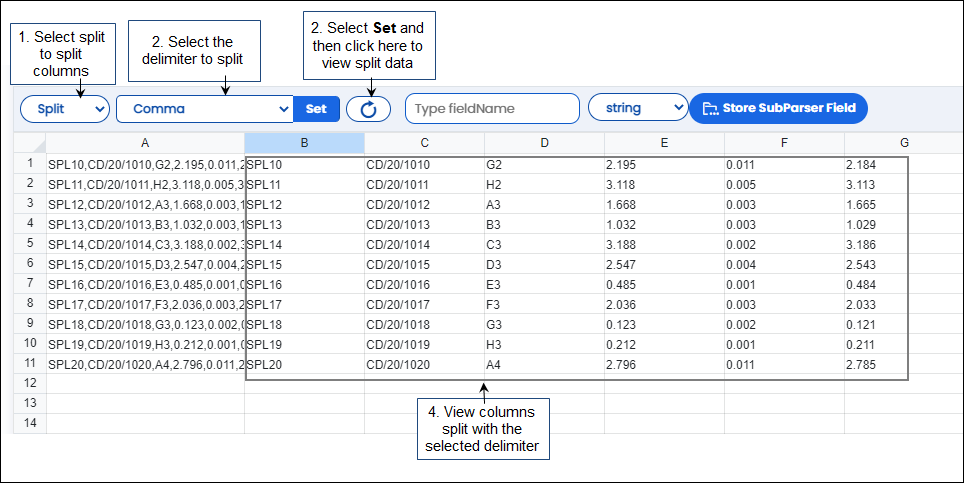
FIGURE: Splitting Columns
Once you select two columns to merge, click  to merge the columns. And then click
![]() to view the result as shown in the figure:
to view the result as shown in the figure:
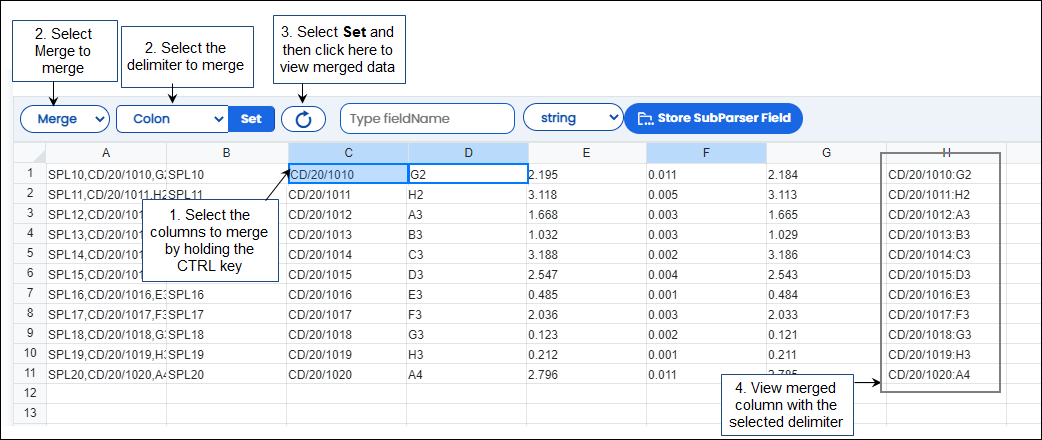
FIGURE: Merging Fields
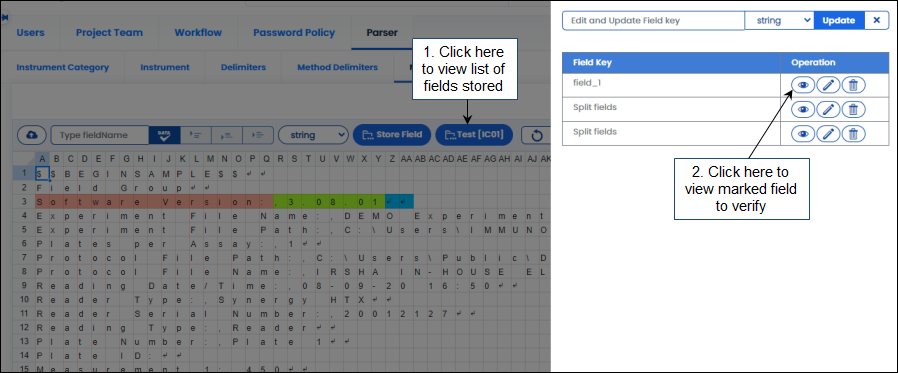
FIGURE: Viewing, Editing and Deleting Marked Fields
 to view the data block/field marked.
 to edit the field name. The field name appears in the Field Key box for editing. You can also change the data type of the field if required, click Update and then on the Parser Setup screen click Submit.
 to delete the field.
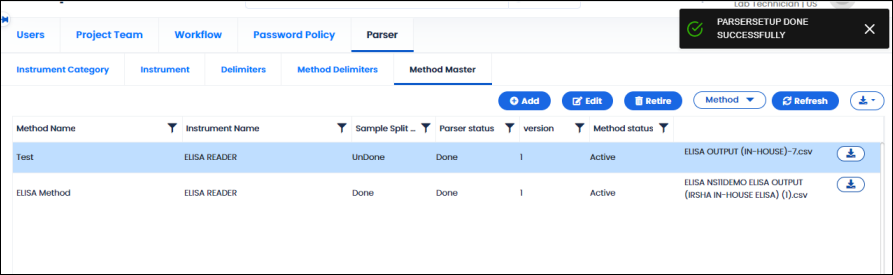
FIGURE: Parser Field Appears as “1” after Parser Setup Done
In the Method Master screen, the Parser Status field of the method appears as “Done” after you setup fields for parsing.
Once you mark fields for parsing, you can evaluate the fields. To do so, follow these steps:
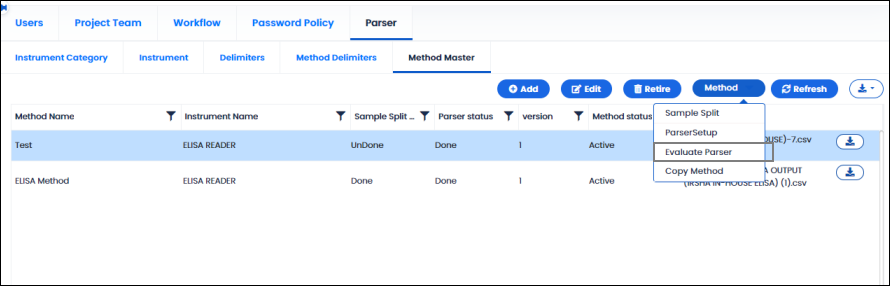
FIGURE: Evaluate Parser Option
The Evaluate Parser screen appears as shown in the figure:
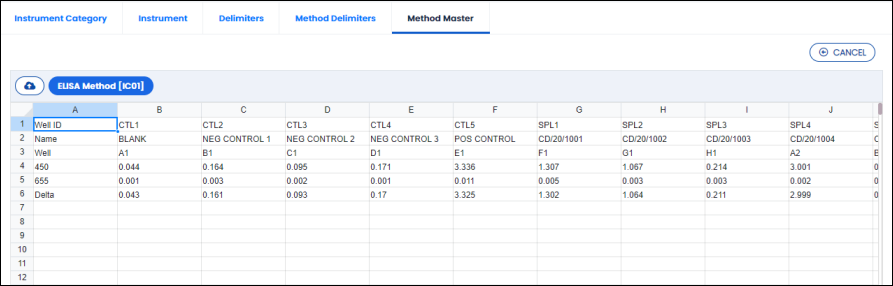
FIGURE: Evaluate Parser Screen Showing Fields and Values
You can see the list of fields added in the Parser Setup screen and values for the fields captured appear as shown in the above figure.
The Copy Method option enables you to copy a method after sample split and parser setup are done. You can copy a method for the same instrument category. So, while copying a method you need to specify the instrument name. Instruments from the same instrument category of the method you copy will appear in the Instruments field. Once copied, you can make required changes to the copied method for further use.
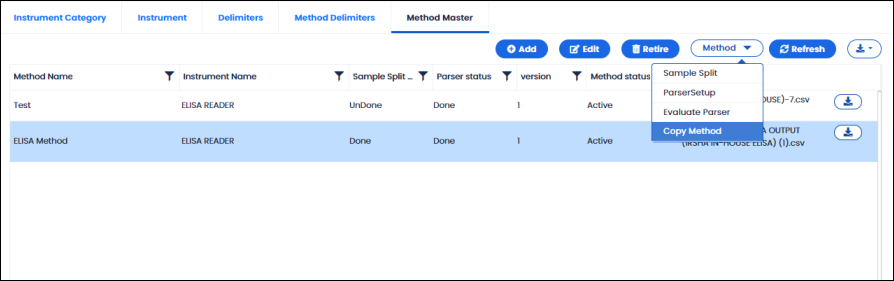
FIGURE: Copy Method Option
The Copy Method screen appears as shown in the figure:
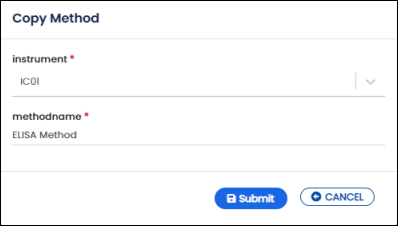
FIGURE: Copy Method
