Once an order is registered, the registered orders appear in the Pending Orders folder. You can process an order. When you open the order for processing, the results from the instrument are captured and appear on the sheet. You can review results, calculations etc. and approve/reject the task. When approved the task goes to the next step in the workflow. The rejected task goes to the previous step in the workflow for corrections.
When the task is in the final step of the workflow, you can complete the task.
To process order, follow these steps:
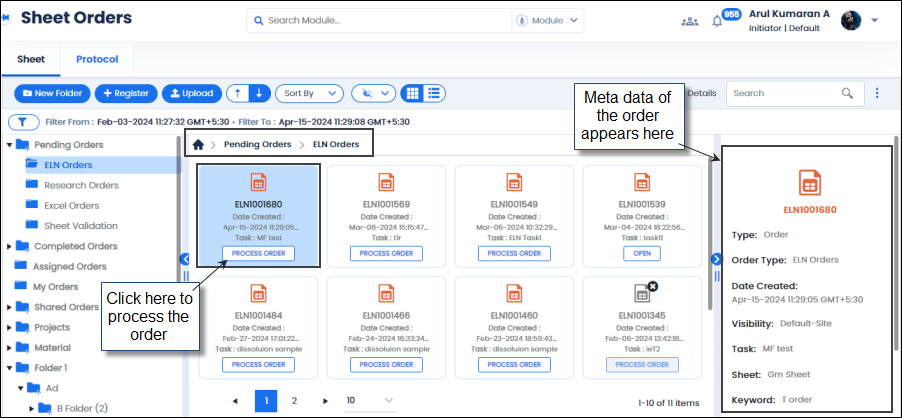
FIGURE: Processing Order 1
The lab sheet mapped to the order appears as shown in the figure:
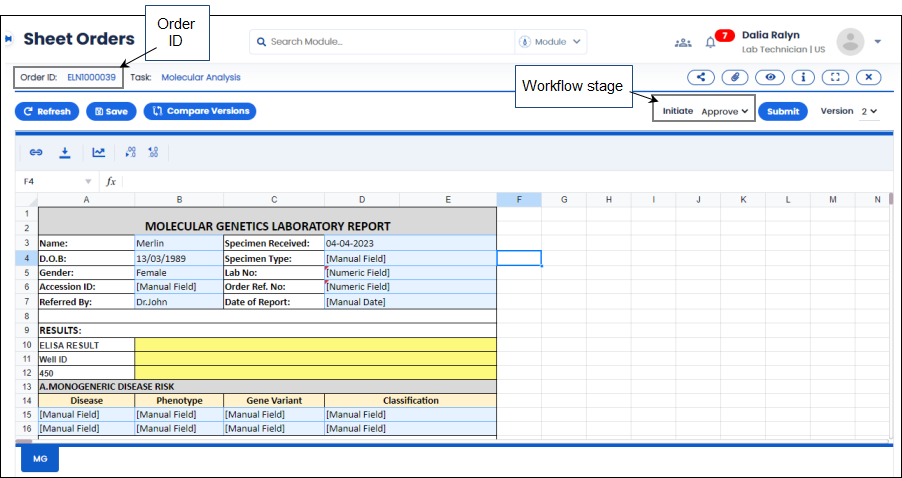
FIGURE: Processing Order 2
You can see the Order ID and Task Name appear. The sheet is automatically locked for processing.
 option Click to complete the test/task. The completed tasks appear in the Completed Orders folder.
Based on the workflow, the approved task goes to the next step. The rejected task goes to the previous step for correction.
 to view full screen.
 to the order processing screen. If you close without saving, the following dialog appears:
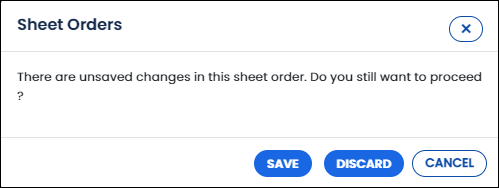
When you process the sheet orders, you can compare versions by clicking Compare Versions option as shown in the figure:
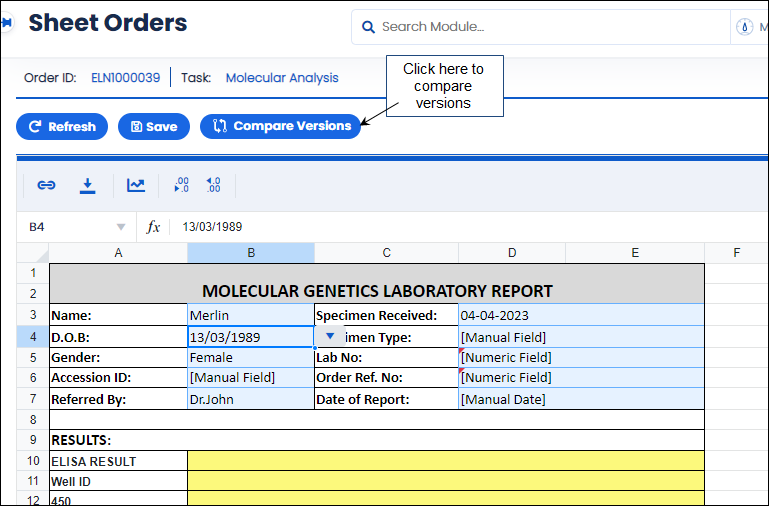
FIGURE: Using the Compare Versions Options
The Compare Versions screen appears as shown in the figure:
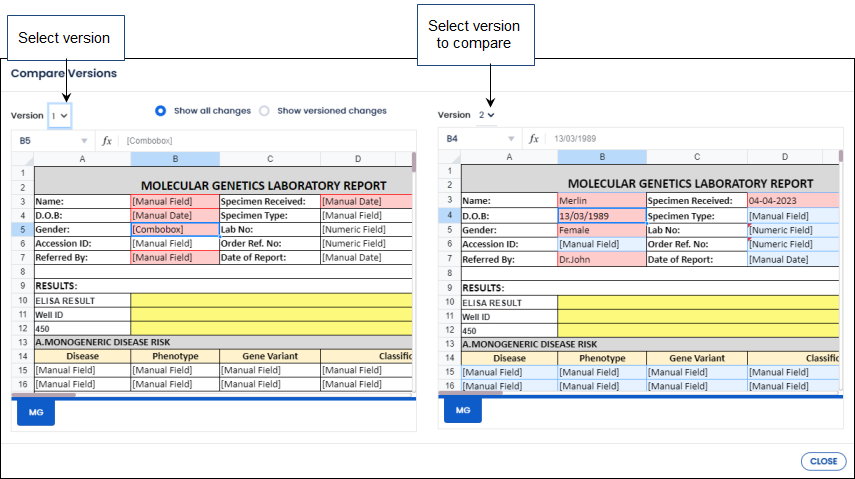
FIGURE: Compare Versions Screen
You can view the difference/changes between the selected versions highlighted in pink as shown in the above figure.
To share the order with other users, follow these steps:
 The Share with Other Usersdialog appears as shown in the figure:
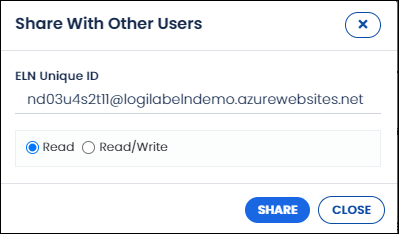
FIGURE: Share Order with Other Users
Note: Alternatively, you can click that appears on the order record in the Sheet Orders screen to share with other users.
Click  to attach files to the order. In the dialog, select file size option, click Choose File to attach files and then click Upload as shown in the figure:
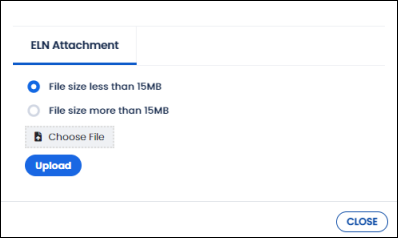
FIGURE: Attaching Files to the Order
Click to view version history, transaction history and workflow history of the order as shown in the figure:
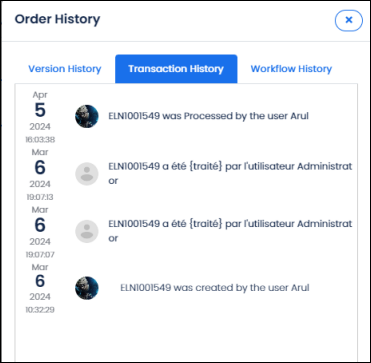
FIGURE: View Order History
Click  to view audit history of the order as shown in the figure:
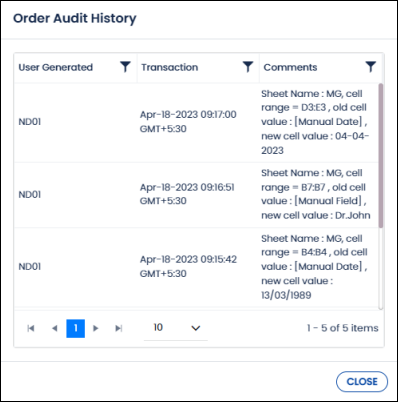
FIGURE: Order Audit History Dialog
ELN captures cell level change history. Even if you edit / change value in a cell and do not save the change, the change is logged in ELN and the same appears in the Order Audit History dialog.
Click  to copy the order link as shown in the figure and paste in the lab sheet/browser to open the order:
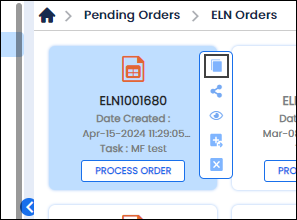
FIGURE: Copy Link
When you open the link in a new tab, the following dialog appears for authentication:
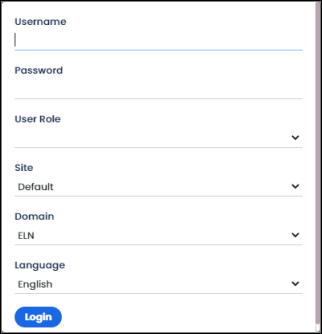
FIGURE: Copy Link Authentication
Type valid Username and Password and then click Login. The order opens as shown in the figure:
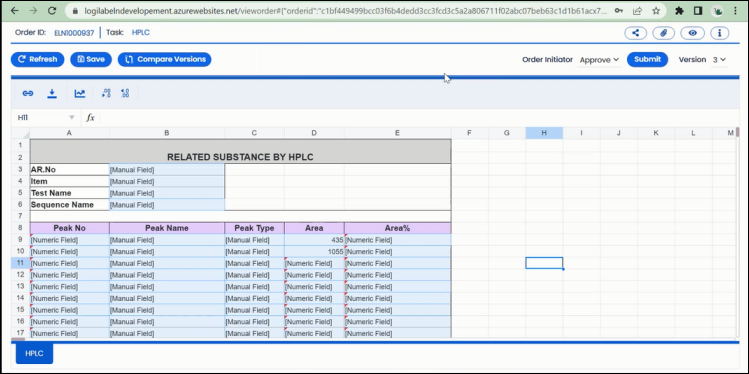
FIGURE: Order Opened in New Tab
Click to view version history, transaction history and workflow history of the order as show in the figure:

FIGURE: Viewing Transaction History and Workflow History
Alternatively, you can clickthat appears inside the lab sheet to view history of the order.
After registering the ELN Task Order, in the Pending Orders tab, click PROCESS ORDER that appears near the ELN Task Order you want to process as shown in the figure:
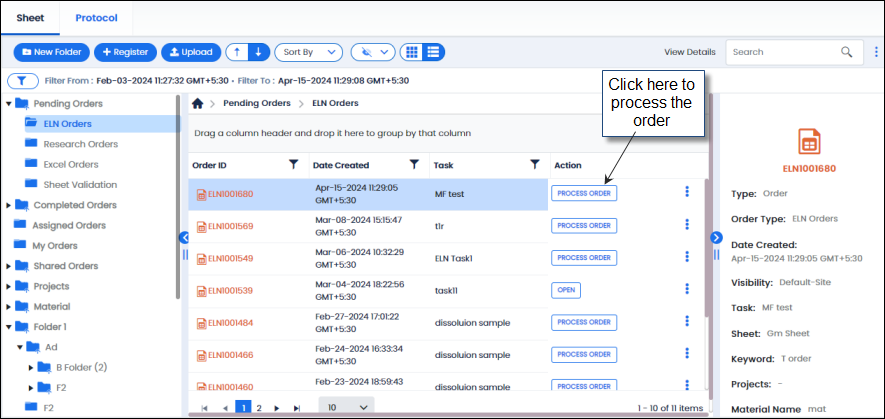
FIGURE: Processing ELN Task Order
The lab sheet attached to the order opens in Excel.
You cannot edit the sheet that is in the Completed/Approved state. But still, you can use the link, export and chart options:
 - Link with other lab sheets
 - Export lab sheet
 - Add chart to the sheet
 Decrease Decimal
 Increase Decimal
When you register a Research Activity Order for the first time, once you select the task, the sheets attached to the task are listed. You can select the Default Template option when the predefined template is not available.
After registering the research activity order, in the Pending Orders folder or in the user defined folder, click PROCESS ORDER that appears in the research activity order you want to process as shown in the figure:
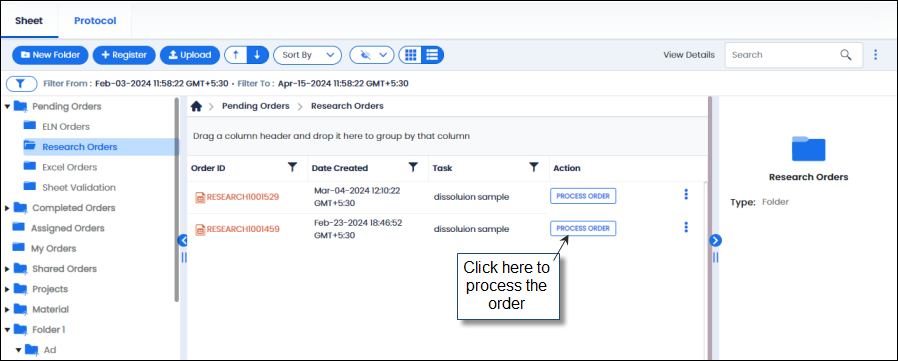
FIGURE: Processing Research Activity Order 1
The lab sheet attached to the order opens in Excel as shown in the figure:
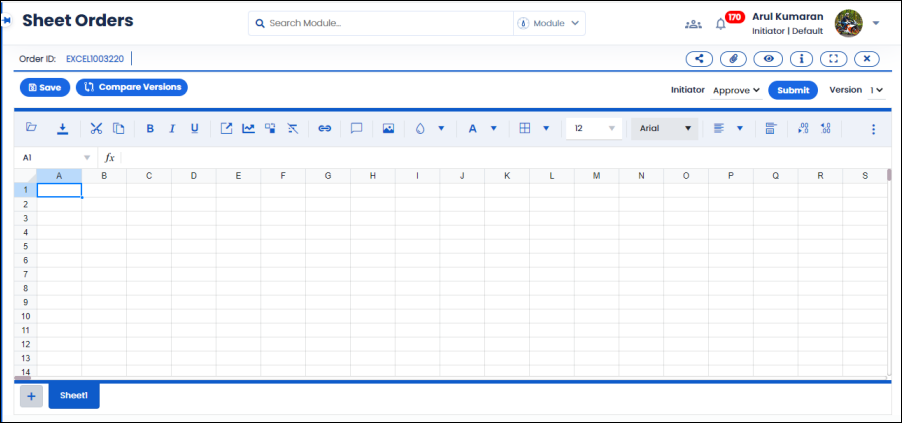
FIGURE: Processing Research Activity Order 2
You can do the following in the Excel while processing the Research Activity Order:
 Add / edit / remove fields in the lab sheet.
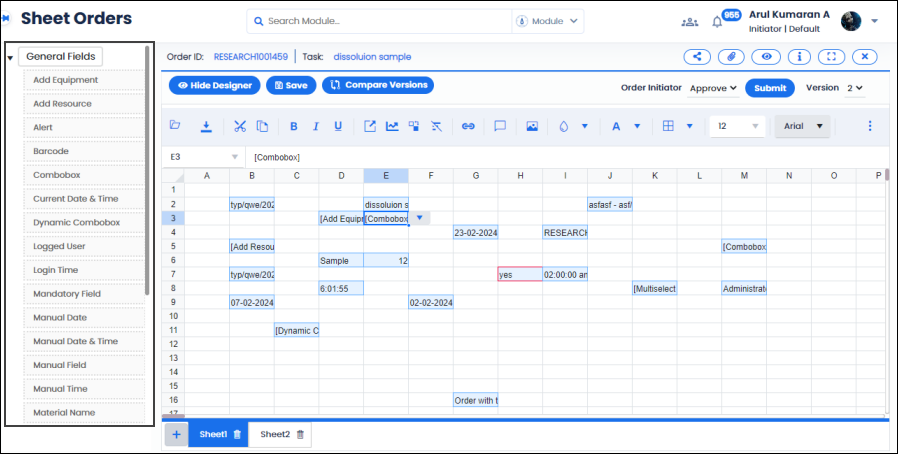
FIGURE: Show Designer
 to hide the designer (left panel).
Excel orders allow the user to open a lab sheet while processing.
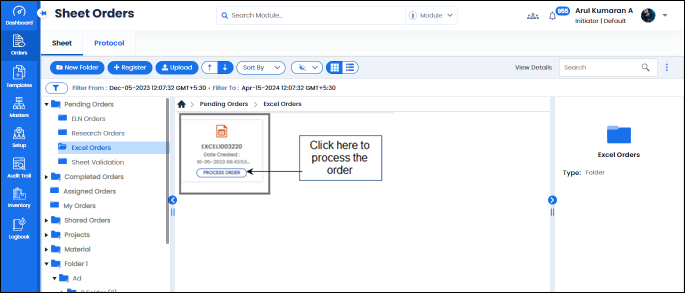
FIGURE: Processing Manage Excel Order 1
The new template opens in Excel as shown in the figure:

FIGURE: Processing Manage Excel Order 2
 File Open dialog, locate the lab sheet and then click Open . The lab sheet opens as shown in the figure:
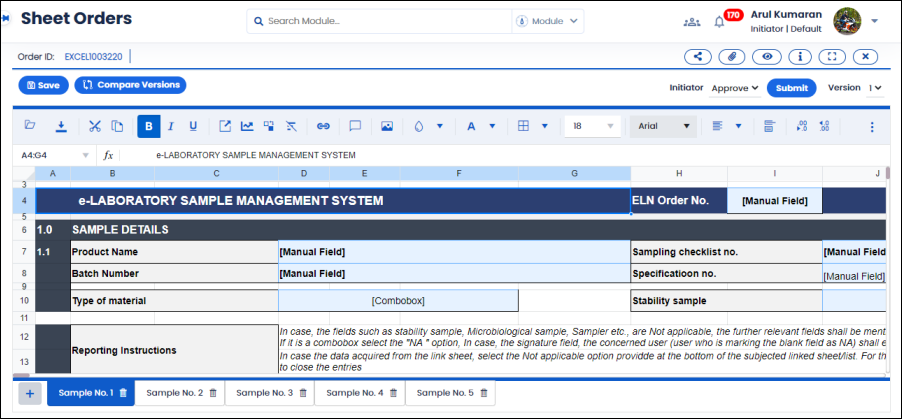
FIGURE: Processing Manage Excel Order 3
Now you can process the lab sheet as you process the ELN order.
Sheet validation order is registered only for sheets that are in-progress state. Sheet validation is done to evaluate the sheet or to test / check the status of the sheet.
After registering the Sheet Evaluation order, in the Pending Orders >>Sheet Validation folder, click PROCESS ORDER that appears in the Sheet Evaluation order you want to process as shown in the figure:
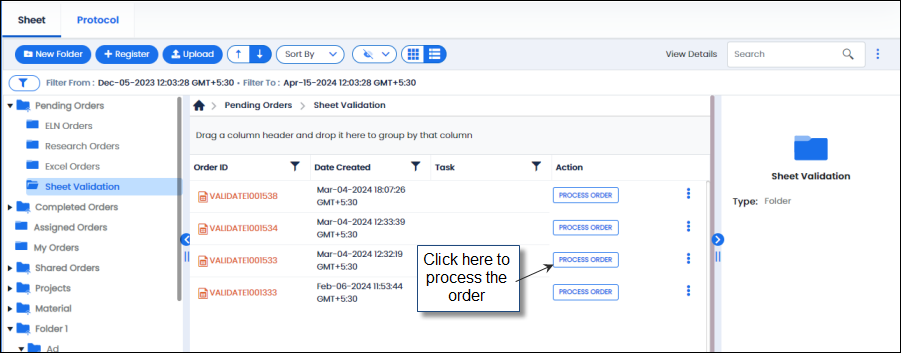
FIGURE: Processing Sheet Validation Order 1
The order opens as shown in the figure for processing:
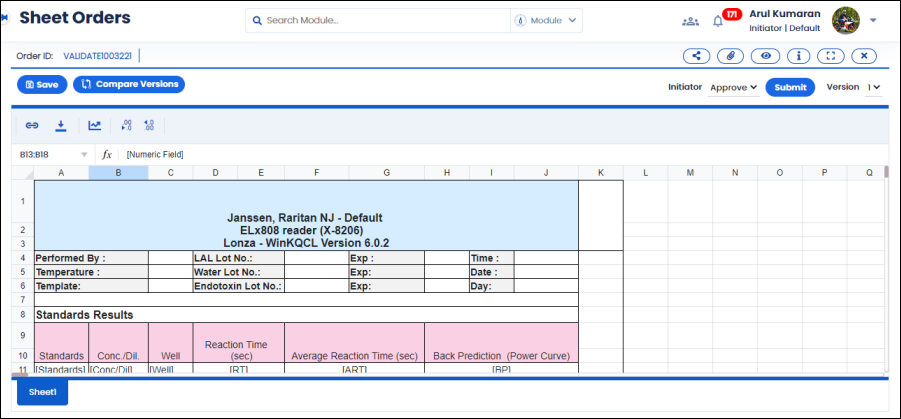
FIGURE: Processing Sheet Validation Order 2
