Once an order is registered, the registered orders appear in the Pending Orders>>ELN Protocol Orders folder or in the selected user defined folder. You can process an order.
You can review descriptions, calculations, add inputs to the controls, attach files etc. and submit the order. When approved the task goes to the next step in the workflow. The rejected task goes to the previous step in the workflow for corrections.
Points to remember.
- When you process an order, the protocol opens, and you must complete all the steps in the protocol.
- You can add values to the fields added to the protocol step.
Add editors at run time: you can add content dynamically when you process by inserting text, image, table, editors as you do when you design the protocol template.
- You can complete each step by clicking the step checkbox. You can see the status change.
- You may skip entering value to the fields in a step.
- But you need to mandatorily complete the following if the following are added to complete a step: -
- Signature: Defined signature
- Multi-step procedure: complete all the steps in the multi-step procedure.
- Once you complete the steps, you can add results. You can add results by adding editors or import results from the protocol steps.
- You can view the protocol in full screen by clicking the
 icon that appears on the top-right corner of the protocol order screen. You can also view each section/step in full screen by clicking the
  icon that appears in the top-right corner of each section/step.
To process protocol orders, follow these steps:
- On the main menu, click
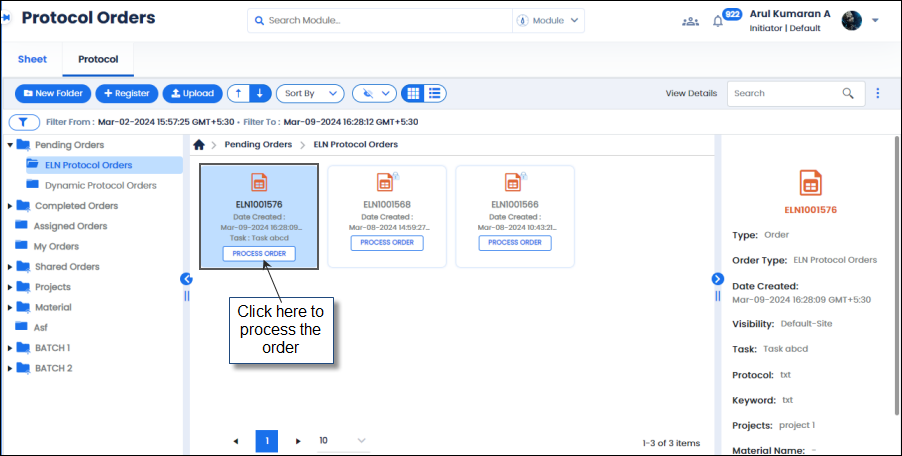
 and then click Protocol Orders. The Protocol Orders screen appears as shown in the figure:
FIGURE: Protocol Orders Screen
By default, the Pending Orders>>Protocol Orders folder appears, and you can see the list of protocol orders registered and pending to process.
To process order, follow these steps:
- Select an order; click PROCESS ORDER. The screen appears as shown in the figure:
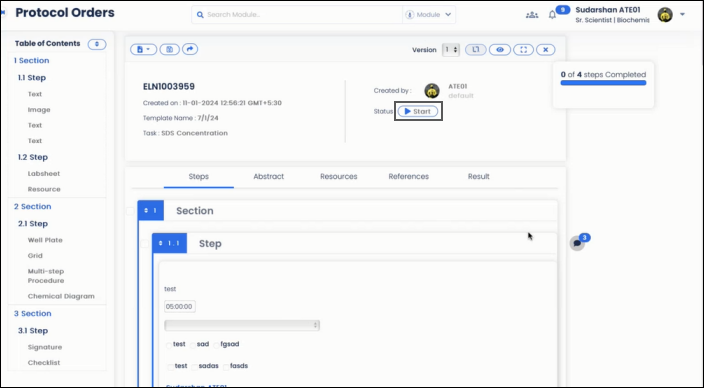
FIGURE: Processing Protocol Order - Start Step
You can see the Order Type, Protocol ID, Task Name, Sample Name, Project Name, and status of the order appears.
- Click
 as shown in the above figure. The protocol steps will start, and the status appears as In-Progress as shown in the figure:
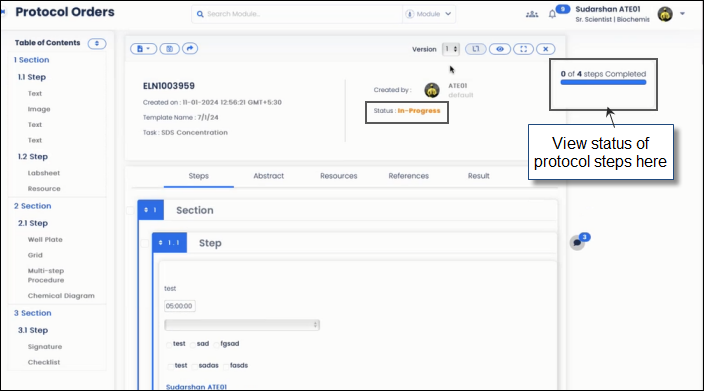
FIGURE: Protocol Order – Filling Placeholder
- You can see the status of the protocol steps as shown in the above figure.
- If there is a place holder available, you can fill in the place holders. Provide / select values for the controls.
Note: Note that you can fill in data for the controls added in the template and you cannot delete content in the template. But you can add additional data at runtime.
- Logilab ELN enables adding data at runtime. You can add more content to the protocol order while processing. Place the cursor where you want to add content and then clickor to add an editor above or below, in the ADD dialog select an editor: Text / Image / Attachment / Labsheet / Resource etc. In the editor, add your content as you add while designing the template.
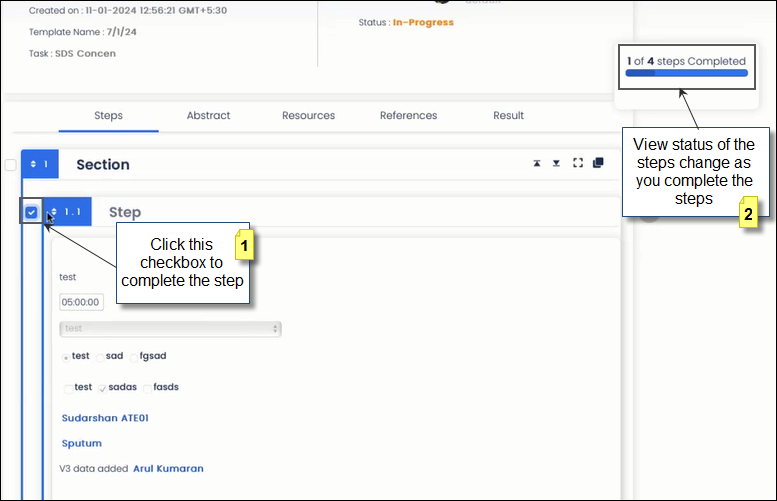
- Once you finish filling values to the predefined controls and add required additional data to the step, you can click to check the checkbox in the step header as shown in the figure to complete the step:
Once you check the box and complete the step, you can see the status change as shown in the above figure.
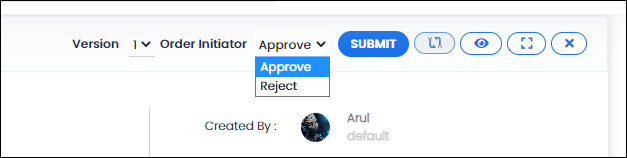
- Once all the steps are completed, in the workflow field, select Approveand then click SUBMIT as shown in the figure:
FIGURE: Process Protocol Order - Steps Completed
Note: If you select Approve, the order goes to the next step in the workflow. You can also select Reject here. If you select Reject, the order goes to the previous workflow step.
- Clear the step check box to restart a step if required.
- Once the protocol order is in the final stage of the workflow, for example: Approved status, theappears and the Savebutton is disabled as shown in the figure:
FIGURE: Completing the Order
- Click Finish/Complete Order. You will see a confirmation message saying, “ORDER COMPLETED SUCCESSFULLY”. And the status appears as Completed.
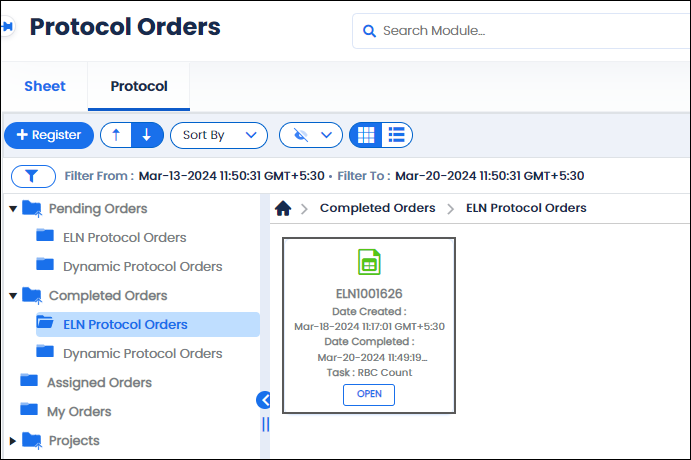
- The completed order appears in the Completed Orders>>ELN Protocol Ordersfolder as shown in the figure:
FIGURE: Completed Order Appears in the Completed Orders Folder
The completed order appears in Green.
1.1.1 Cancelled and Rejected Orders
Cancelled and rejected orders will be marked as cancelled and rejected and appears in the same folder and marked in Red. Cancelled and rejected orders will not be processed further. You can view the transaction details of the cancelled order by mouse-over and click theicon.
1.2 Process Dynamic Protocol Order
Dynamic protocol orders are registered with the default template. While processing dynamic protocol orders, you can add content, controls and attachments dynamically as you do while creating a protocol template.
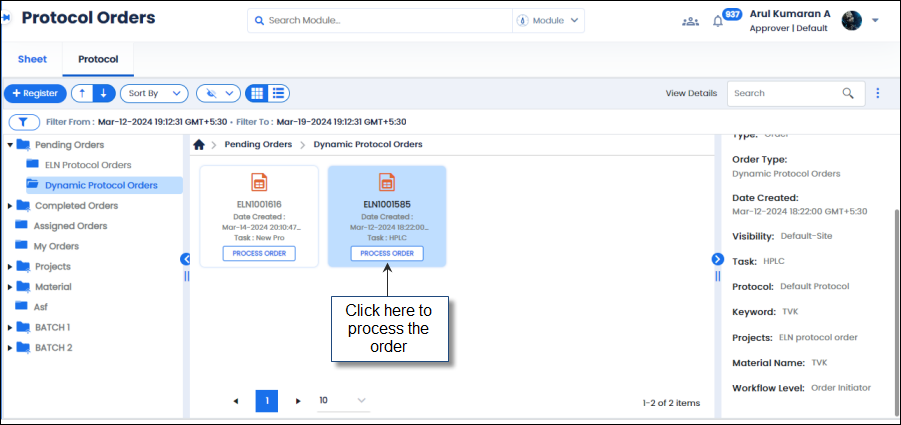
- On the main menu, click and then click Protocol Orders. In the Protocol Orders screen, go to the Pending Orders>>Dynamic Protocol Orders folder as shown in the figure:
FIGURE: Register Protocol Orders & Execute Screen
You can see the list of dynamic protocol orders registered and pending to process.
To process dynamic protocol order, follow these steps:
- Select an order; click PROCESS ORDER. The screen appears as shown in the figure:
FIGURE: Processing Dynamic Protocol Order
You can see the Order Number, Protocol ID, Task Name, and status appear.
- Add values/fill values to the controls. If there is a place holder fill the value.
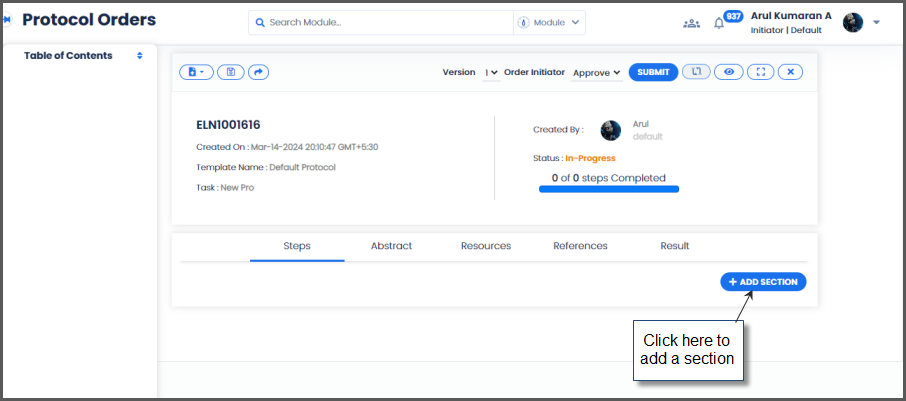
- In addition, dynamic protocols enable the user to add new sections, steps, controls and move steps up and down as you do while creating the protocol. You can add a new section dynamically by clicking the ADD SECTION
- Once you add a section, you can add steps and insert controls as you do while designing a protocol template.
- To edit details, click to edit the step. In the edit mode you can add controls and resources dynamically.
- Provide inputs / add details dynamically for all the tabs.
- Click the step check box to complete the text. Once all the steps in the section are completed, the section checkbox is auto checked to denote the section is completed.
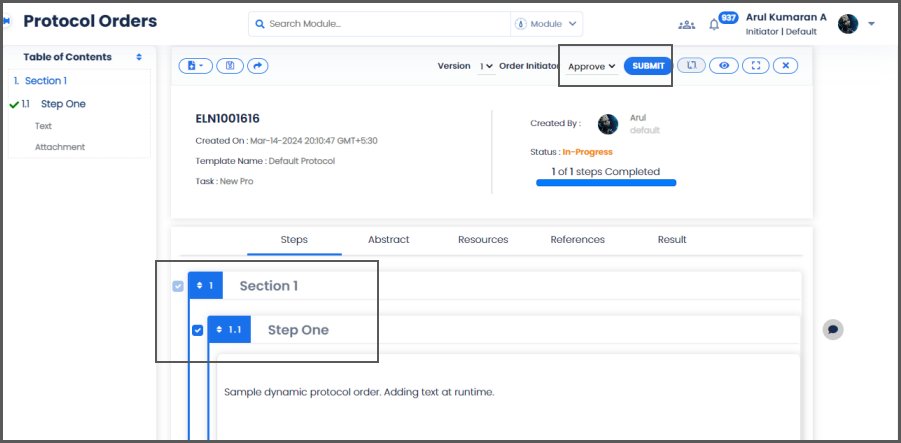
- Once all the sections are completed, you can approve the order. In the workflow field, select Approveand then click Submit to approve the order as shown in the figure:
FIGURE: Completing Steps and Sections
- You will see a confirmation message saying, “STATUS UPDATED SUCCESSFULLY”.
- Once
 the protocol order is in the final stage of the workflow, for example: Approved status, the And the Savebutton is disabled.
 - Click Finish/Complete Order. You will see a confirmation message saying, “ORDER COMPLETED SUCCESSFULLY”. And the status appears as Completed.
- The completed order appears in the Completed Orders>>Dynamic Protocol Ordersfolder as shown in the figure: