The Register Protocol Orders & Execute screen enables you to register protocol orders to be performed. The orders shall be registered for the following:
- ELN Protocol Order: Protocol orders shall be registered for tests and analysis created in Logilab ELN
- Dynamic Protocol Order: Dynamic protocol orders shall be registered using the default template. Dynamic protocols enable add details / controls in each step in the protocol while processing.
To register protocol order, follow these steps:
- On the main menu, click
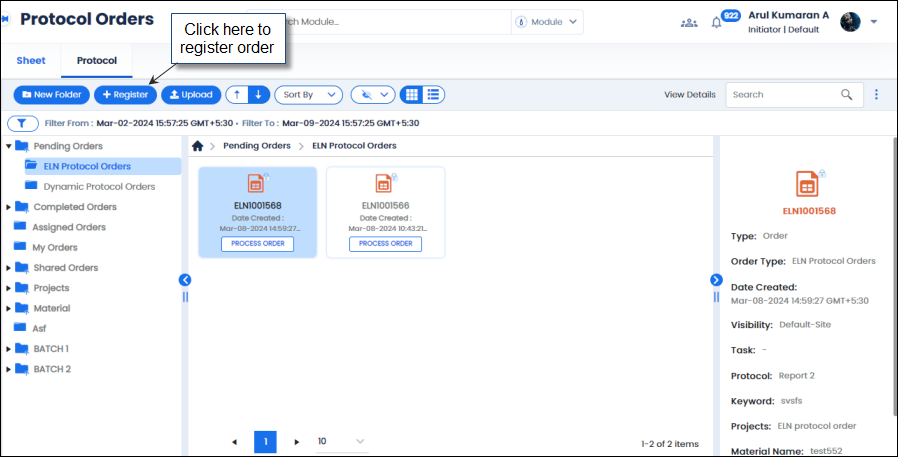
 and then click Protocol Orders. The Protocol Orders screen appears as shown in the figure:
FIGURE: Protocol Orders Screen
- Click Register to register an order. The Create Order dialog appears as shown in the figure:
FIGURE: Create Order Dialog
- Select the order type. ELN Protocol Order / Dynamic Protocol Order.
- In the Task field, select the test/task.
- In the Select a Material field, select the material for the task.
- In the Select Protocol Template field, select a template.
- In the Select a Project field, select the project. Based on the selected project, the project team workflow user list appears. The sheet will pass through the workflow steps and the respective user must approve the sheet in each step.
- In the Assign To field, select Order Workflow / User for the order. If you select Order Workflow, then the order will pass through the workflow defined. If you select User, then you must select the user to assign the order.
- In the Key Word field, type a keyword for the order you want to register.
- Under Order Visibility, set the order visibility to Site / Only me / Project Team.
- Under Save Within, you can see user defined folders if any. Click to select the folder to store the order.
- Click REGISTER ORDER. The order is registered and the same appears in the folders Pending Orders>>ELN Protocol Orders folder as shown in the figure:
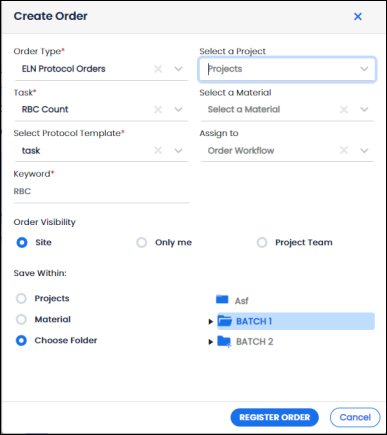
FIGURE: Registered Protocol Orders