Once the user account is created, you will receive a welcome mail from [email protected] with Username and Password to login.
The Logilab ELN login screen appears as shown in the figure:

FIGURE:-Dashboard Rights Screen
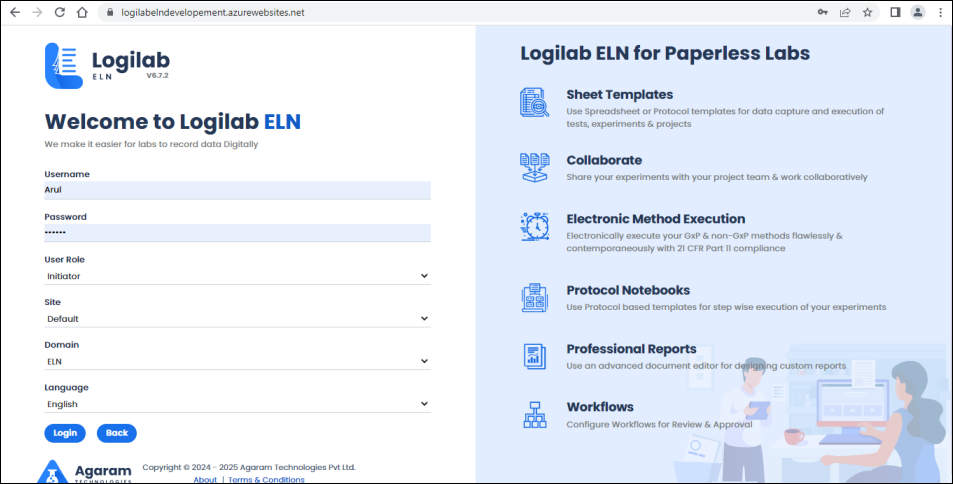
FIGURE: First Time Login Screen 2
If you login for the first time, follow these steps:
Once you move the cursor to the Password field, the New Password Generation option appears as shown in the figure:
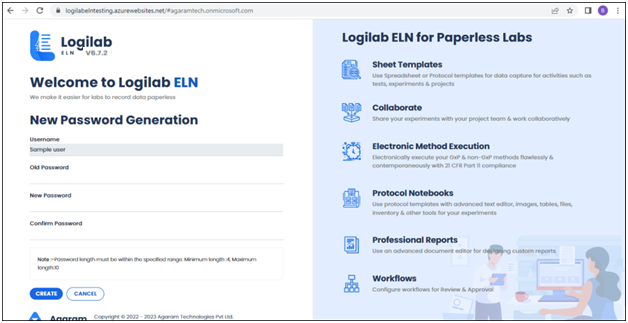
FIGURE: New Password Generation Screen
To login to Logilab ELN, follow these steps:
The Logilab ELN login screen appears as shown in the figure:
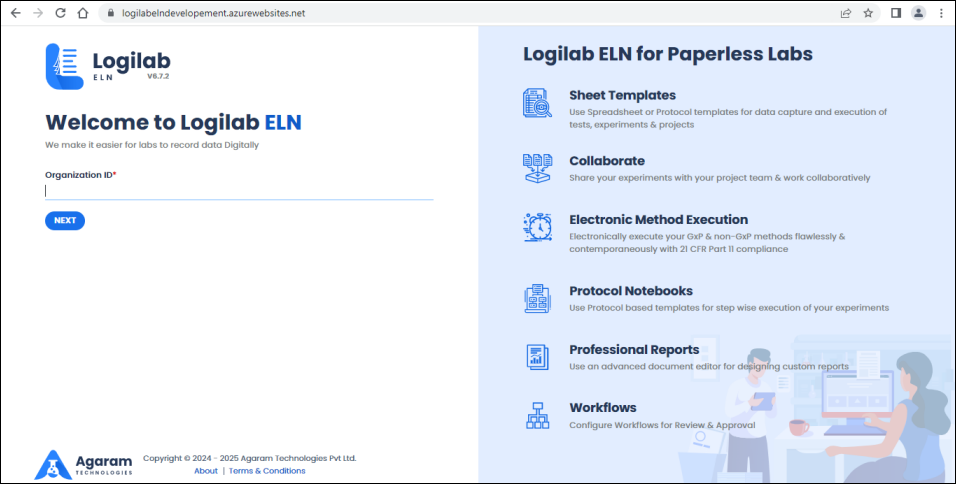
FIGURE: Logilab ELN Login Screen1

FIGURE: Logilab ELN Login Screen2
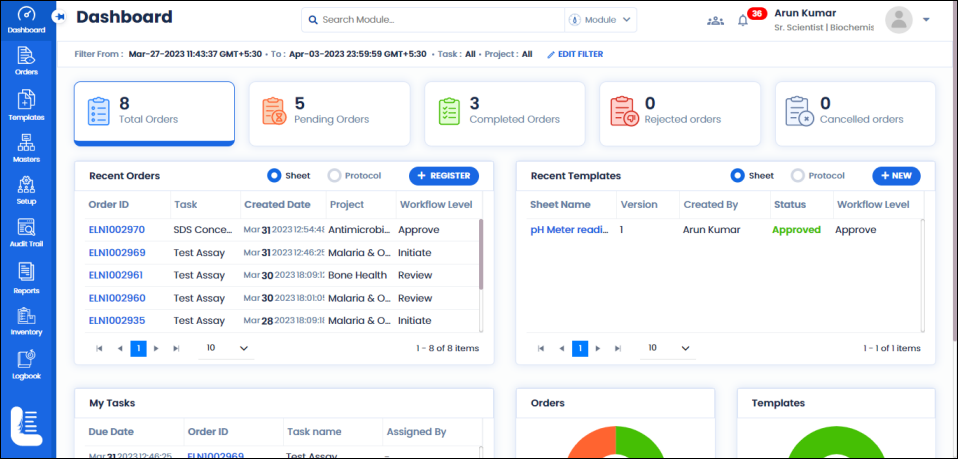
FIGURE: ELN Dashboard
Logilab ELN main menu appears as shown in the figure:

FIGURE: Logilab ELN Main Menu
Logilab ELN main menu consists of the following:
 Dashboard: Enables you to view quick progress of the ELN orders. You can view the trend in the graph. Also enables creating sheet templates and protocol templates from dashboard.
 Orders
 Templates:
 Masters: Enables create and manage basic masters in ELN.
 Setup: Helps to create and manage user accounts, user roles, Domains and define access to user/ groups. Also enables defining order workflow, sheet workflow, Protocol workflow and password policy.
 Audit Trail: Enables you set up audit trail options in Logilab ELN modules, screens and tasks. Also enables view audit trail log.
 Inventory: Enables to create and manage masters and transactions related to inventory.
 Logbook: Enables creating and manage logbook to track activity and material usage in inventory.
The descriptions of common controls in ELN are listed below:
| Button Name | Image | Description |
|---|---|---|
| Save |  | Will save the changes done to the current screen / dialog. |
| Submit |  | Will submit the entries given by the user to perform certain task. |
| Add |  | Enables add new records to the masters. |
| Edit |  | Enables edit the selected record in the master |
| Delete |  | Enables delete the selected record in the master |
| Import |  | Imports data to the masters |
| Export / Download |  | Exports downloads master data to Excel / PDF / CSV |
| Close |  | Will close the screen / dialog without saving. |
| Refresh |  | Will clear the entries in the current form for fresh entry. |
| Mandatory Fields |  | All fields marked with a * are mandatory and must be filled to avoid error/alert messages. |
To add a new record to the master, follow these steps:
SUBMIT.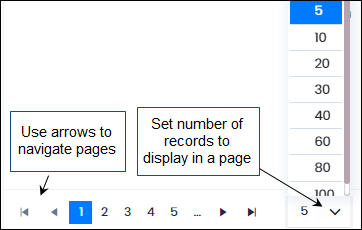
FIGURE: Set Number of Records for View
You can view the selected number of records in the master screen. For example, if you select 5. Then each page displays 5 records.
The import option is available for User, Instrument, Delimiters, Method Delimiters, Method, Unit, Section and Material masters.
Logilab ELN enables you import master data from Excel. To do so, follow these steps:
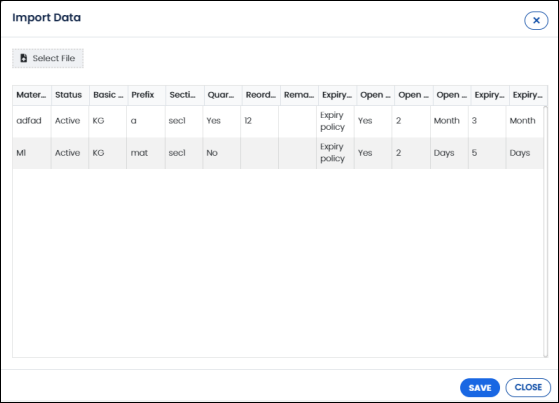
FIGURE: Set Number of Records for View
If the fields in the Excel file does not match the fields in the master, an Import Data dialog appears as shown in the figure:
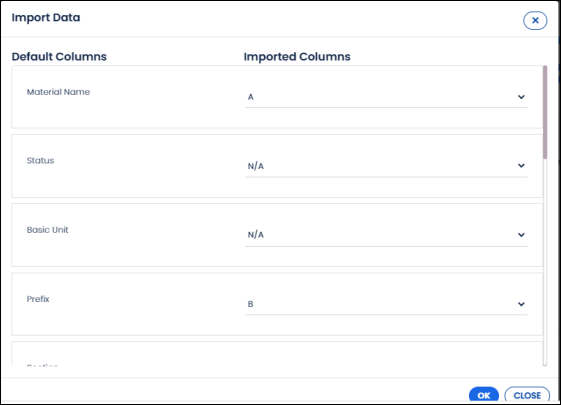
FIGURE: Importing Master Data - Different Field Namesw
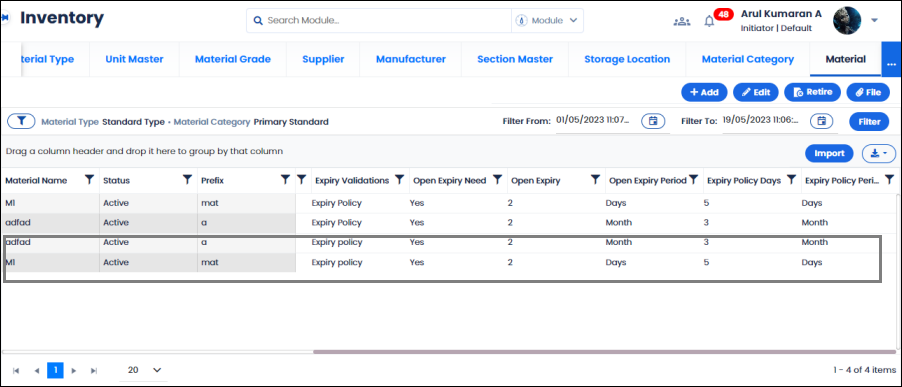
FIGURE: Data Imported from Excel
ELN allows import duplicate values to the master.
ELN Dashboard enables you to search and jump to the module / order / template from the Dashboard.
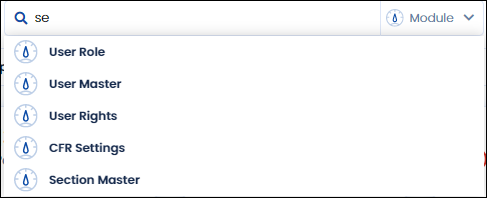
FIGURE: Search Module
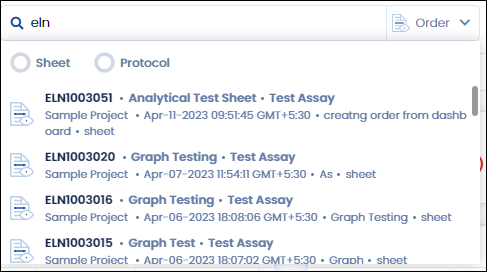
FIGURE: Search Order
Details such as Order name, template name, task name, project name, date and time order created and keyword along with the template type appears.
Logilab ELN allows you to group records in a screen by a selected field/column.

FIGURE: Drag and Drop Column to Group Records
You can use multiple columns to group records.
The records are grouped by the selected column and appear in alphabetical ascending order as shown in the figure:
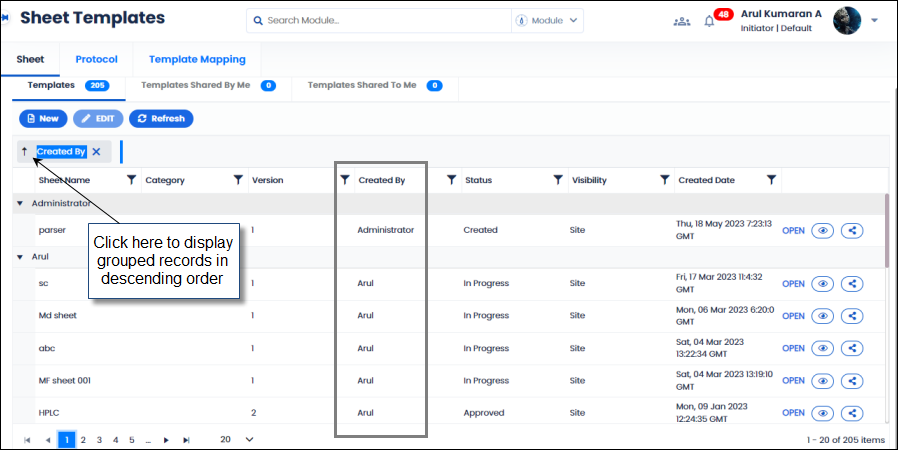
FIGURE: Records Grouped Based on the Selected Column
If the user account is mapped to multiple user roles, the user will have options listed to switch to other user roles. To switch user role, follow these steps:

FIGURE: Switch User Role Dialog
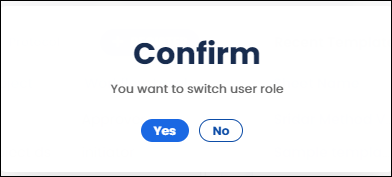
FIGURE: Confirm - User Role Switch Dialog
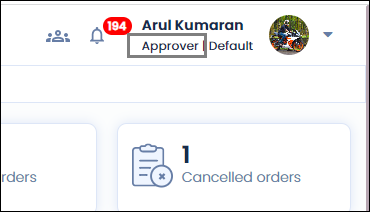
FIGURE: User Role Switched
If the user account is mapped to multiple sites, the user will have options listed to switch to other sites. To switch site, follow these steps:
 icon that appears at the top-right corner of the screen. Go to the Switch Site tab as shown in the figure:
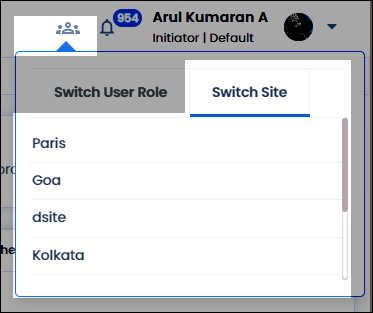
FIGURE: Switch Site Tab
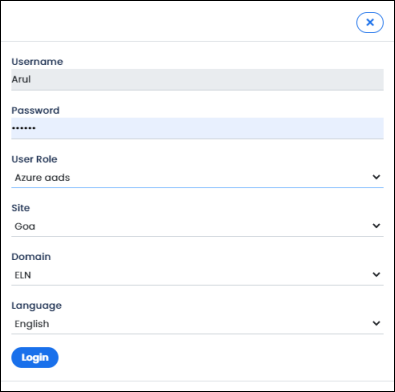
FIGURE: Confirm - Site Switch Dialog
To change your profile picture in ELN, follow these steps:
 iconthat appears at the top-right corner of the screen. The Change Your Profile Picture dialog appears as shown in the figure:
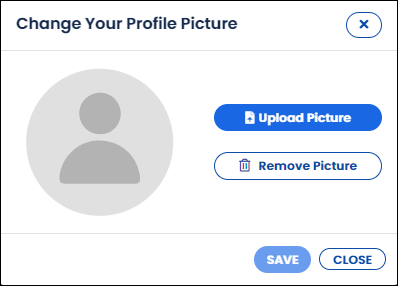
FIGURE:Changing Profile Picture
The picture is uploaded and appears as shown in the figure:
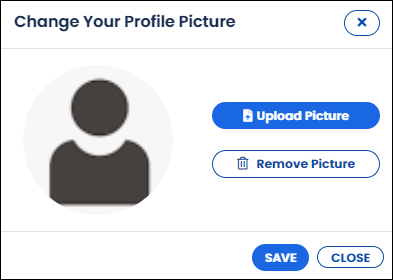
FIGURE: Uploading Profile Picture
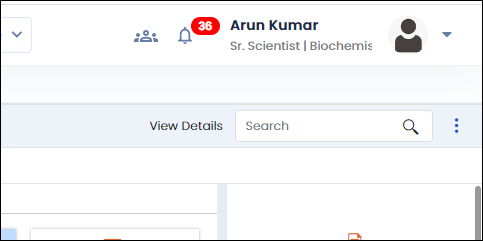
FIGURE: Profile Picture Updated
 Notification
The notification feature helps the user to view all the activities related to them and the project team the user belongs to. The number of unviewed notifications appears in red on top of the notification bell.
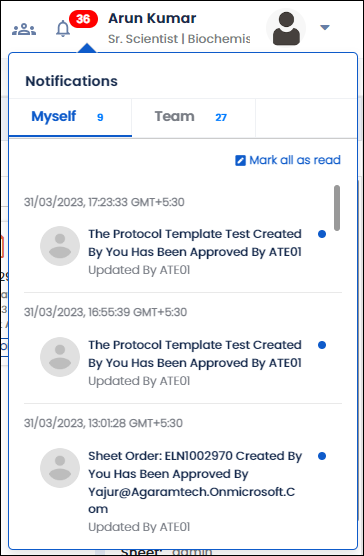
FIGURE: Notification Feature
The notifications are classified in to two categories: Myself and Team.
Under Myself- alerts related to the user currently logged in will appear.
Under Team- alerts related to the team the user belongs to appears.
Once you view the notifications the alert will disappear.
You can also click to open the order to view or work on it as shown in the figure:
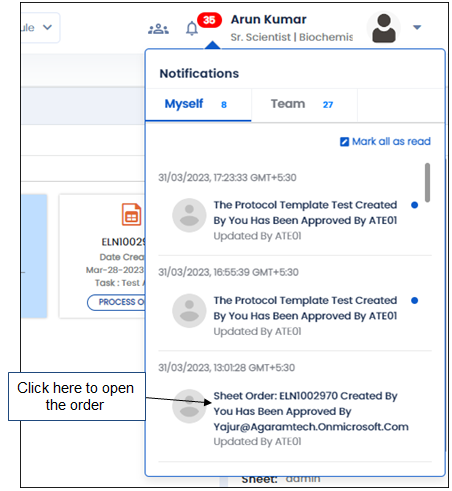
FIGURE: Opening Order Screen from Notifications
The Profile menu enables you to change password, change settings and logout. Click on the dropdown iconthat appears at the top-right corner of the screen. The profile menu appears as shown in the figure:
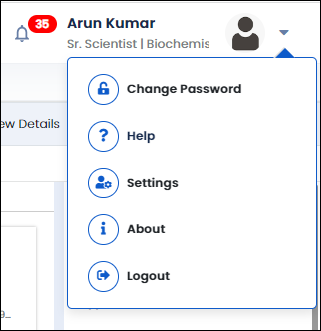
FIGURE: Profile Menu
Note: The Change Password option will not appear in the Profile menu when the user log in using Microsoft user Id.
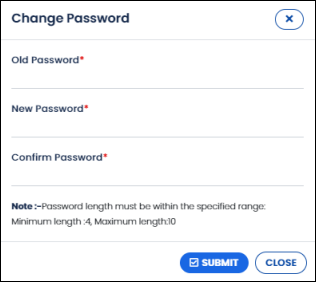
FIGURE: Change Password Dialog
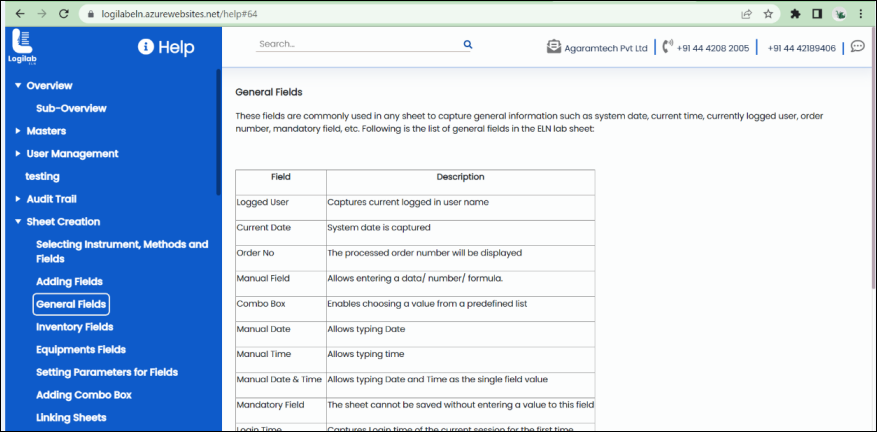
FIGURE: Help Screen
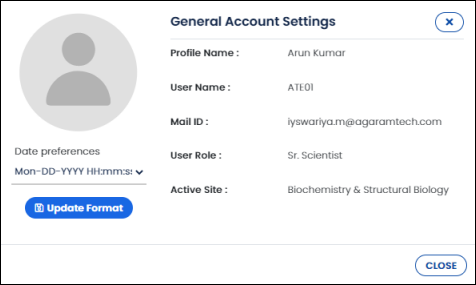
FIGURE: General Account Settings Dialog
If required, you can change the date format.
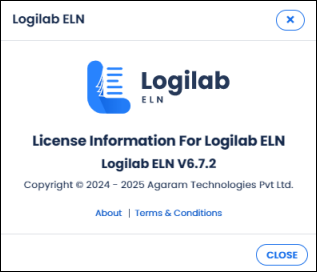
FIGURE: About Dialog
The Logout option helps you logout Logilab ELN.
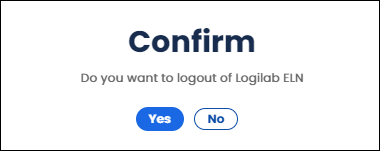
FIGURE: Confirmation Dialog
For administrator login, the License option will appear in the profile menu as shown in the figure:

FIGURE: License Option in Profile Menu
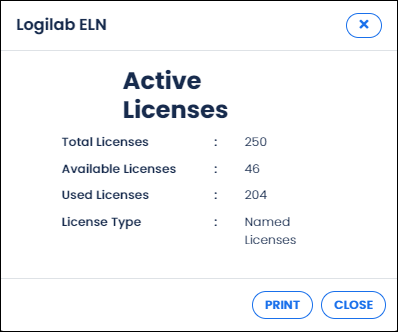
FIGURE: License Information
