User master enables us to create and manage user accounts.
Note: For administrators the Site field will appear. Hence, administrator users can create site specific user accounts.
To create a new user account, follow these steps:
 and then click User Master. The User Master tab appears as shown in the figure:
FIGURE: Setup – User Master Tab
In the User Master tab, you can see the list of users created. Also, options to add, edit, and retire users appears as shown in the above figure.
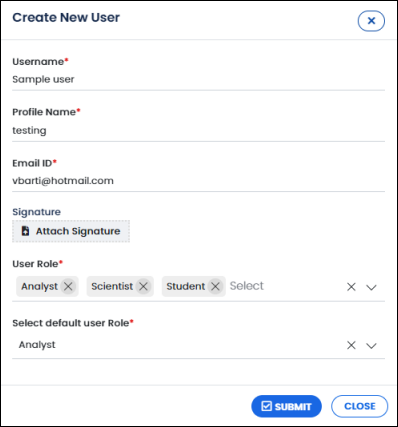
FIGURE: Create New User Dialog
You can see the user account you just added listed in the user master and will be in active state with new ELN Unique ID generated as shown in the figure:

FIGURE: New User Account Created
The user will receive a mail with the login credentials and ELN login link as shown in the figure:
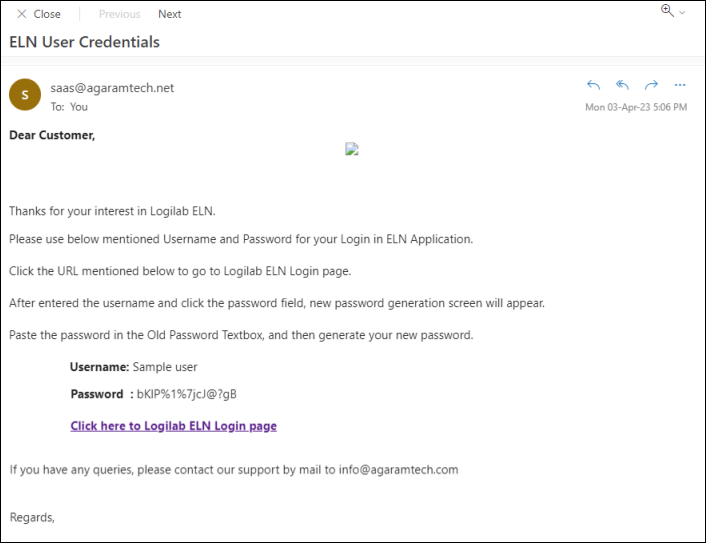
FIGURE: Mail with Login Credentials Received by the User
To edit user details, in the User Master tab, select the user, and then click Edit. In the Edit User dialog, do required changes and then click SUBMIT.
To activate the user account, in the User Master tab, select the inactive user account and then click Activate/Deactivate. The user account is activated, and the user Status appears Active.
To deactivate user accounts, in the User Master tab, select the active user account and then click Activate/Deactivate.
The user account will be locked after three or more unsuccessful password attempts as defined in the Password Policy screen. The administrator can unlock the locked user accounts. To do so, in the User Master tab, select the user account that is locked and then click Unlock.
To reset password, follow these steps:
The password will be reset. When you login for the next time the system prompts for new password.
A user account shall be retired for some reason. Once retired, the user account cannot be activated.
