Masters in Qualis DMS are used to store and maintain data outside a process and refer it in process using "Master" field type in the form. For example, when you store a sample, you may want to look up the storage data such as organisation, department, lab, site, section etc. In this example storage location data can be created and managed as a master. Also, user data can be created and managed as a master.
In Qualis DMS you can add/create masters, edit master details and delete existing masters.
Qualis DMS allows you to manage configuration under mastermodule.
FTP Config master is used to create and manage FTP Configurations that are used for file upload.
Creating a FTP Config
To create a new FTP Config, follow these steps:
1.On the Explorer, click MASTER, Configuration and then click FTP Config. The FTP Config master screen appears as shown in the figure:
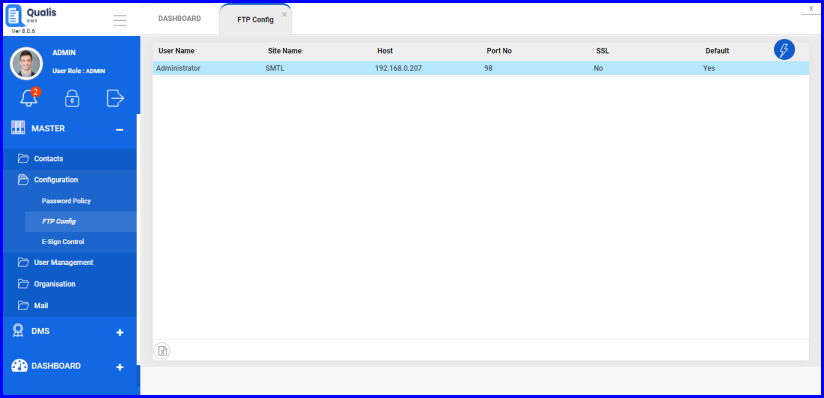
FIGURE:-FTP Config Master Screen
In the FTP Config master screen you can see the list of FTP Configurations created. Also options to add, edit and delete FTP configurations appear in the action menu as shown in the above figure.
2.Click action menu and then click Add. The Add FTP Config dialog appears as shown in the figure:
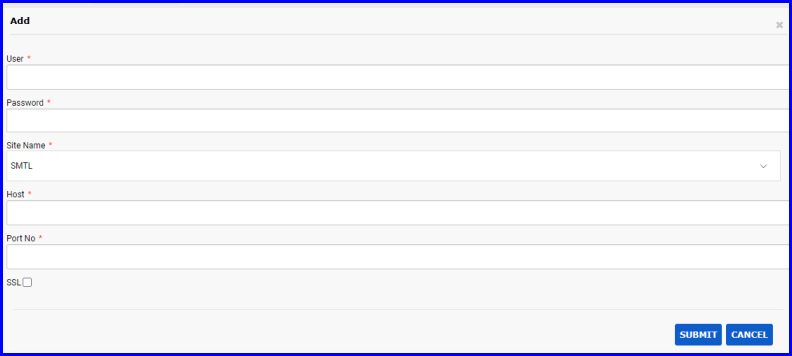
FIGURE: - Add FTP Config Dialog
3.In the Userfield, type the name of the machine/server where you want to upload the files.
4.In the Password field, type the password of the machine/server.:
5.In the Site Namefield, select the name of the site.
6.In theHost field, type the Host Name/IP address of the machine/server
7.In the Port No field, type the port number.
8.Click to enable the SSL option if required.
9.Click SUBMIT.
1.To edit a FTP Configuration, in the FTP Config master screen, select the FTP Configuration to edit, click action menu and then Edit. In the Edit FTP Config dialog, do required changes and then click SUBMIT.
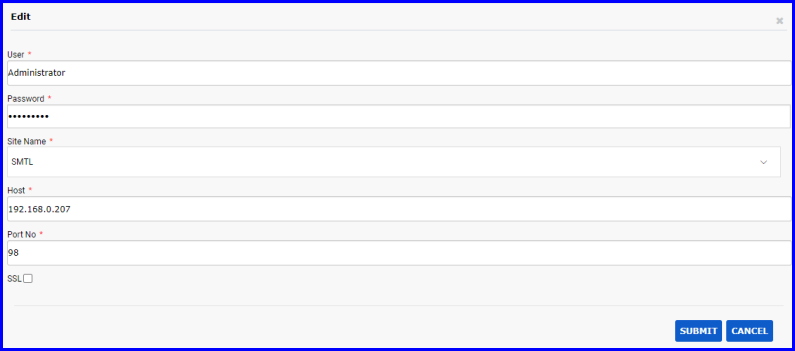
FIGURE: - Edit FTP Config Dialog
2.To delete a FTP Configuration, in the FTP Config master screen, select the FTP Configuration you want to delete, click action menu and then click Delete.
You can set a FTP configuration as default one. To do so, follow these steps:
1.In the FTP Config master screen, select the FTP Configuration, click action menu and then Set Default as shown in the figure:
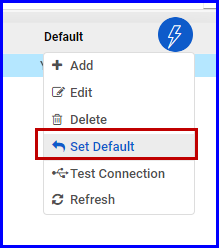
FIGURE: - Set Default Option
You can test connection for FTP configuration. To do so, follow these steps:
1.In the FTP Config master screen, select the FTP Configuration, click action menu and then Test Connection. The Confirmation Dialog appears as shown in the figure:.
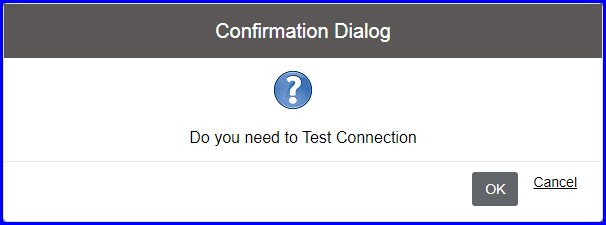
FIGURE:- Confirmation Dialog
2.Click OK. If the connection is successful, you can see the success message as shown in the figure:
FIGURE: - Alert Dialog
Password policy can be set to control user authentication behavior. Password policy is must for regulatory compliance and also depends on the organisation policy defined for the individual applications.
Qualis DMS enables you to create password policies for each role. You can also create multiple password policies for a role.
When you create a policy it will be in the Draft status. You need to approve the policy to enforce. When a new policy is approved for a role, the existing policy will retire automatically.
Note: When a new password policy is approved for a role, the password policy of the entire users in that user role will be changed.
Password Policy master is used to create and manage Password Policies.
1.On the Explorer, click MASTER, Configuration and then click Password Policy. The Password Policy master screen appears as shown in the figure:

FIGURE: - Password Policy Master Screen
4.In the Policy Name field, type the name for the policy you want to create..
5.Fill in all fields appropriately as follows:
6.Setup basic rules for the password such as Minimum # of Numeric Character, Minimum number of Lowercase Character, Minimum number of Uppercase Character, Minimum Number of Special Character, Minimum Password Length and Maximum Password Length
7.Under Password Life Time, fill the following:
8.In the Failed Password attempt that will lock the Account field, type number of failed attempts after which the application will be locked.
9.In the Idle Lock Time in Mins field, type number of minutes after which the system will be locked. The DMS application will be locked after the mentioned time and user has to unlock the application with valid password that is used to login.
10.Click to check the Password Expiry Required check field to enable password expiry option. If this option is enabled, then the following two fields are enabled and becomes mandatory..
11.In theExpiry Password Policy in Days field, type number of days the password is valid. After which the password would be expired. An alert shall be sent to the user to reset the password.
12.In the Alert Password Expiry in Days field, type number of days before which the password expiry alert will be sent to the user.
13.In the Comment field, type your comments if any.
14.Click SUBMIT.
You can see the Password Policy you created listed in the Password Policy master.
Only policies in the “Draft” status can be updated and deleted.
1.To edit a password policy, in the Password Policy master screen, select the role, select the password policy, click action menu and then click Edit. In the Edit Password Policy dialog, do required changes and then click SUBMIT.
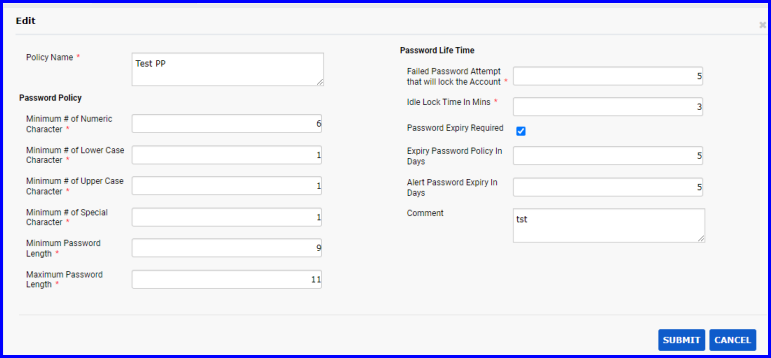
FIGURE: - Edit Password Policy Dialog
2.To delete a password policy, in the Password Policy master screen, select the role, select the password policy you want to delete, click action menu and then click Delete.
Policies in the “Draft” status can be approved.:
1.To approve a password policy, in the Password Policy master screen, select the role, select the password policy, click action menu and then click Approve. In the Confirmation dialog click Ok.
You can copy password policy to multiple roles.
1.To copy a password policy, in the Password Policy master screen, select the role; select the password policy, click action menu and then click Copy..
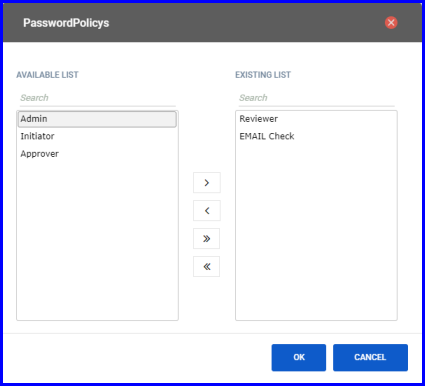
FIGURE: - Copy Password Policy Dialog
2.From the Server Name field, select the server name you want to create the directory.
2.In the Copy Password Policy dialog, under AVAILABLE LIST select the roles and click to copy the policy.
Now the selected password policy is copied to all the selected roles.
E-Sign Rights screen helps you to set E-Sign authentication at the control level for a selected screen.
1.On the Explorer, click MASTER, click Configuration and then click E-Sign Control. The E-Sign Control screen appears as shown in the figure:

FIGURE: - Esign Control Screen
2.Under Screen Name, select a screen. You can see the list of controls in the selected screen.
3. Click to enable the check field under Need Esign of the respective control that requires E-Sign authentication and then click 
Note: When you click the control with E-sign authentication in the transactions the E-Sign dialog pops up for authentication.d.
