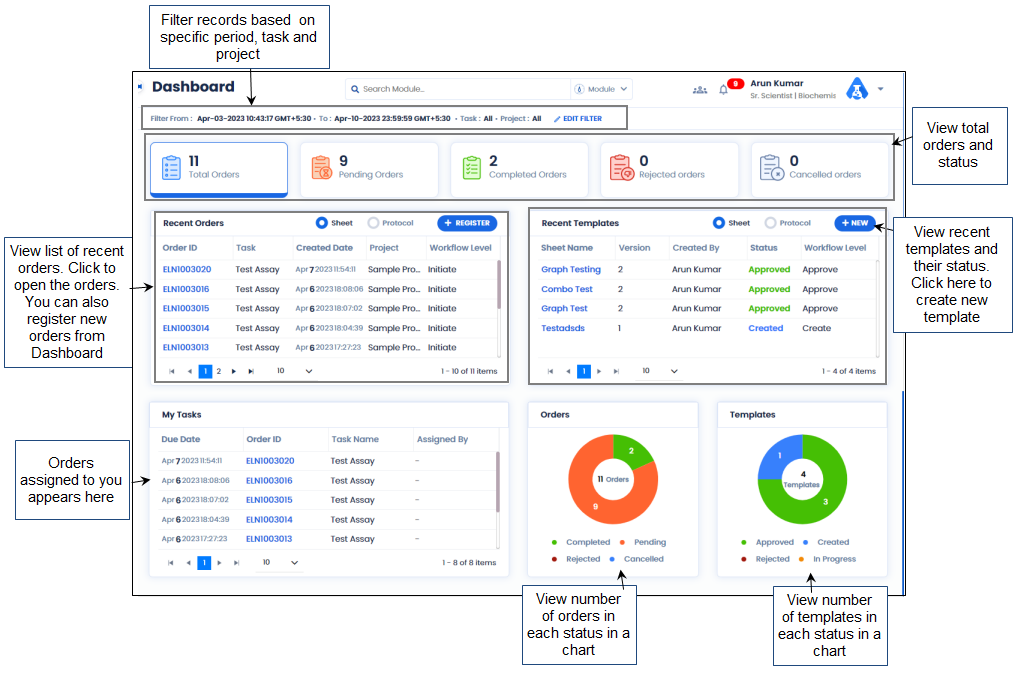
Logilab ELN - Dashboard
- On the main menu, click
 and then click Dashboard. ELN Dashboard appears as shown in the figure:
FIGURE: ELN Dashboard
Number of orders under the following status appears:
- Total Orders
- Pending Orders
- Completed Orders
- Rejected Orders
- Cancelled Orders
ELN Dashboard enables the user to do the following:
- Search Module / Order / Template
- Filter by Date or Date Range
- Register Sheet Order
- Register Protocol Order
- Creating Sheet Templates from Dashboard
- Creating Protocol Templates from Dashboard
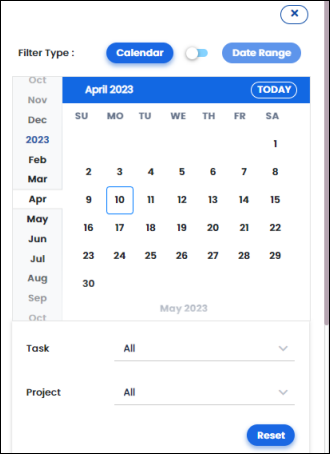
1.1 ;Filter by Date or Date Range
The ELN Dashboard enables you fetch records based on a selected date or date range. Select calendar or Date Range.
1.1.1 Filter by Date
To fetch records based on a selected date, follow these steps:
- Click. The filter dialog appears. In the filter dialog, click Calendar.
FIGURE: Filter by Date
You can see data fetched for the selected date range in the Dashboard.
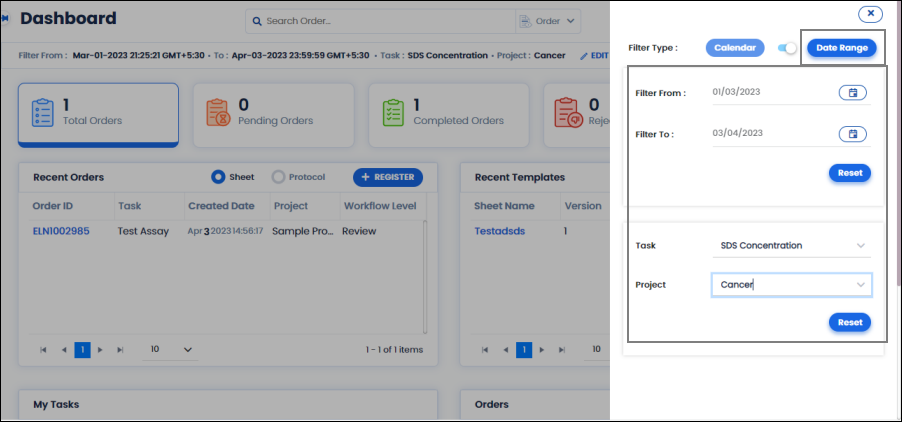
1.1.2 Filter by Date Range, Task and Project
To search based on a specific period, task, and project, follow these steps:
- Click. The filter dialog appears. In the filter dialog, click Date Range.
- Select Filter fromand Filter to dates to specify the duration for which the records will be fetched.
- To narrow the search, select Taskand Project. Records are fetched for the selected task and project for the selected date range as shown in the figure:
FIGURE: Filter by Date Range
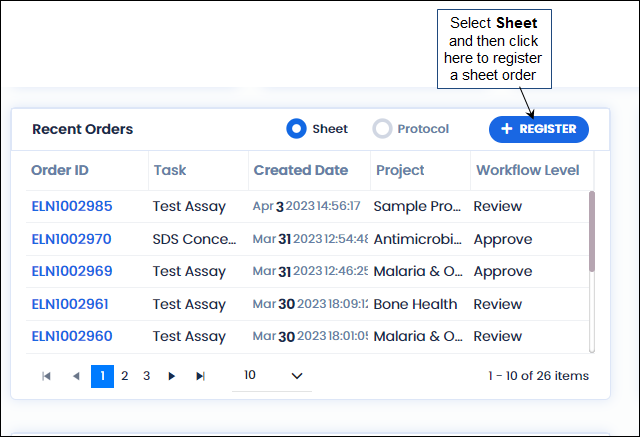
1.2 Register Sheet Order
ELN Dashboard enables you to register sheet orders from the dashboard. To create a sheet order from Dashboard, follow these steps:
- On the Dashboard, in the Recent Orderssection, select Sheet and then click REGISTER as shown in the figure:
FIGURE: Registering Sheet Orders from Dashboard
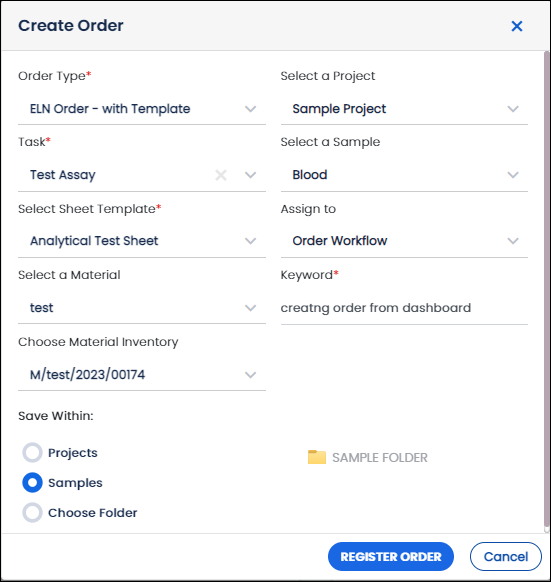
The Create Order dialog appears as shown in the figure:
FIGURE: Create Order Dialog
- Fill in the required fields and then click REGISTER ORDER. The order is registered.
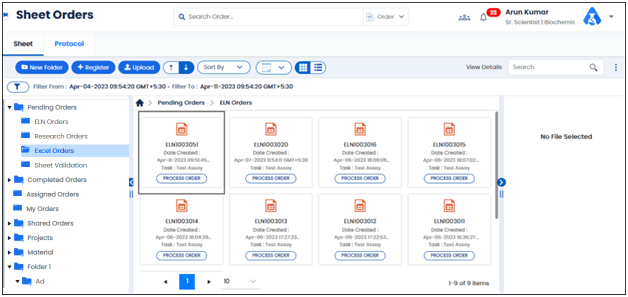
- On the main menu click Orders, and then click Sheet Orders. The screen appears with the ELN Ordersfolder open. you can see the sheet order you created from the dashboard appear as shown in the figure:
FIGURE: ELN Orders Folder Showing Order Created from Dashboard
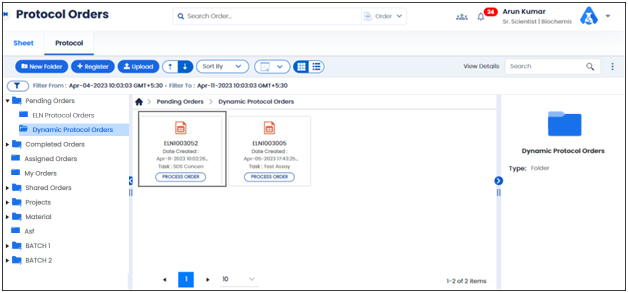
1.3 Register Protocol Order
ELN Dashboard enables you to register protocol orders from the dashboard to create a protocol order from Dashboard, follow these steps:
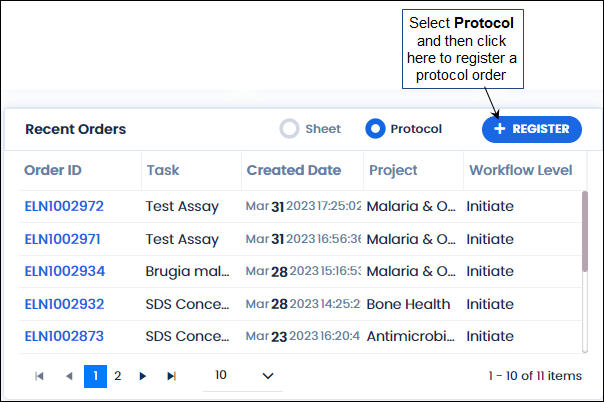
- On the Dashboard, in the Recent Orderssection, select Protocol and then click REGISTER as shown in the figure:
FIGURE: Registering Sheet Orders from Dashboard
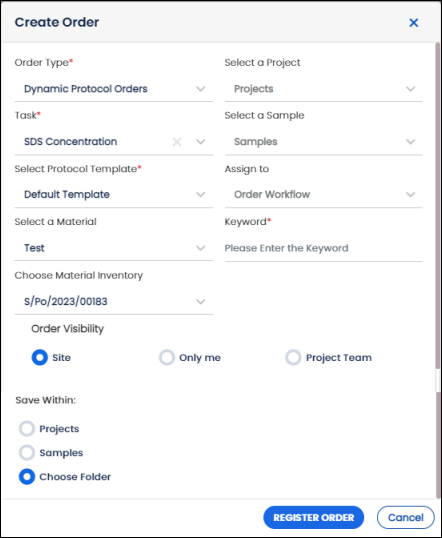
The Create Order dialog appears as shown in the figure:
FIGURE: Create Order Dialog
- Fill in the required fields and then click REGISTER ORDER. The order is registered.
- On the main menu click Orders, and then click Protocol Orders. Under the Pending Orders folder opens the folder ELN Protocol Orders/ Dynamic Protocol Orders. You can see the protocol order you created from the dashboard appears as shown in the figure:
FIGURE: Protocol Order Created from Dashboard
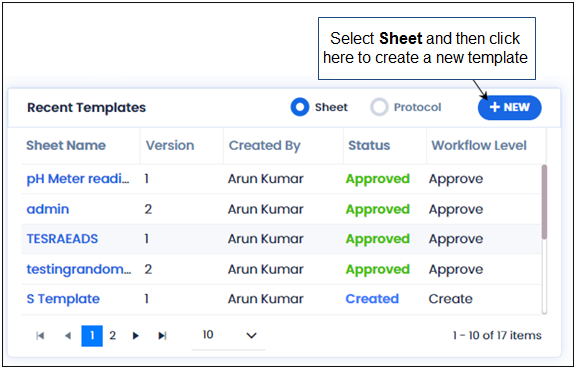
1.4 Creating Sheet Template from Dashboard
ELN enables you to create sheets and protocol templates from dashboard. To create a template from Dashboard, follow these steps:
- In the Recent Templatessection, select Sheet and then click NEW.
FIGURE: Creating Templates from Dashboard
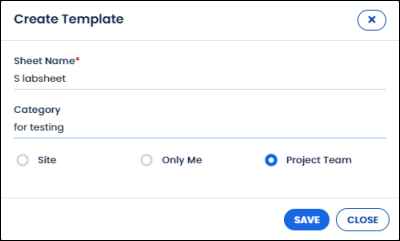
The Create Template dialog appears as shown in the figure:
FIGURE: Create Template Dialog
- In the Protocol Name field, type the name for the template you want to create.
- In the Category field, type the category name if any for the template.
- To set the template visibility, select Site/ Only Me/ Project Team.
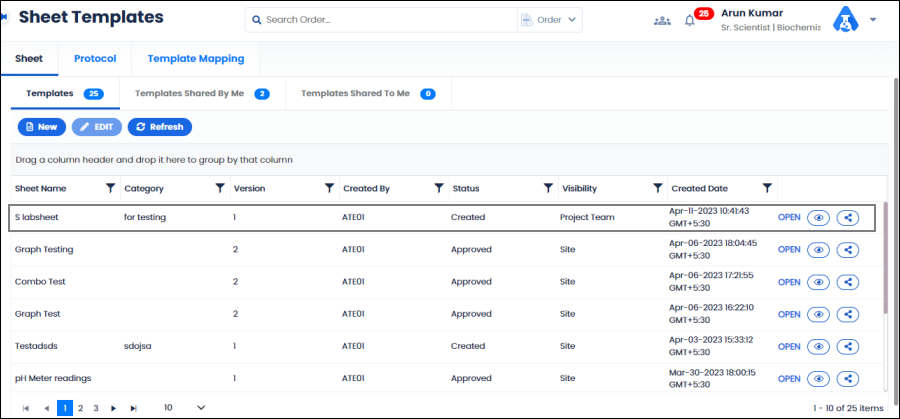
- Click SAVE . The template is created and appears in the Templates screen as shown in the figure:
FIGURE: Template Created from Dashboard
You can open the template for designing.
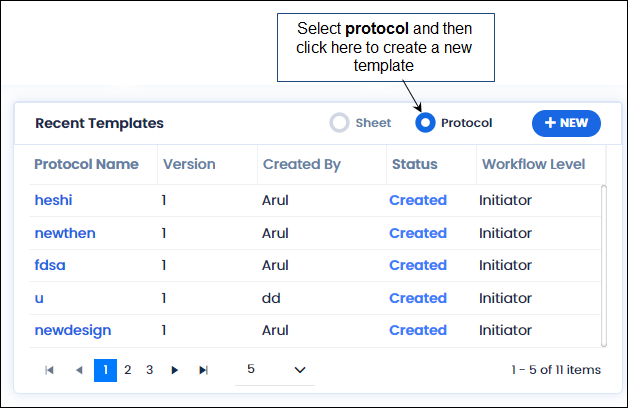
1.5 Creating Protocol Template from Dashboard
ELN enables you to create sheets and protocol templates from dashboard. To create a template from Dashboard, follow these steps:
- In the Recent Templatessection, select Protocol and then click NEW.
FIGURE: Creating Templates from Dashboard
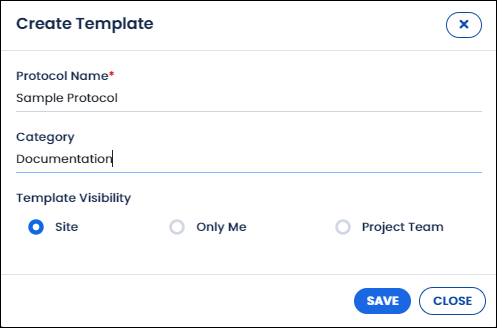
The Create Template dialog appears as shown in the figure:
FIGURE: Create Template Dialog
- In the Protocol Namefield, type the name for the template you want to create.
- In the Category field, type the category name if any for the template.
- To set the template visibility, select Site/ Only Me / Project Team.
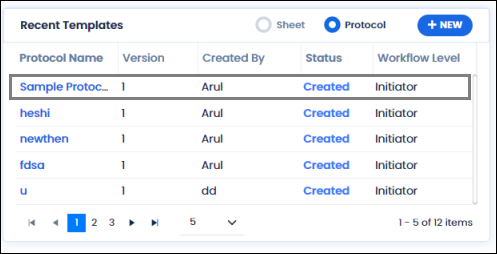
- Click SAVE. The template is created and appears in the list as shown in the figure:
FIGURE: Template Created from Dashboard
- Click to open the template. The template opens for designing.
1.6 Set Column Visibility
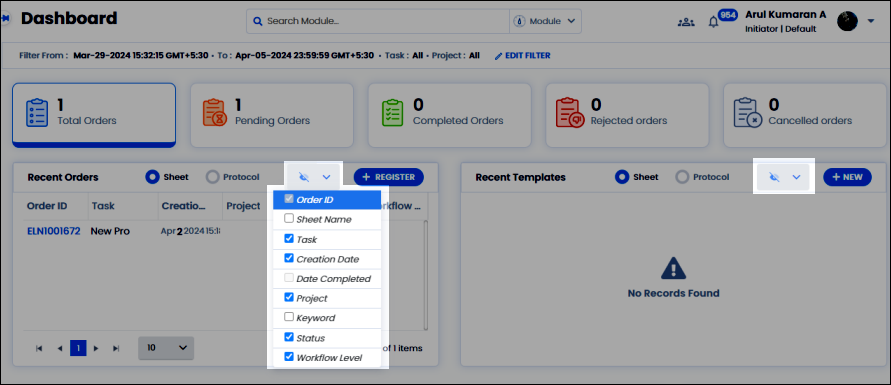
Under Recent Orders and Recent Templates, you can set the column visibility as shown in the figure:
FIGURE: Setting Column Visibility
- Click
 to view list of columns you can add to the grid.
 - You can check the column name to make it visible in the grid.
- Uncheck to remove from the grid.
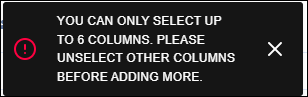
- You can add a maximum of six columns at a time.
- If you select more than six columns, you will get an error message as shown in the figure:
FIGURE: Setting Column Visibility
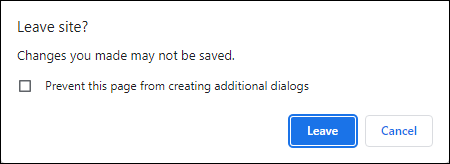
1.7 Closing ELN
When you close the tab without saving, ELN will display the following dialog for conformation to avoid loss.
Of data:
FIGURE: Confirmation Dialog
- Click Leave to close the application without saving.
- Click Cancel to cancel the closed operation. You can save your data and then close the application.