1.1 Material Master
Material master is used to add and manage materials.
- On the main menu, click
 and then click Material Master. The Material Master screen appears as shown in the figure:
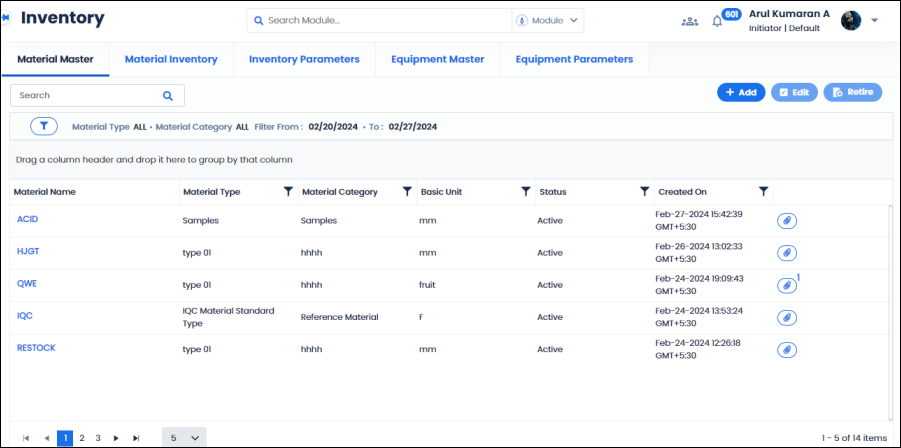
FIGURE: Material Master Screen
In the Material master screen, you can see the list of materials added and options to add, edit and retire material appears.
Details such as material Name, Material type, material category, unit, status, created date and attachments appear.
1.1.1 Filtering Materials
By default, all materials added for the past one week appear. You can use the filter options to filter materials.
- Click.
 The filter dialog appears as shown in the figure:
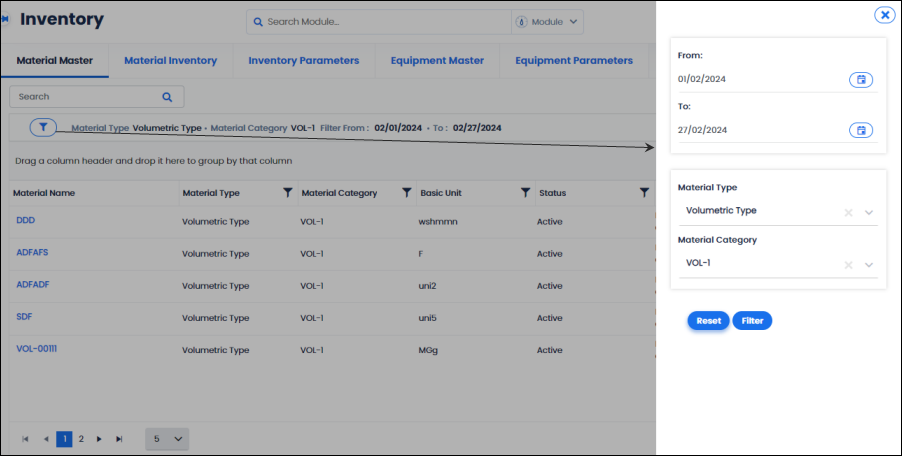
FIGURE: Filtering Materials
- Select the From and to dates to fetch materials added on a specific period.
- Select Material Typeand Material Category to further narrow your search.
1.1.2 Viewing Metadata of a Material
- On the Material Master screen, click on the material name to view metadata of the material as shown in the figure:
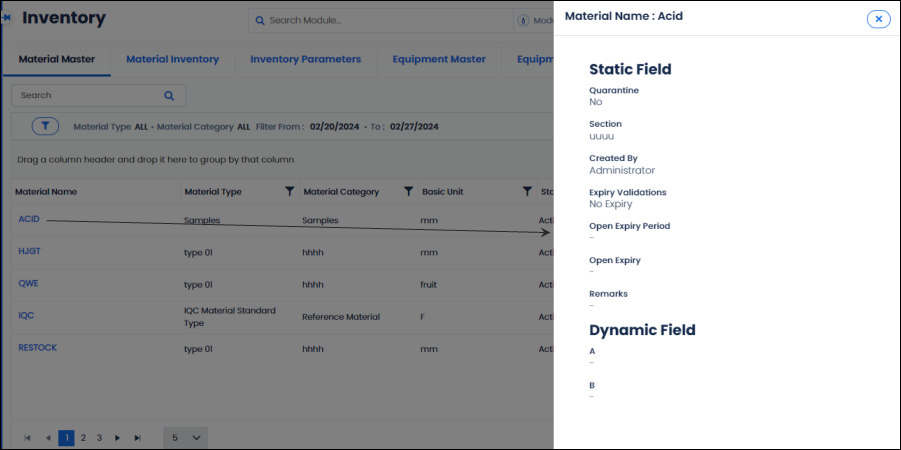
FIGURE: Viewing Metadata of the Material
You can view the list of static and dynamic fields.
1.1.3 Adding a New Material
To add material, follow these steps:
- On the main menu, clickand then click Material Master. The Material master screen appears as shown in the figure:
FIGURE: Material Master Screen
Note: For administrators the ActiveSite field will appear. Hence, administrator user can create site specific materials.
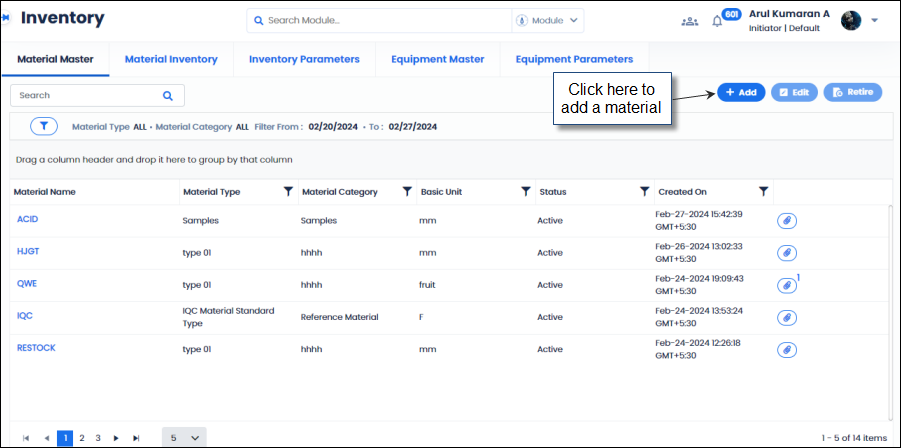
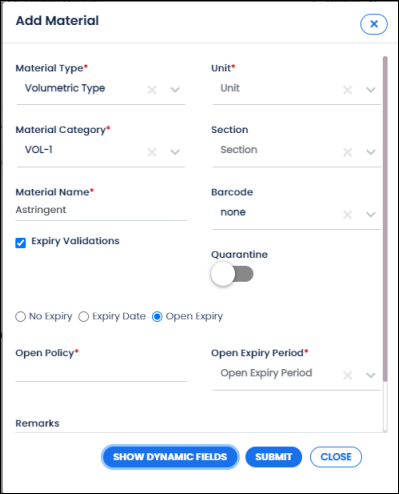
- Click Add. The Add Material dialog appears as shown in the figure:
FIGURE: Add Material Dialog
- In the Material Type field, select the material type.
- In the Material Category field, select the category.
- In the Material Name field, type the material name you add.
- In the Unit field, select the unit to measure the material.
- In the Sectionfield, select section to add material.
- In the Barcode field, select Barcode if you want to generate a barcode to the material: Barcode/ QR code / Non
- Click to turn on the Quarantineoption to quarantine the material until it is released in the Material Inventory screen.
- Click Expiry Validations to see the expiry options. Under Expiry Validations, select any of the following options:
If you select this option, the material has no expiry date.
Expiry Date:
Mention the expiry date.
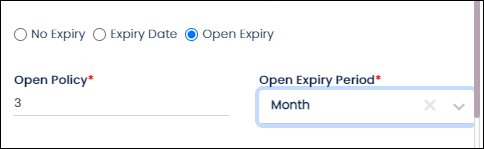
Open Expiry
This option is used set life of the material. Click to enable Open Expiry Policy option. In the Open Policy field, type the number, in the Open Expiry Period field select period.For example
FIGURE: Setting Open Expiry
For example: After opening, the material will expire in three months.
Note: When you set expiry policy to the material, following are mandatory in the Inventoy screen:
- The Received Date & Timefield becomes mandatory when you add material in the Inventory screen.
- You must set Open Datefor the material when you issue the material.
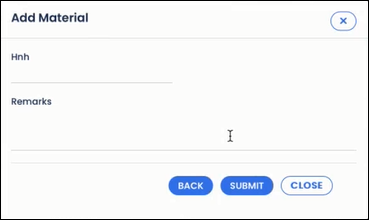
- Click SHOW DYNAMIC FIELDS. The dynamic fields appear as shown in the figure:
FIGURE: Filling Dynamic Fields
- Fill in the required dynamic fields.
- Click SUBMIT.
You can see the material you just added listed in the Material master.
1.1.4 Adding Attachments to Materials
Once you add a material, you can add attachments to the material. To do so, follow these steps:
- On the Material Master
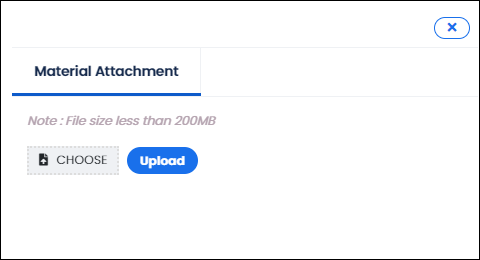
 screen, clickto attach a file to the material. The Material Attachment dialog appears as shown in the figure:
FIGURE: Material Attachment Dialog
- Click CHOOSE. In the Open dialog locate the file to attach and then click Open.
- And then click Upload.
- The file is attached to the material. And you can see the number of attachments for the material as shown ii the figure:
FIGURE: File Attached to the Material
1.1.5 Editing and Retiring Material
- To edit material details, in the Material master screen, select the material, and then click Edit. In the Edit screen, do required changes and then click SUBMIT.
- To retire a material, in the Material master screen, select the material you want to retire then click