Material Type master consists of four material types defined. You can select a material type and add fields.
To add fields to the material type, follow these steps:
1.On the main menu, clickand then click Material Type. The Material Type master screen appears as shown in the figure:
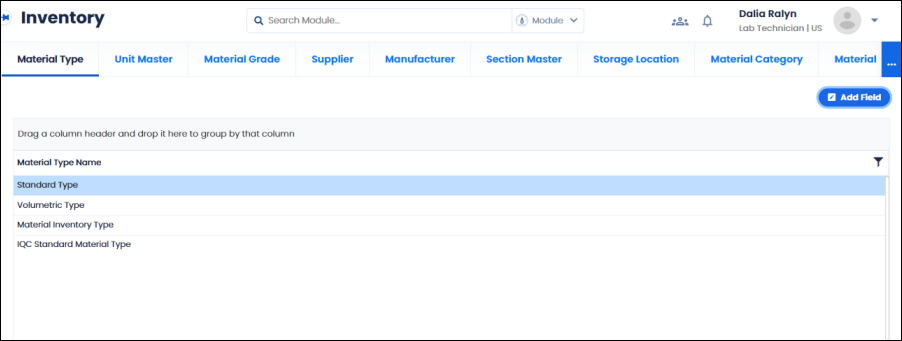
2.You can see four predefined material type. Select a material type to add fields. The Add Fieldoption is enabled.
3.Click Add Field. The Add Repositorydialog appears as shown in the figure:
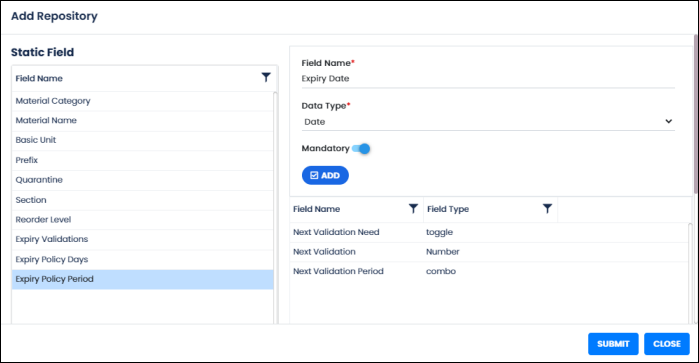
FIGURE: Add Repository Dialog
On the left side you can see list of static fields added to the material type. To add a dynamic field, follow these steps:
4.In the Field Nametype the field name you want to add.
5.In the Data Typefield, select data type for the field.
6.Click to turn on the Mandatory If this option is turned on, in the forms, when you select this material type, this field (For Example: Expiry Date field in the figure) becomes mandatory.
7.Click ADD. The field is added to the list on the right side.
Unit master is used to create and manage units that are used to measure samples/material etc.
To create a new unit, follow these steps:
On the main menu, clickand then click Unit Master. The Unit Master screen appears as shown in the figure:
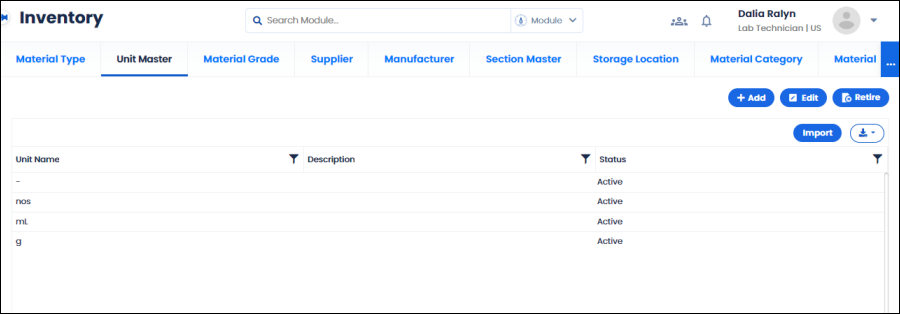
FIGURE: Unit Master
1.In the Unit Master screen you can see the list of units added and options to add, edit and retire units appears.
Note: For administrators the ActiveSite field will appear. Hence, administrator user can create site specific units.
2.Click Add. The Add screen appears as shown in the figure:
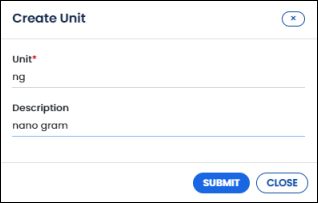
FIGURE: Create Unit Screen
3.In the Unit field, type the name for the unit you want to add.
4.In the Descriptionfield, type description for the unit.
5.Click SUBMIT.
You can see the unit you created listed in the unit master.
To edit unit, follow these steps:
1.Select a unit and then click Edit. In the Edit Unit screen do required changes and then click SUBMIT.
Material Grade master is used to add and manage material grade details. These material grades are used to grade materials.
To create a new material grade, follow these steps:
1.On the main menu, clickand then click Material Grade. The Material Grade master screen appears as shown in the figure:
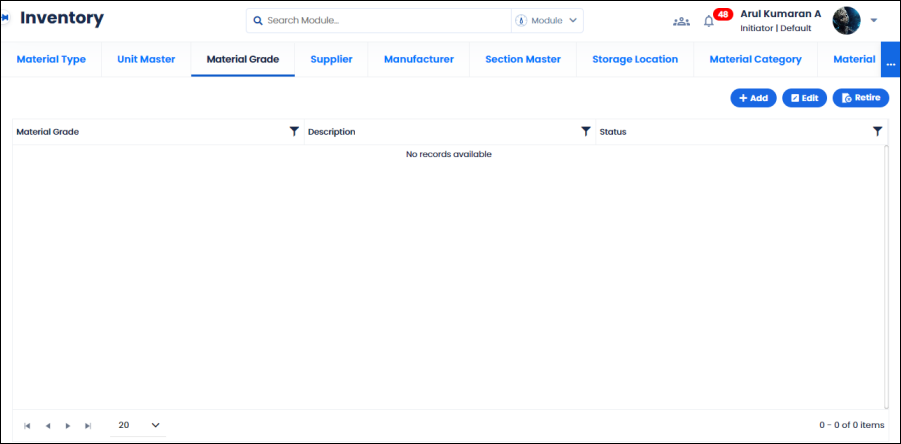
FIGURE: Material Grade Master Screen
In the Material Grade master screen you can see the list of material Grades added and options to add, edit and retire material grades appears.
Note: For administrators the ActiveSite field will appear. Hence, administrator user can create site specific material grades.
2.Click AddThe Add Material Grade dialog appears as shown in the figure:
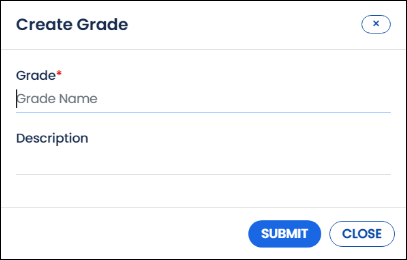
FIGURE: Add Material Grade Dialog
3.In the Material Grade field, type name for the grade you want to add.
4.In theDescription field, type description about the grade.
5.Click SUBMIT.
You can see the material grade you just added listed in the Material Grade master.
1.To edit material grade details, in the Material Grade master screen, select the material grade, and then click Edit. In the Edit material grade screen, do required changes and then click SUBMIT.
2.To retire a material grade, in the Material Grade master screen, select the material grade you want to retire, and then click
Supplier master is used to add and manage suppliers.
To create a new supplier, follow these steps:
1.On the main menu, clickand then click The Supplier master screen appears as shown in the figure:
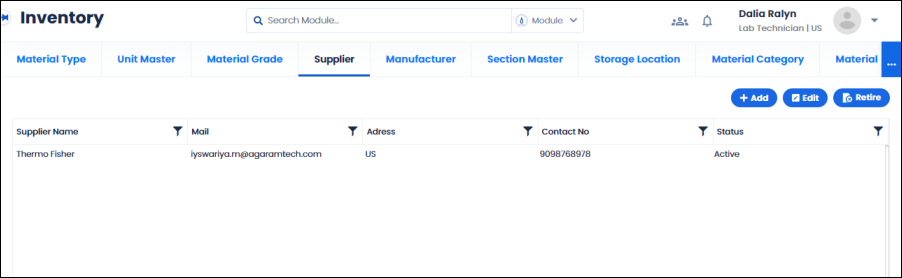
FIGURE: Supplier Master Screen
In the Supplier master screen you can see the list of supplier added and options to add, edit and retire supplier categories appears. You can also attach files for the supplier.
Note: For administrators the ActiveSite field will appear. Hence, administrator user can create site specific suppliers.
2.Click AddThe Create Supplier dialog appears as shown in the figure:
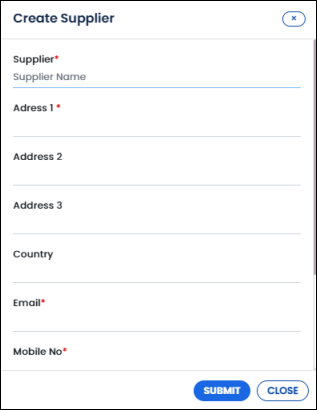
FIGURE: Create Supplier Dialog
3.In the Supplier field, type the supplier name.
4.Fill in other fields appropriately.
5.lick Submit.
You can see the supplier you just added listed in the Supplier master.
1.To edit supplier details, in the Supplier master screen, select the supplier, and then click Edit. In the Edit screen, do required changes and then click SUBMIT.
2.To retire a supplier, in the Supplier master screen, select the supplier you want to retire then click
Manufacturer master is used to add and manage manufacturer details.
To create a new manufacturer, follow these steps:
1.n the main menu, clickand then click The Manufacturer master screen appears as shown in the figure:

FIGURE: Manufacturer Master Screen
In the Manufacturer master screen you can see the list of manufacturers added and options to add, edit and retire manufacturers appears.
Note: For administrators the ActiveSite field will appear. Hence, administrator user can create site specific manufacturers.
2.Click AddThe Create Manufacturer dialog appears as shown in the figure:
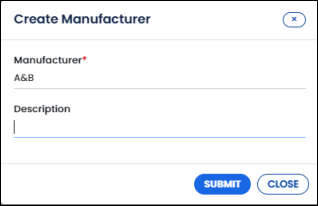
FIGURE: Create Manufacturer Dialog
3.In the Manufacturer field, type name of the manufacturer you want to add.
4.In theDescription field, type description about the manufacturer.
5.Click SUBMIT.
You can see the manufacturer you just added listed in the Manufacturer master.
1.To edit manufacturer details, in the Manufacturer master screen, select the manufacturer, and then click Edit. In the Edit Manufacturerscreen, do required changes and then click SUBMIT.
2.To retire a manufacturer, in the Manufacturer master screen, select the manufacturer you want to retire, and then click
Section master is used to add and manage sections. Sections are used to divide materials based on different department in the organization.
To create a new section, follow these steps:
1.On the main menu, clickand then click The Section master screen appears as shown in the figure:
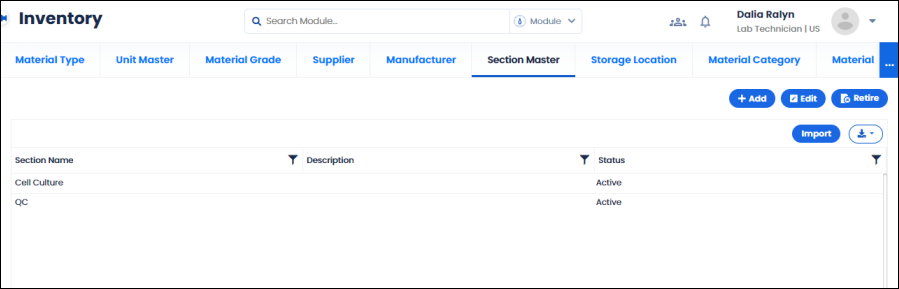
FIGURE: Section Master Screen
In the Section master screen you can see the list of sections added and options to add, edit and retire sections appears.
Note: For administrators the ActiveSite field will appear. Hence, administrator user can create site specific sections.
2.Click AddThe Create Section dialog appears as shown in the figure:
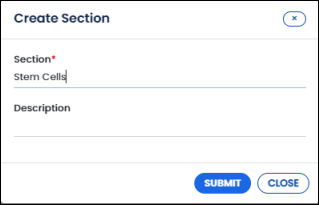
FIGURE: Create Section Dialog
3.In the Section field, type name of the section you want to add.
4.In theDescription field, type description about the section.
5.lick SUBMIT.
You can see the section you just added listed in the Section master.
1.To edit section details, in the Section master screen, select the section, and then click Edit. In the Edit Sectiondialog, do required changes and then click SUBMIT.
2.To retire a section, in the Section master screen, select the section you want to retire then click
Storage Location master is used to create and manage storage structures that are used to store samples.
To create a new storage location, follow these steps:
1.n the main menu, clickand then click Storage Location. The Storage Location master screen appears as shown in the figure:

FIGURE: Storage Location Master Screen
In the Storage Location master screen you can see the list of storage locations added and options to add, edit and retire storage locations appears.
Note: For administrators the ActiveSite field will appear. Hence, administrator user can create site specific storage locations.
2.lick AddThe Add dialog appears as shown in the figure:

FIGURE: Create Storage Location Dialog
3.In the Sample Storage location Name field, type name of the storage location you want to add.
4.In the Sample Storage Locationfield, clickto add a parallel node. Clickto add a child node. Click and type the name for the node.
5.Using the above options design the storage structure.
6.Click SAVE.
You can see the storage location you just added listed in the Storage Location master.
1.To edit storage location details, in the Storage location master screen, select the storage location, and then click Edit. In the Edit screen, do required changes and then click SUBMIT.
2.To retire a storage location, in the Storage location master screen, select the storage location you want to retire then click
Material Category master is used to add and manage material categories. Material category is used in various forms and masters to group materials.
To create a new material category, follow these steps:
1.On the main menu, clickand then click Material Category. The Material Category master screen appears as shown in the figure:
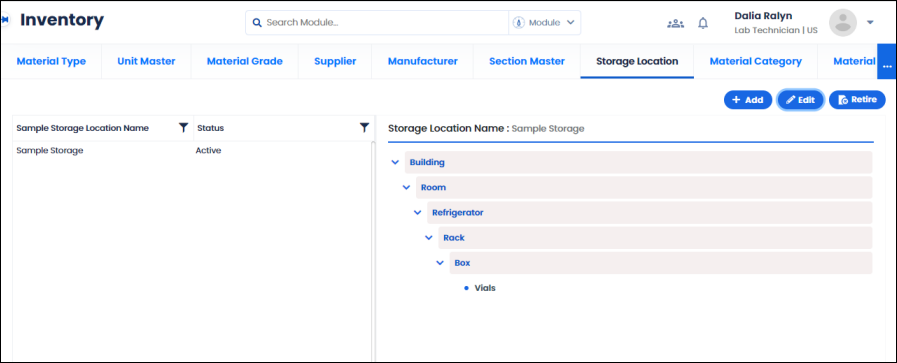
FIGURE: Material Category Master Screen
In the Material Category master screen you can see the list of material categories added and options to add, edit and retire material categories appears.
Note: For administrators the ActiveSite field will appear. Hence, administrator user can create site specific material categories.
2.lick AddThe Create Material Category dialog appears as shown in the figure:
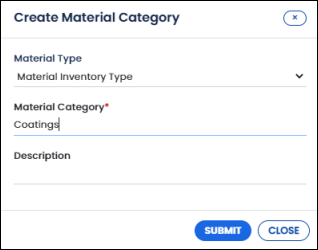
FIGURE: Create Material category Dialog
3.In the Material Typefield, select material type.
4.In the Material Category field, type name of the material category you want to add.
5.Click SUBMIT.
You can see the material category you just added listed in the Material Category master.
1.To edit material category details, in the Material Category master screen, select the material category, and then click Edit. In the Edit screen, do required changes and then click SUBMIT.
2.o retire a material category, in the Material Category master screen, select the material category you want to retire then click
Material master is used to add and manage materials. You can also import materials from Excel.
1.On the main menu, clickand then click The Material master screen appears as shown in the figure:
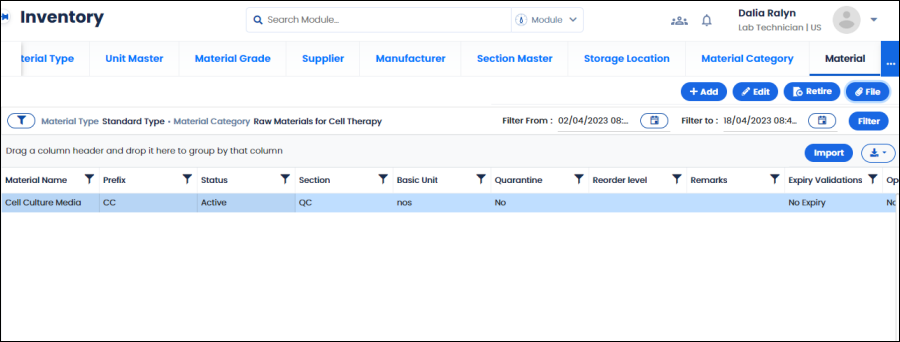
FIGURE: Material Master Screen
In the Material master screen you can see the list of materials added and options to add, edit and retire material categories appears. You can also attach files for the material.
Select date and time from Filter From and Filter To fields and then click Filter to fetch materials added on a specific period as shown in the figure:
FIGURE: Filtering Material Added on a Specific Period
Logilab ELN enables you import material data from Excel. To do so, follow these steps:
1.On the Material master screen, click Import. The Import Datadialog appears.
2.Click Choose File, locate the Excel file and then click Open. If the fields in the Excel file matches fields in the Material master, the data is loaded and appears as shown in the figure:
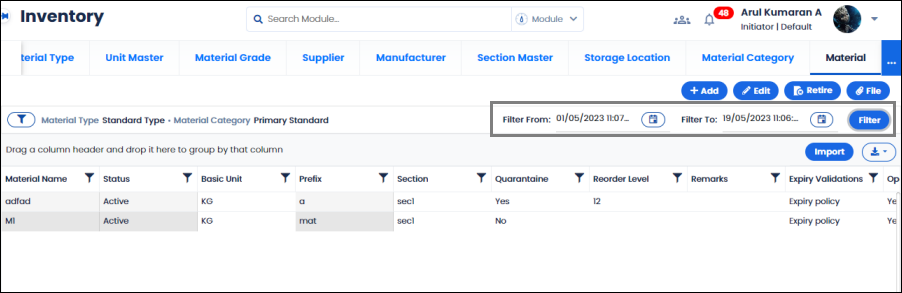
FIGURE: Importing Material Data - Matching Field Names
plick SAVE. Data is loaded to the material master.
If the fields in the Excel file does not match the fields in the Material master, the a Import Data dialog appears as shown in the figure:
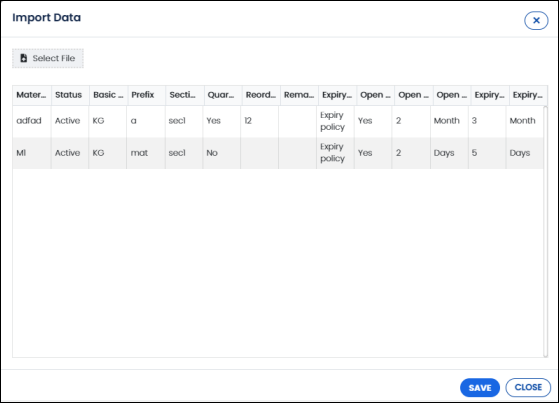
FIGURE: Importing Material Data - Different Field Names

4.Under Default Columns,fields from the material master are listed. Under Imported Columns, fields from the Excel file are listed. You must map fields from the Excel sheet to fields in the material master. You must map fields at least for the mandatory fields.
5.lick SAVE. Data is loaded to the material master as shown in the figure:
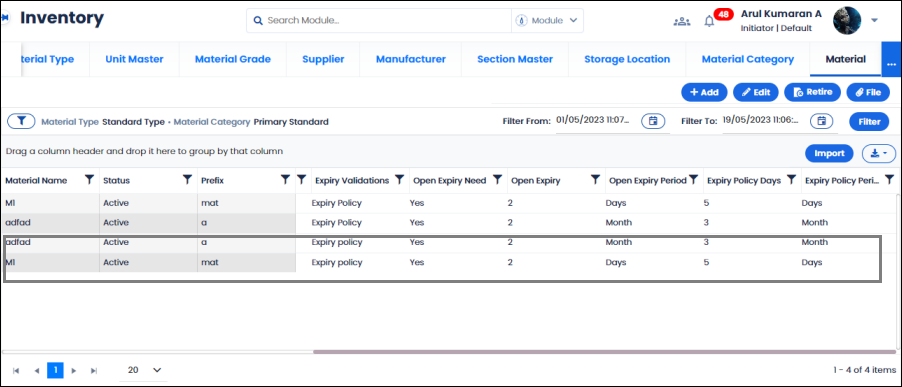
FIGURE: Data Imported from Excel
ELN allows import duplicate values to the Material master.
To add material, follow these steps:
1.On the main menu, clickand then click The Material master screen appears as shown in the figure:

FIGURE: Material Master Screen
Note: For administrators the ActiveSite field will appear. Hence, administrator user can create site specific materials.
2.Click. The filter appears as shown in the figure:
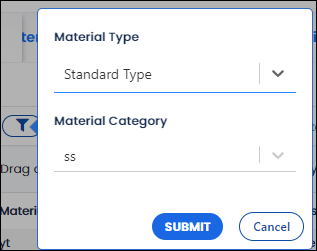
FIGURE: Selecting Material Type and Material Category to Add Material
3.Select Material Typeand Material Category to add material and then click SUBMIT.
4.lick The Add dialog appears as shown in the figure:
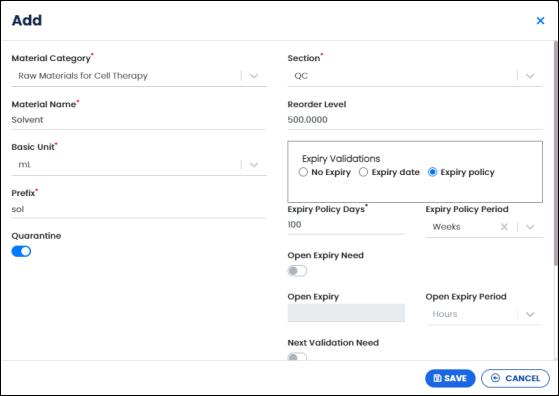
FIGURE: Add Material Dialog
1.In the Material Category field, select the category to group the material you add.
2.In the Material Name field, type the material name.
3.In the Basic Unitfield, select the unit to measure the material.
4.In the Prefixfield, type prefix for the material.
5.Click to turn on the Quarantineoption to quarantine the material until it is released in the Material Inventory field.
6.In the Sectionfield, select section to add material.
7.In the Reorder Levelfield, type the quantity of material at which the order must be placed to replenish the stock. A notification is sent when the material reaches the reorder level.
8.Under Expiry Validations, select any of the following options:
If you select this option, the material has no expiry date. But you can set open expiry to set expiry period from the date the material is open. Click to enable the Open Expiry Need option. In the Open Expiry field, type number, in the Open Expiry Period field, select period as shown in the figure:
When this option is selected, you must set open expiry to set expiry period from the date the material is open. Click to enable the Open Expiry Need option. In the Open Expiry field, type number, in the Open Expiry Period field, select period as shown in the figure:
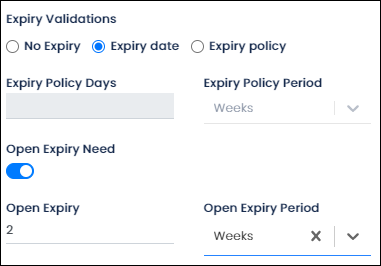
FIGURE: Setting Expiry Date
This option is used set life of the material. Click to enable Expiry Policy option. In the Expiry Policy Days field, type the number, in the Expiry Policy Period field select period. You can also set expiry period from the date the material is open. Click to enable the Open Expiry Need option. In the Open Expiry field, type number, in the Open Expiry Period field, select period as shown in the figure:

FIGURE: Setting Expiry Policy
Note: When you set expiry policy to the material, following are mandatory in the Inventoy screen:
The Received Date & Timefield becomes mandatory when you add material in the Inventory screen.
You must set Open Datefor the material when you issue the material.
9.Fill in other fields appropriately.
10.Click SAVE.
You can see the material you just added listed in the Material master.
1.To edit material details, in the Material master screen, select the material, and then click Edit. In the Edit screen, do required changes and then click SUBMIT.
2.To retire a material, in the Material master screen, select the material you want to retire then click
