Registration Sub Type master is used to add and manage registration sub types. Registration sub type is created for a selected registration type. You can create versions for registration sub type. You can edit the details until the registration sub type is in the Draft state. Once approved you cannot edit the details.
The previous one will expire once you approve an new registration sub type
To create a new registration sub type, follow these steps:
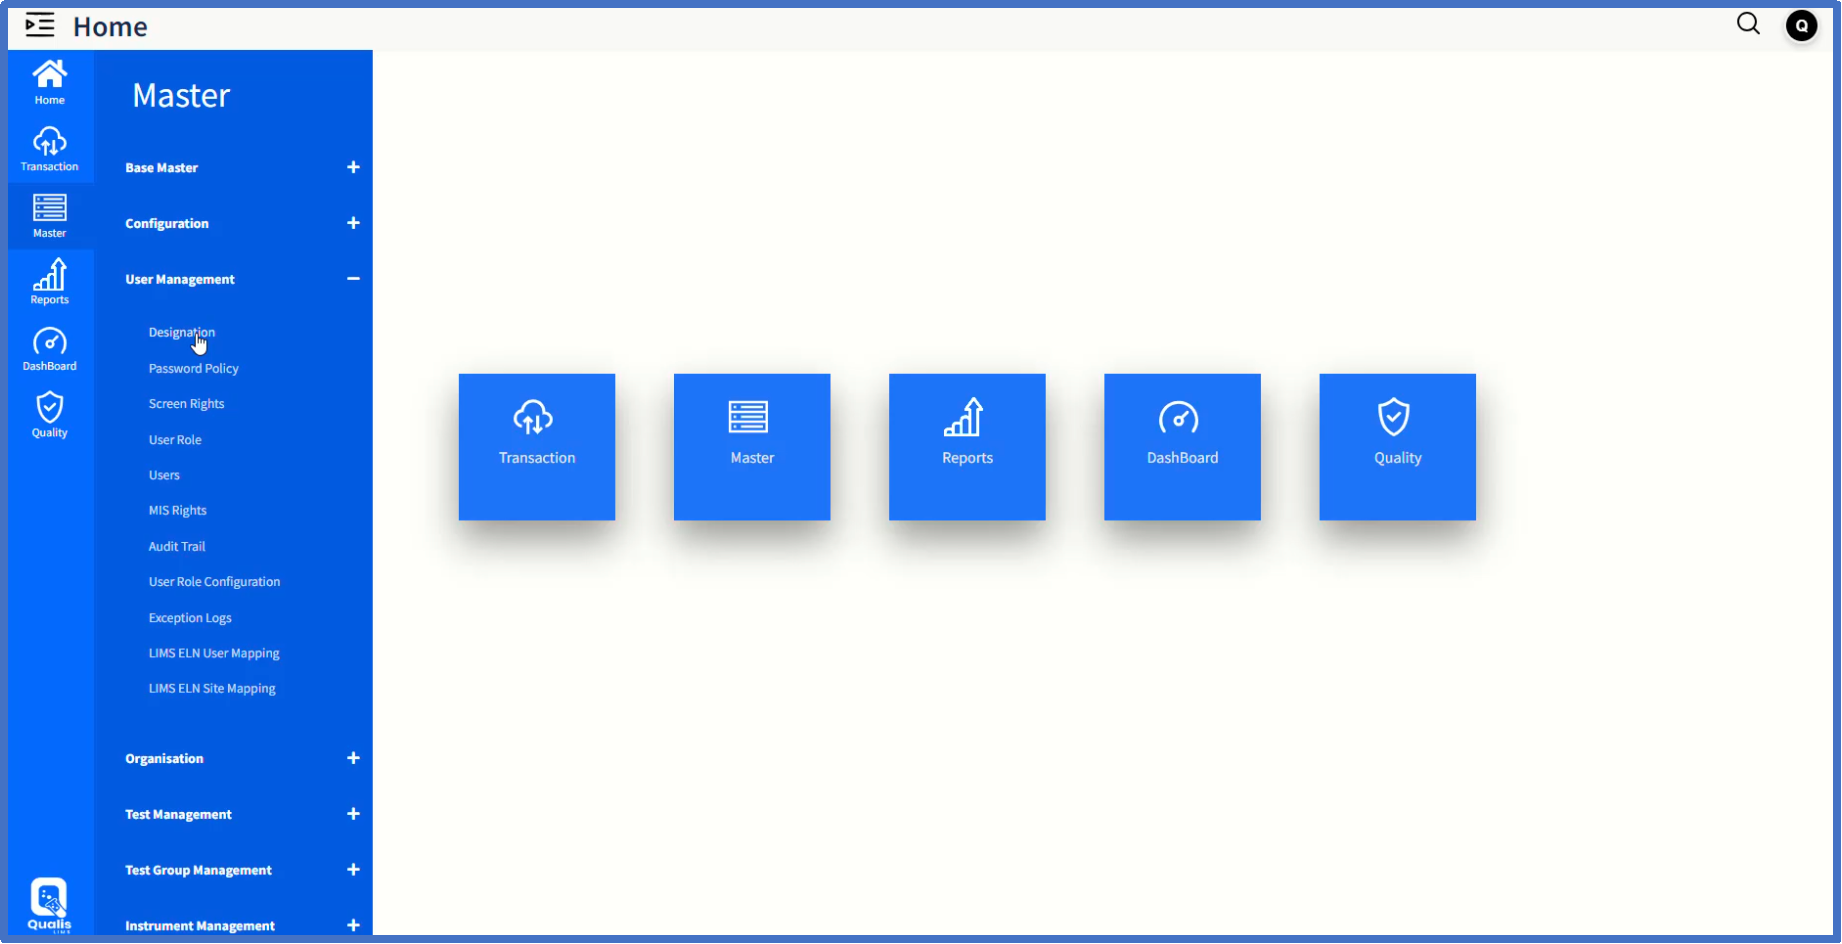
1.On the main menu, click, Configuration and then click Registration Sub Type. The Registration Sub Type master screen appears as shown in the figure:
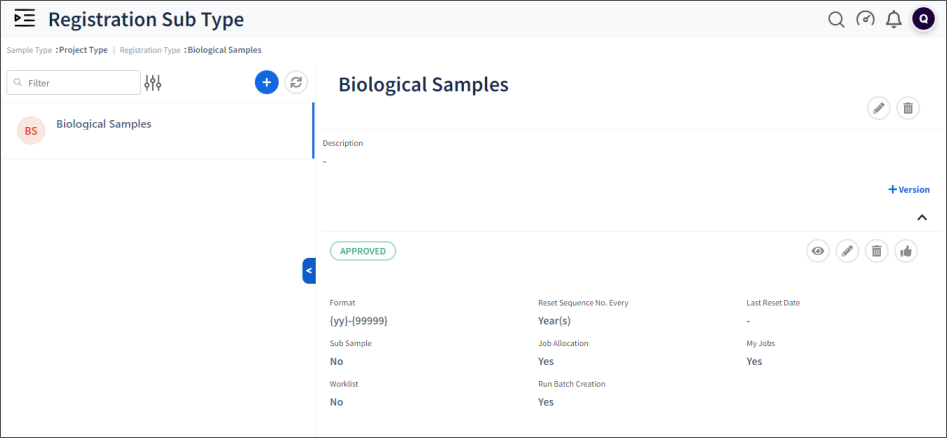
FIGURE: Registration Sub Type Master Screen
In the Registration Sub Type master screen, you can see the list of registration sub types created. Options to edit and delete registration sub types appear in each record.
2.Click. The filter dialog appears as shown in the figure:
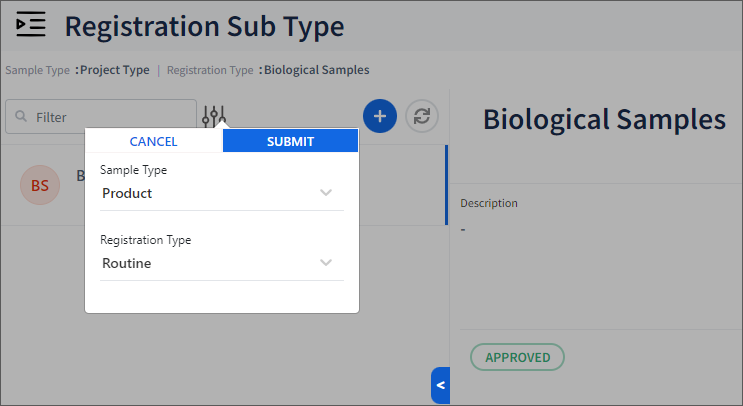
FIGURE: Selecting Registration Type to add Registration Sub Type.
3.Select the Sample Type and Registration Type to add the registration sub type and then click SUBMIT. The screen appears as shown in the figure:
Let us move on to configure User role by clicking 'User Role' page item.
On 'User Role' page, the list of user roles already created will be displayed.
Click on + icon to add a new user role.

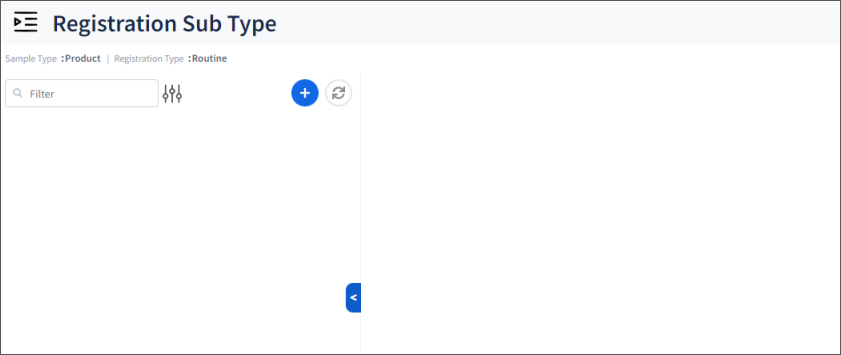
FIGURE: Registration Sub Type Screen for the selected Registration Type.
If there is a registration sub type already added, the details appears. .
4.Click.  The Add Registration Type screen appears as shown in the figure:
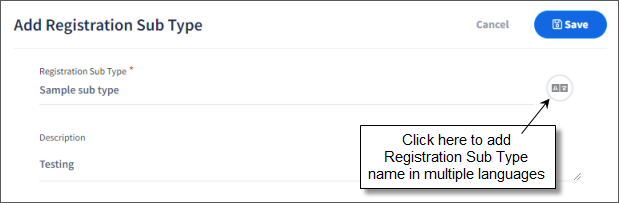
FIGURE: Add Registration Sub Type Dialog
5.In the Registration Sub TypeName field, type the registration sub type name.
6.Click  to add Registration Sub Type name in multiple languages. The multilingual options appears as shown in the figure:
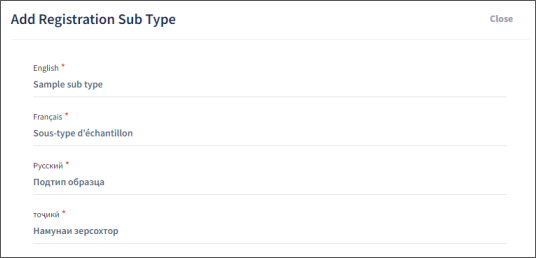
FIGURE: Multilingual Options
7.You can type the Registration Sub Type name in French, Russian and Tajik as shown in the above figure. Click Close to close the multilingual dialog.
8.In the Description field, type the description.
9.Click Save.
You can see the registration sub type you just created listed in the Registration Sub Type master as shown in the figure:
The policy thus created is in 'Draft' status.
Click on 'Approve' icon to change the status to approved one.

FIGURE: Registration Sub Type Created
1.In the Registration Sub Type screen, click  to add a version. The Add Version dialog appears as shown in the figure:
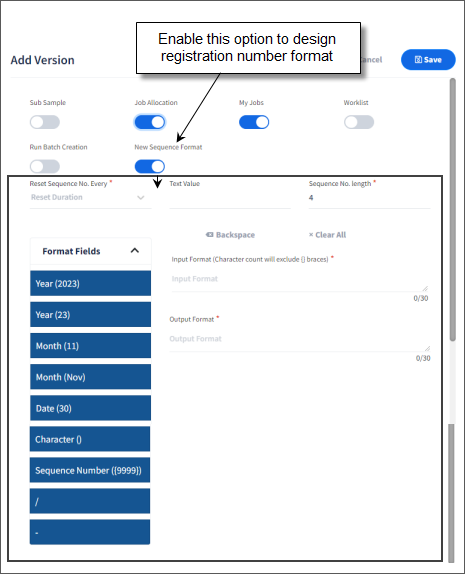
FIGURE: Add Version.
2.Click to enable options to add to the workflow.
3.You can define the registration number format by enabling the New Sequence Format option. Once you enable this option, the dialog appears as shown in the above figure:
4.Design registration number format as shown in the figure:
On the Screen Rights page, first select the user role by clicking on Filter icon.
Click on + item which will open up Add Screen Rights dialog window.
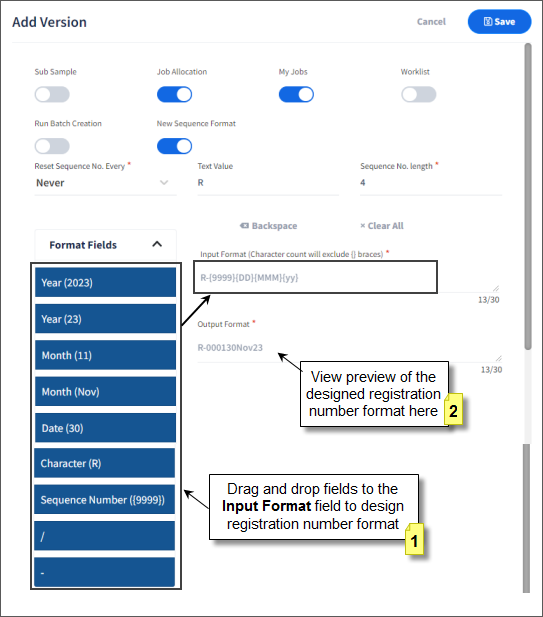
FIGURE: Design Registration No Format
5.In the Reset Sequence No. Every field, select the period to reset the sequence number.
6.In the Text Value field, type the text to add to the registration number. This text appears in . the Character box . you can drag and drop this character box  to the Input Format field to add the character to the registration number format.
7.In the Sequence No. length field, type the length for the sequence number. This number appears in the Sequence Number box  . you can drag and drop this box to the Input Format Input Format field to add the length of sequence number to the registration number format
8.Add other boxes to the Input Format field as required. You can see the preview of the designed registration number format in the Output Format field..
9.Click Save. The registration sub type is saved and appears in the DRAFT as shown in the figure:
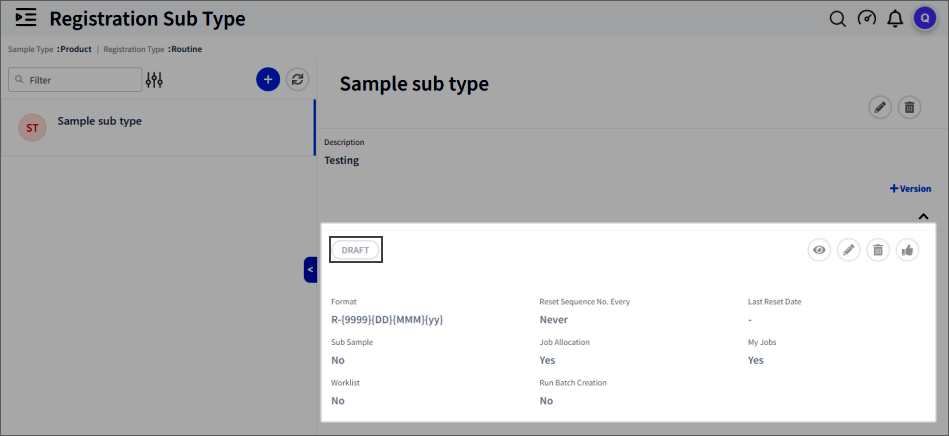
FIGURE: Registration Sub Type Added.
1.Click  to see the transaction flow as shown in the figure:
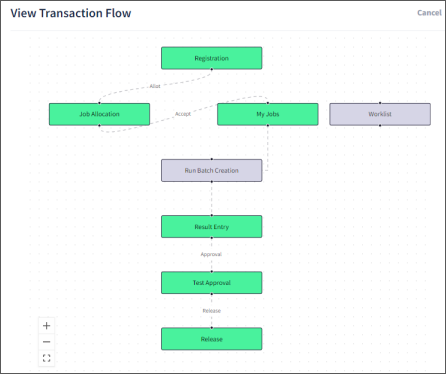
FIGURE: View Transaction Flow
1.Click to edit the record. The Edit Version dialog appears as shown in the figure:
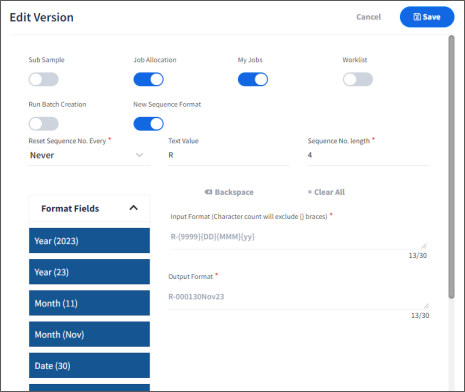
FIgure: Edit Version Dialog
2.Do required changes and then click Save.
1.Click  to delete the Registration Sub Type Version.
1.Click  to approve the Registration Sub Type Version. The version is approved and appears as shown in the figure:.
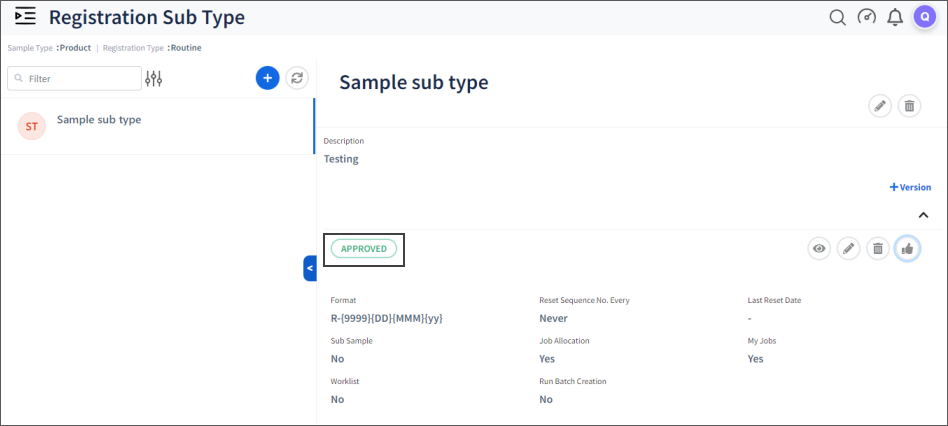
FIGURE: Registration Sub Type Version Approved
1.1.5.1Editing and Deleting Registration Sub Type.
1.To edit registration sub type details, in the Registration Sub Type master screen, select the registration sub type and then click  to edit the registration sub type record. In the Edit Registration Sub Type screen, do required changes and then click Save.
2.To delete a registration sub type, in the Registration Type master screen, select the registration sub type and then click  to delete the registration sub type record.
