After logging into Qualis LIMS application as an administrator user with required privileges,
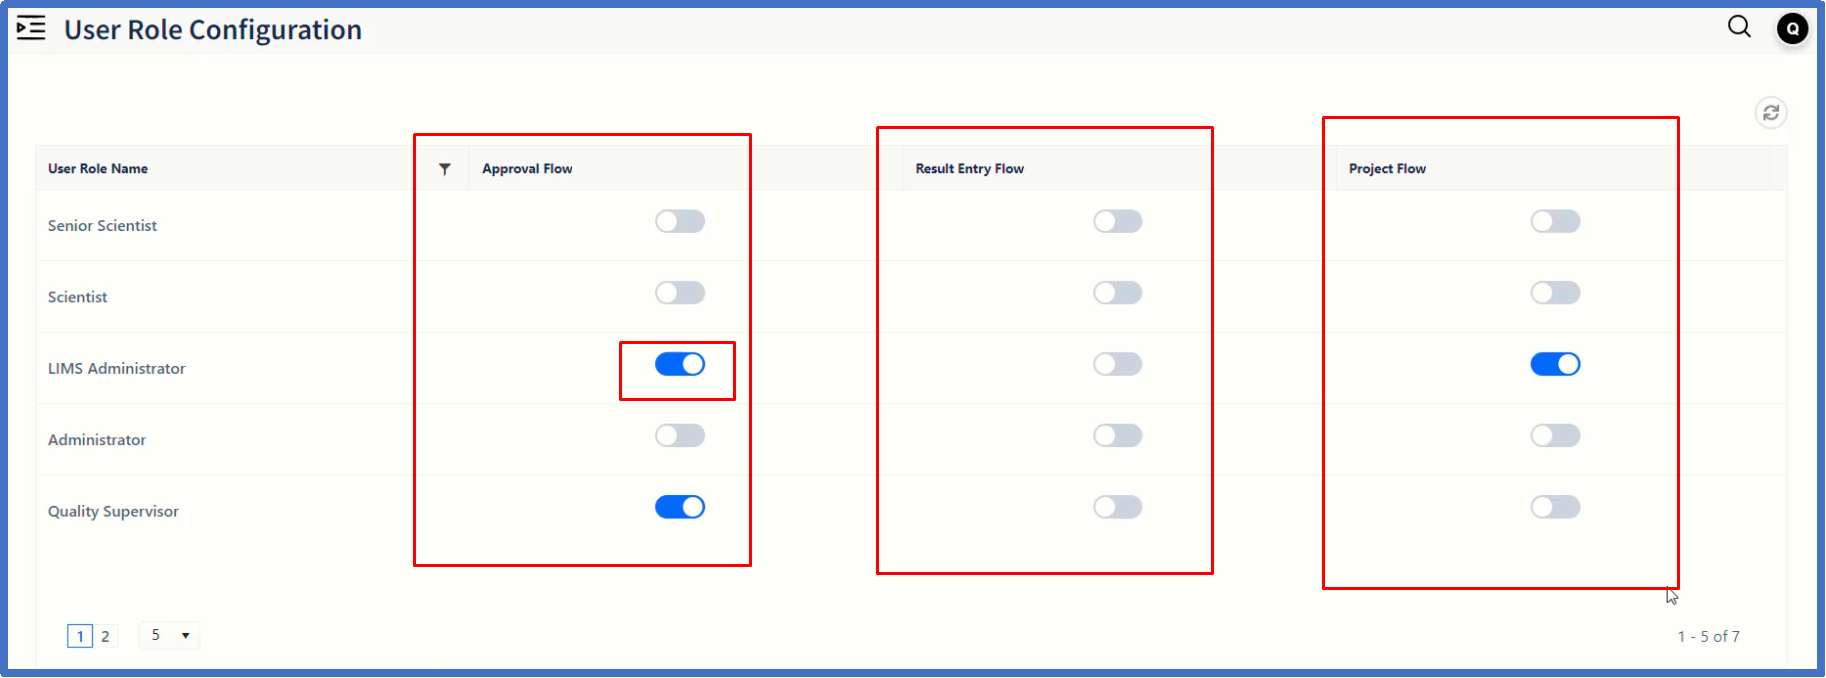
click on ' Designation' page item under User Management submenu under Master module.

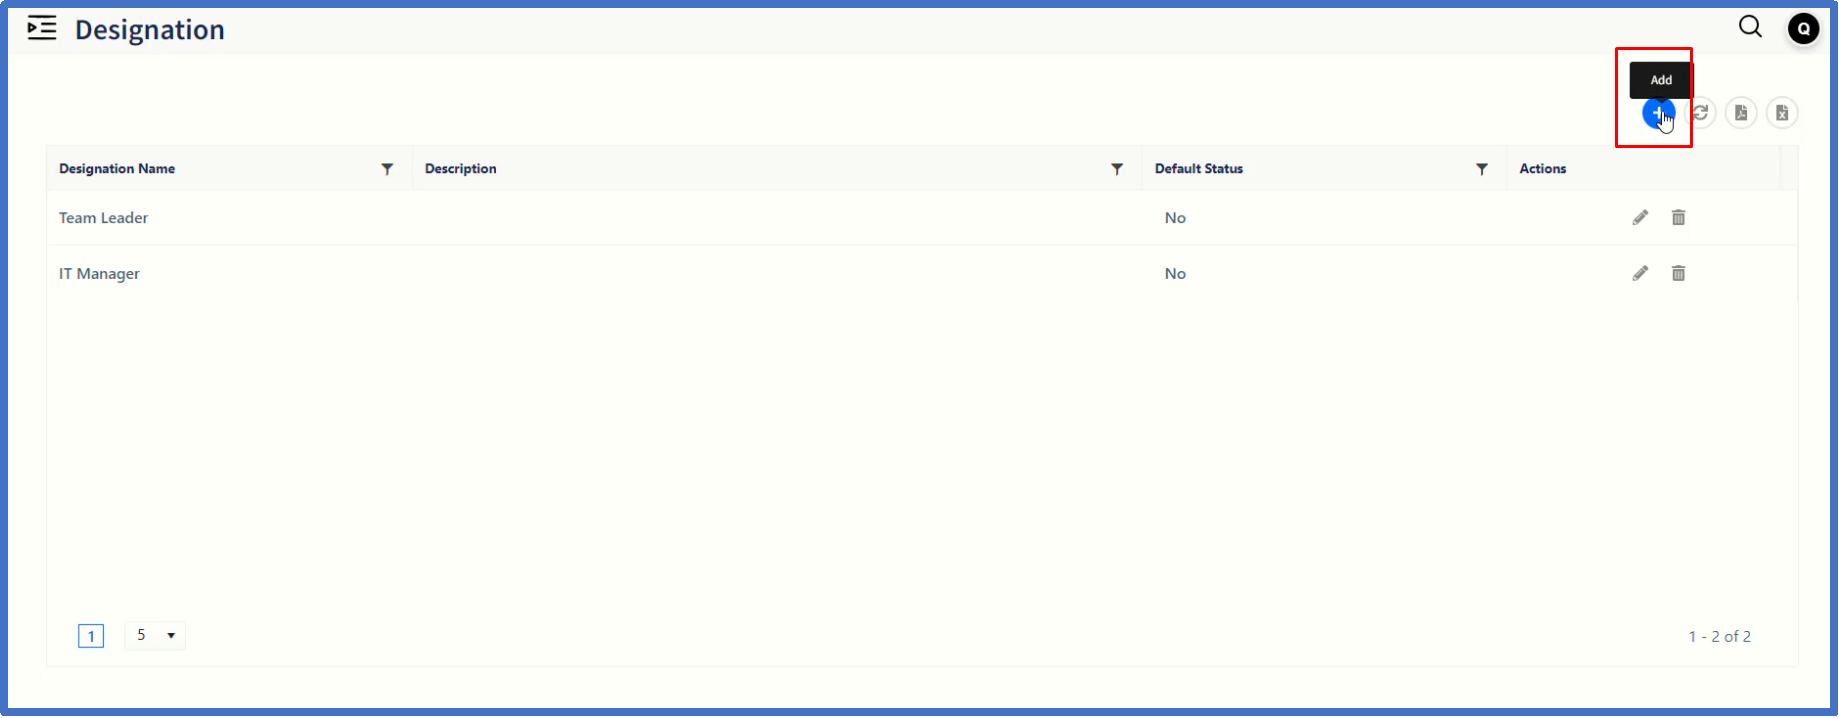
On Designation page, the list of designations already created will be displayed.
Click on + icon to add a new designation.
On Add Designation dialog window, enter valid values in the fields.
Click on ' Save' button after completing the entry of values.

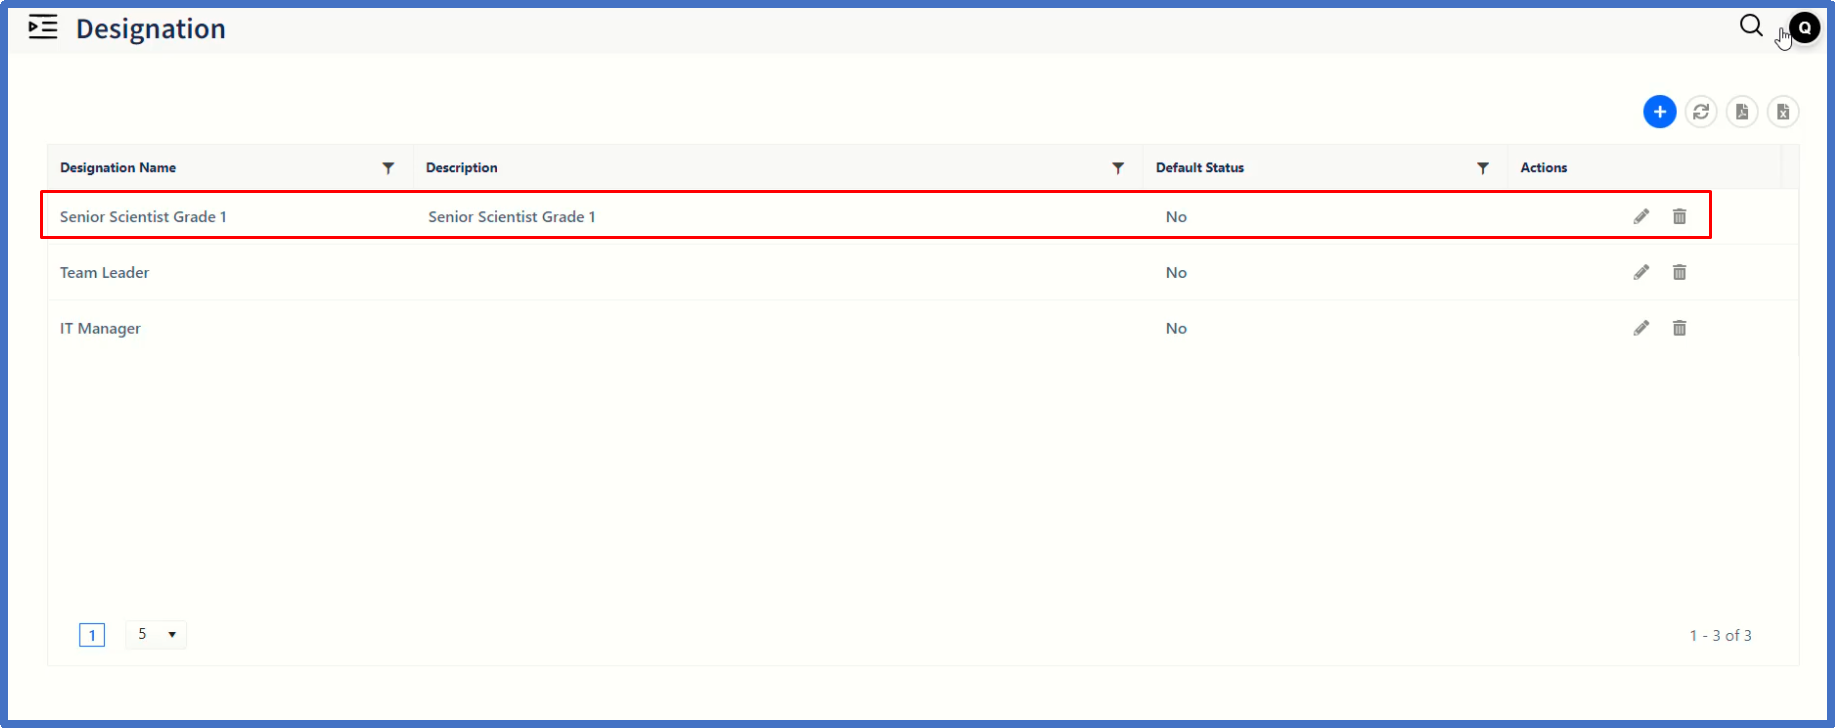
The newly-created Designation will be listed in Designation page.
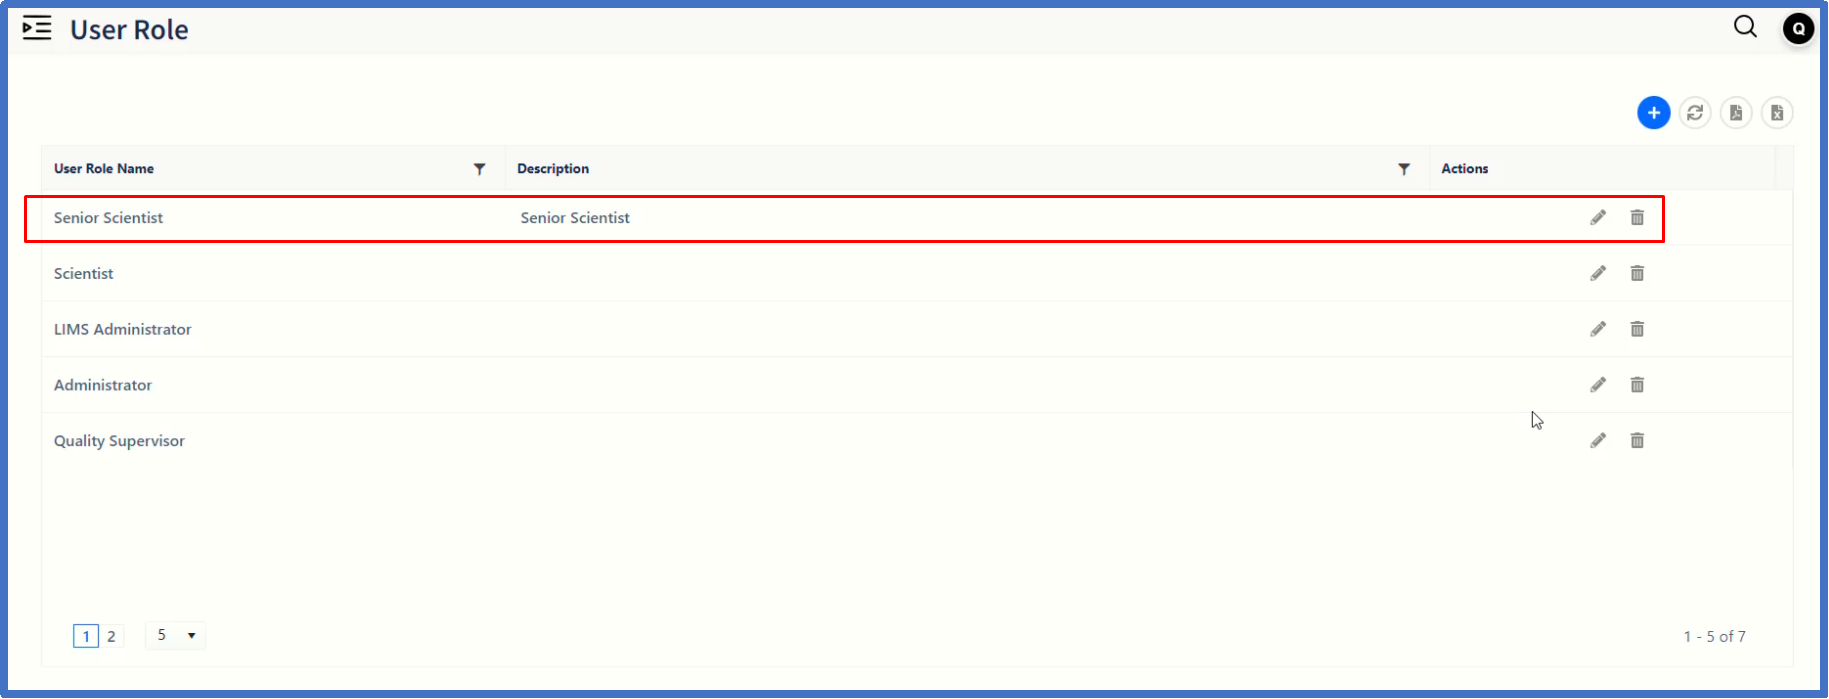
Let us move on to configure User role by clicking ' User Role' page item.

On ' User Role' page, the list of user roles already created will be displayed.
Click on + icon to add a new user role.

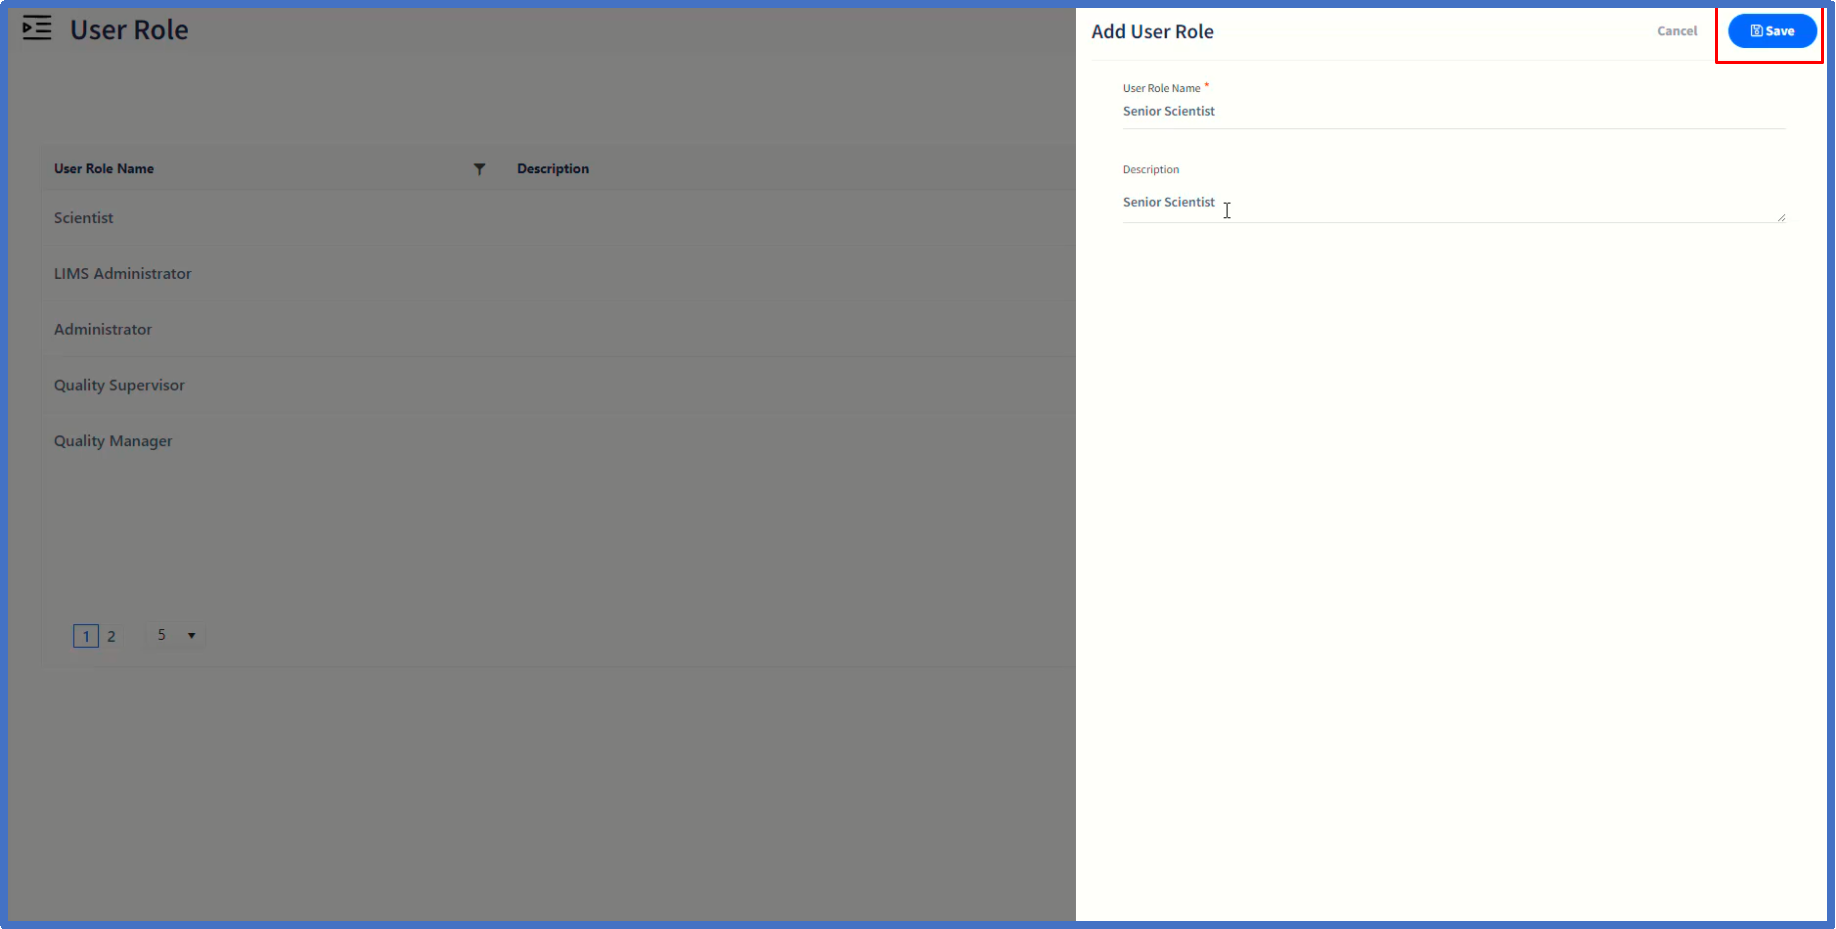
On Add User Role dialog window, enter valid values in the fields.
Click on ' Save' button after completing the entry of values.
The newly-created User role will be listed in User Role page.
Now we need to configure Password policy applicable for the newly-created User role.

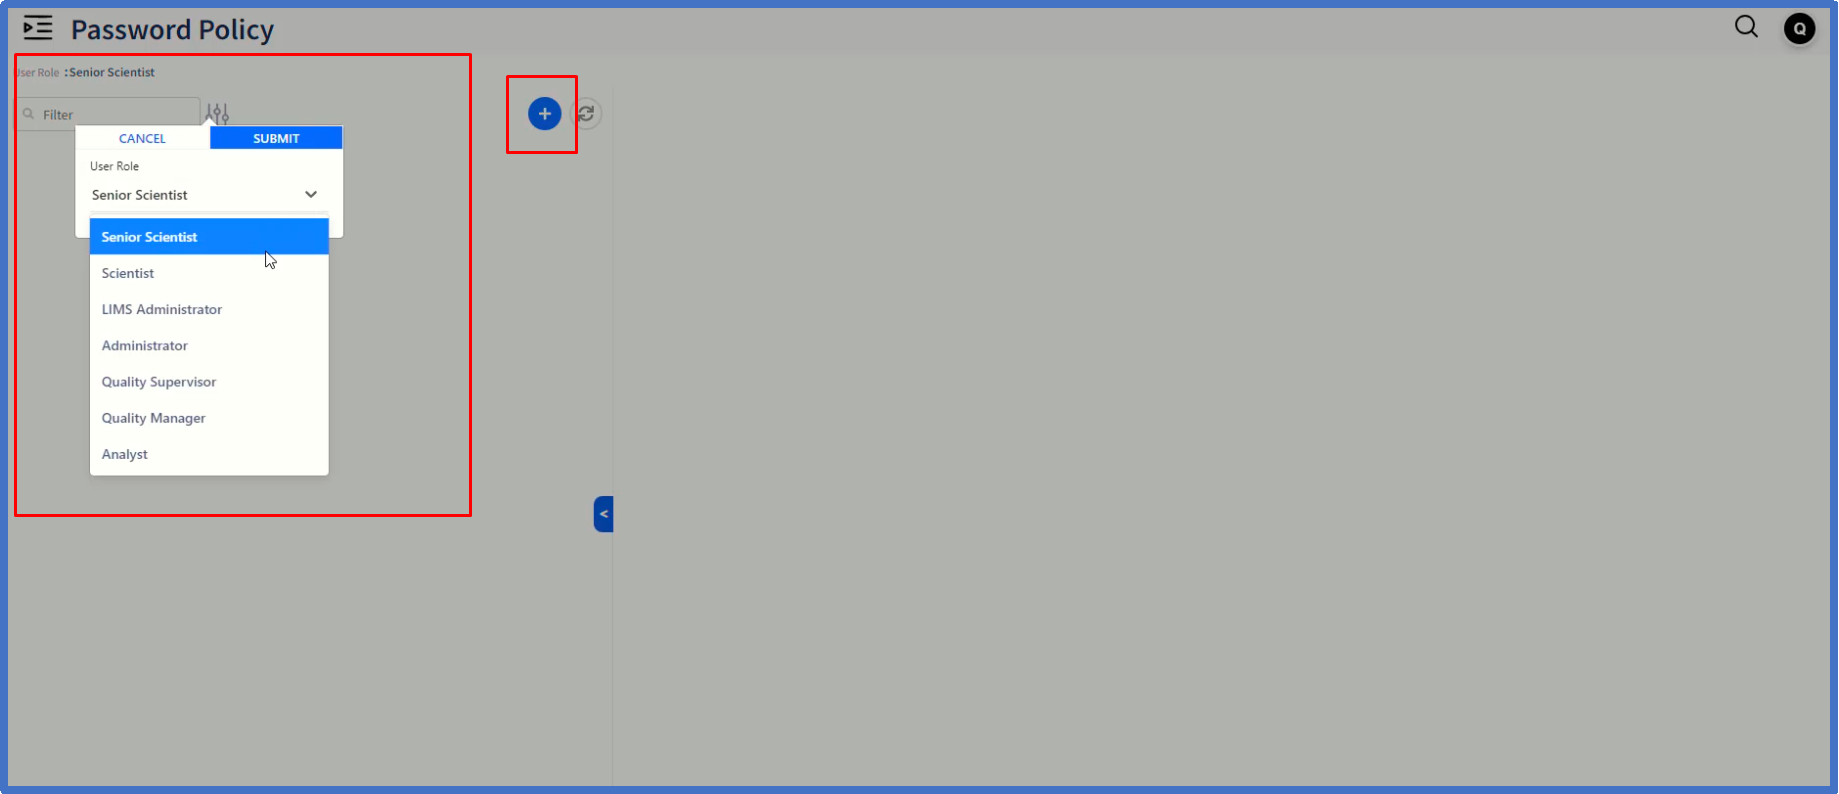
Click on ' Password Policy' page item, which will navigate to Password Policy page and displays the password policy records already created.
To create a new password policy, click on filter icon and select the user role first.
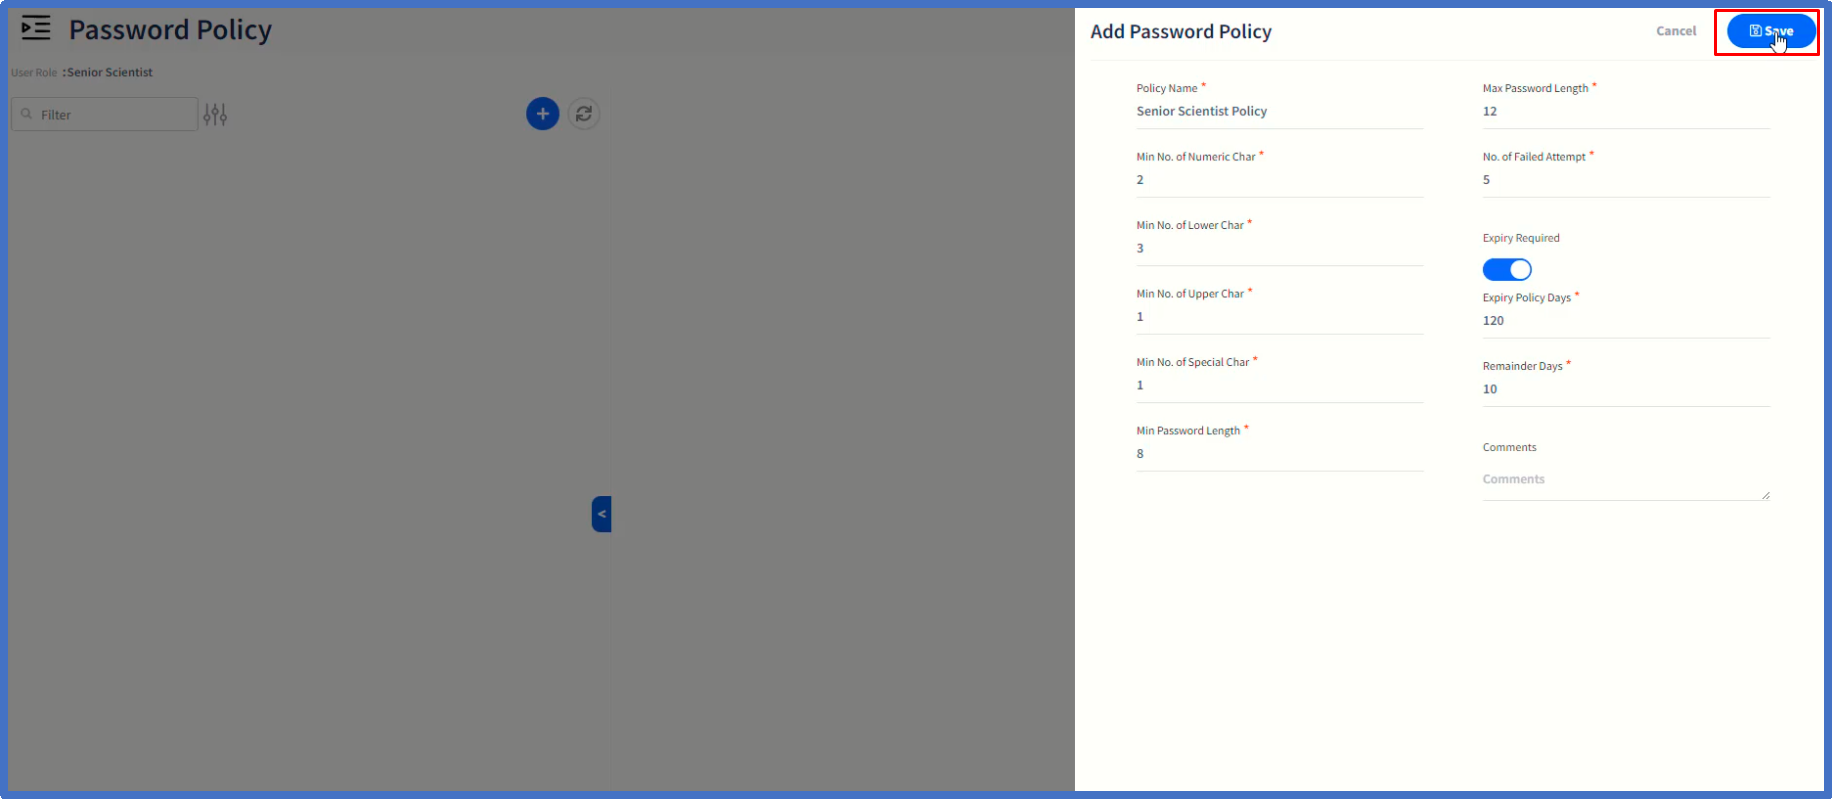
Click on + item which will open up ' Add Password Policy' dialog window.
Enter the Policy Name followed by other policy requirements as shown. This way you can optionally setup a password policy ranging from either simple one to more complex one.
Click on ' Save' button after completing the entry of values.
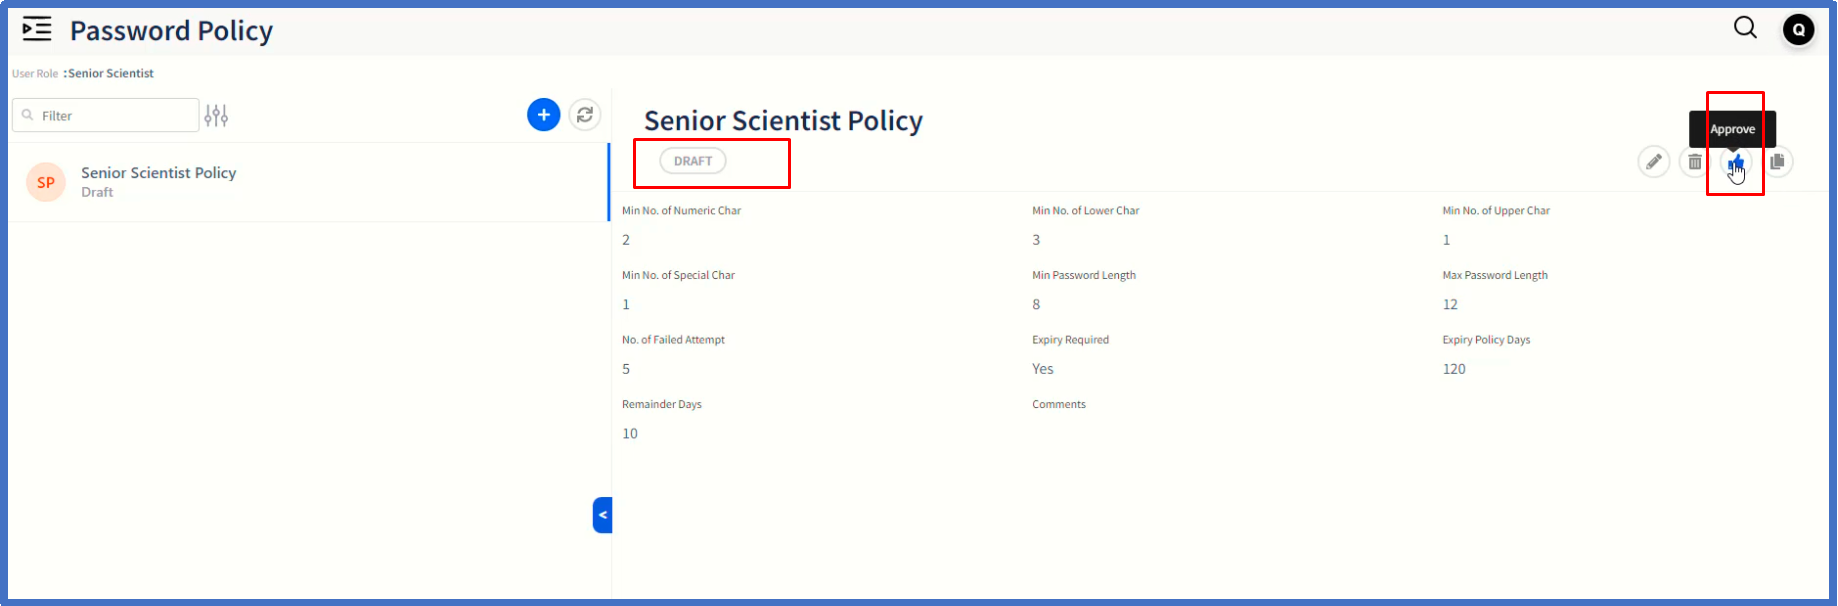
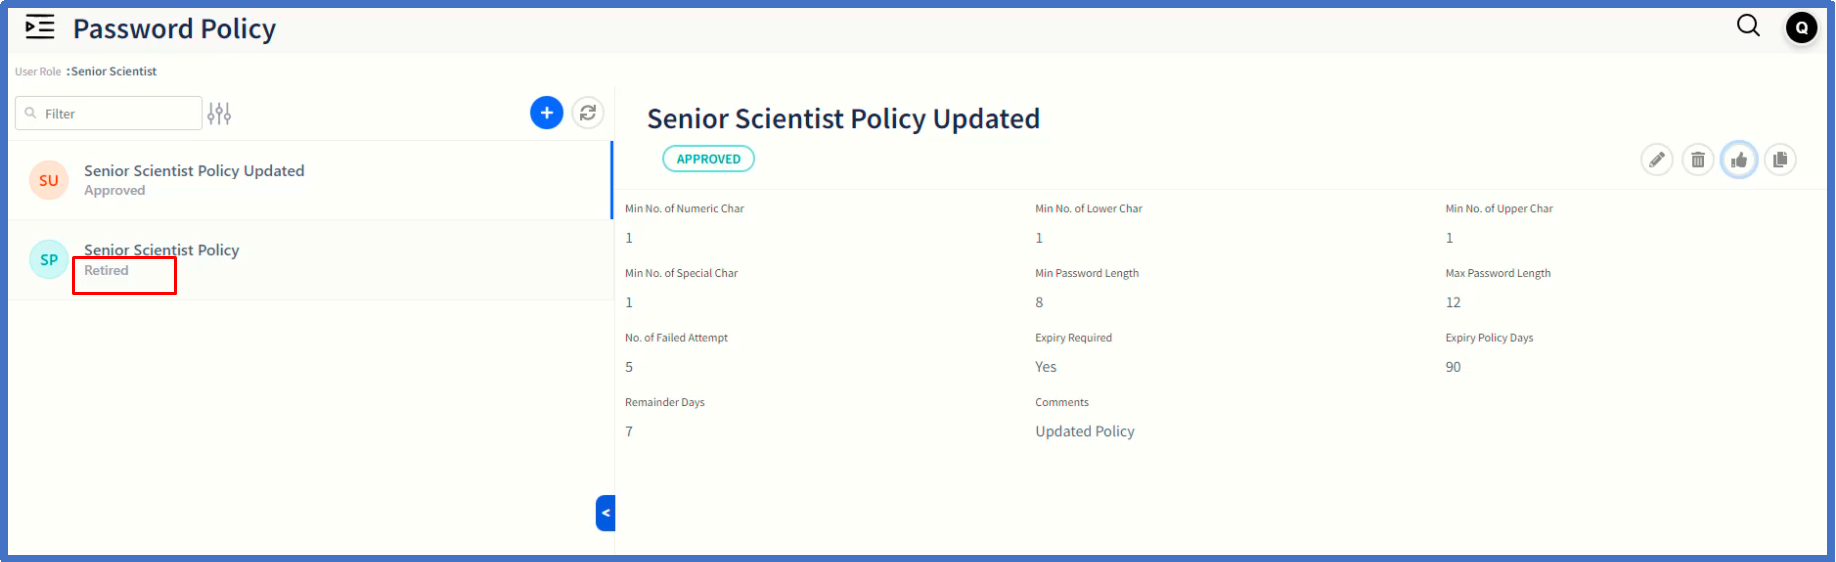
The policy thus created is in ' Draft' status.
Click on ' Approve' icon to change the status to approved one.
If you want to create a new password policy superseding the already-approved one, click on + icon.
Follow the same above-mentioned procedure to create this new policy.
When you approve this newly-created policy, the already existing policy will be automatically retired, that is, its status will be changed from Approved to Retired.
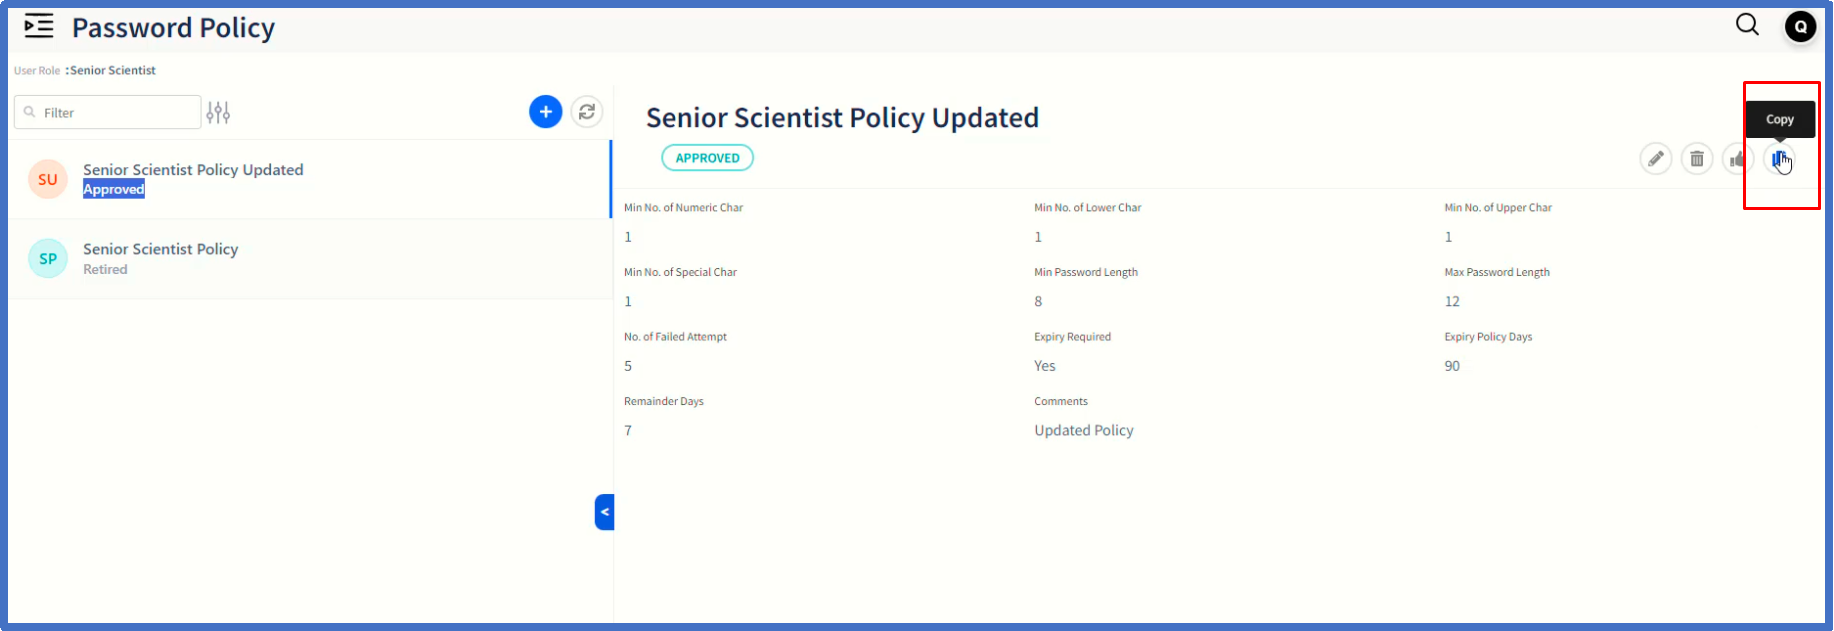
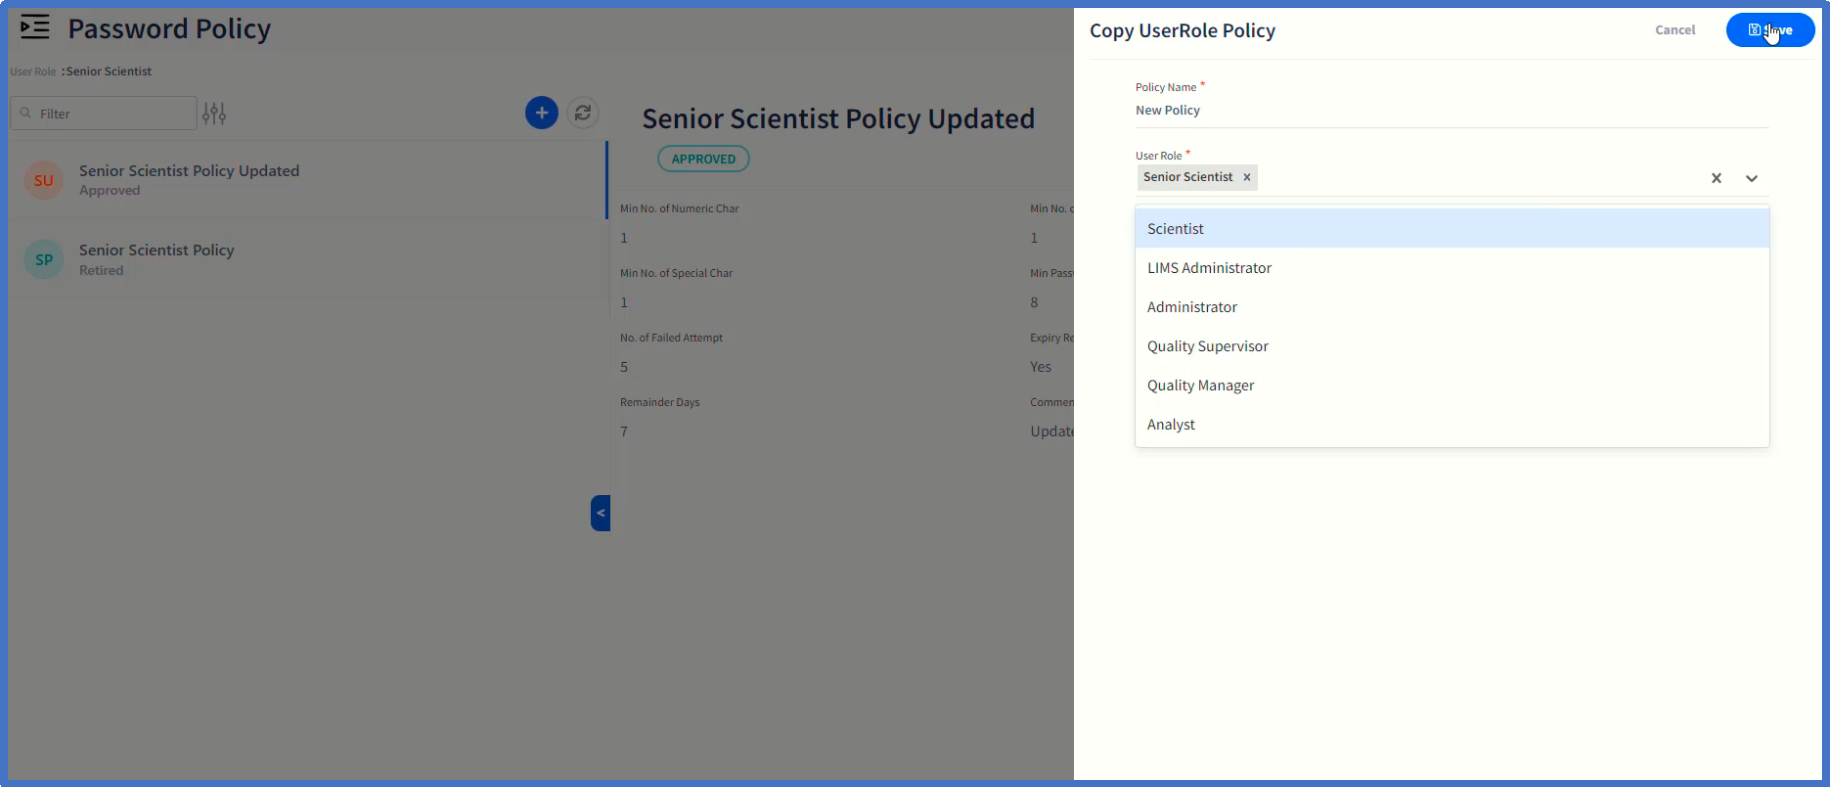
There is an option to copy the existing policy to the new one and make modifications.
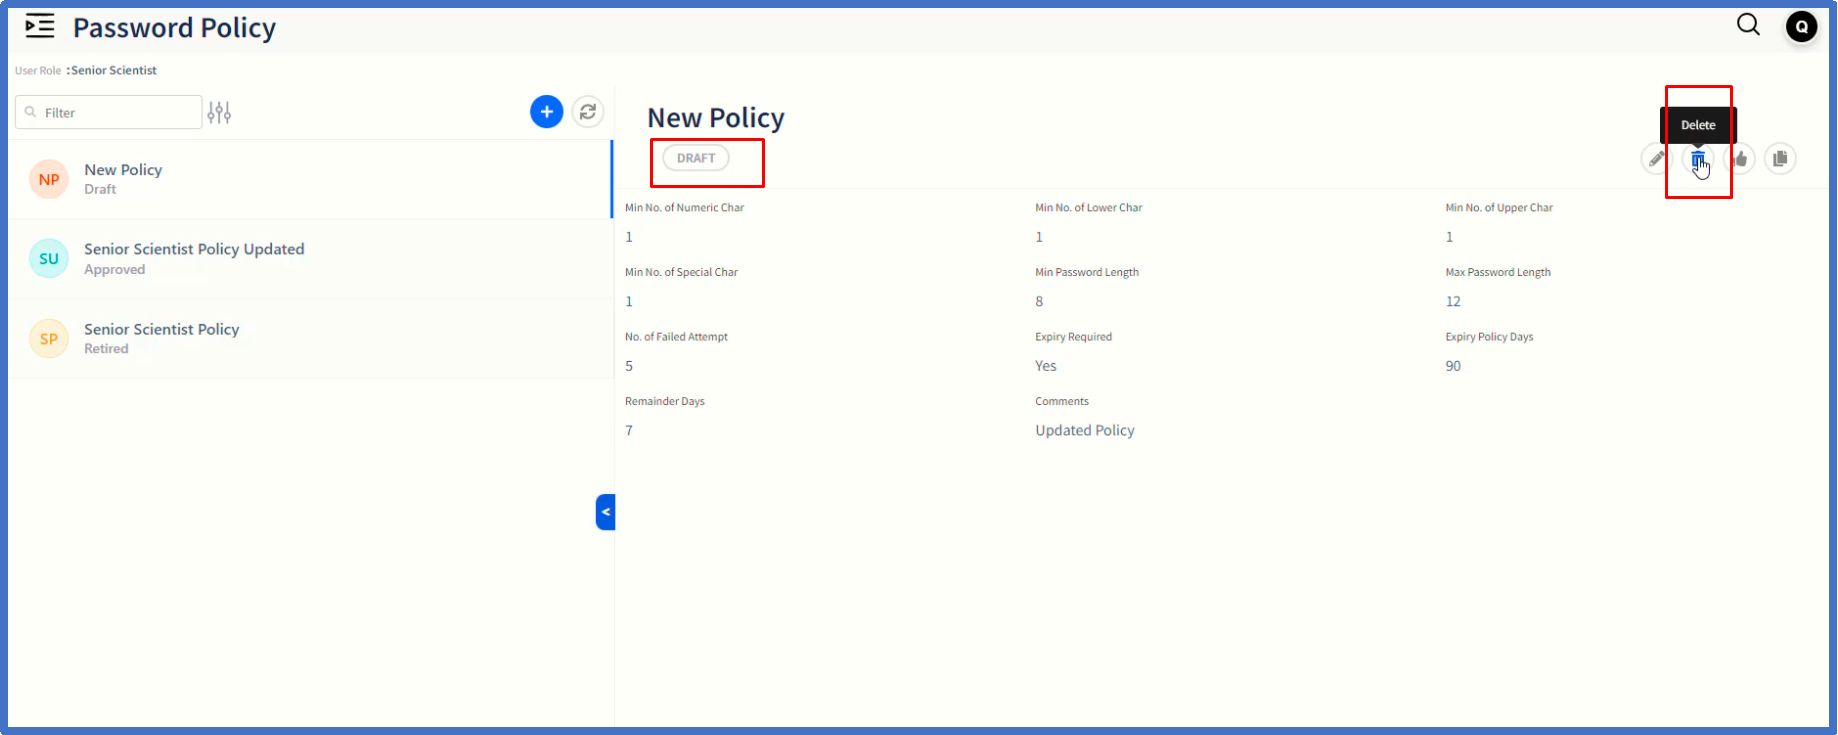
The delete option will work only on the policies which are in ' Draft' status and not ' Approved' ones.
Let us move on to the next step, that is, screen rights configuration to the user roles.
Click on ' Screen Rights' page item.

On the Screen Rights page, first select the user role by clicking on Filter icon.
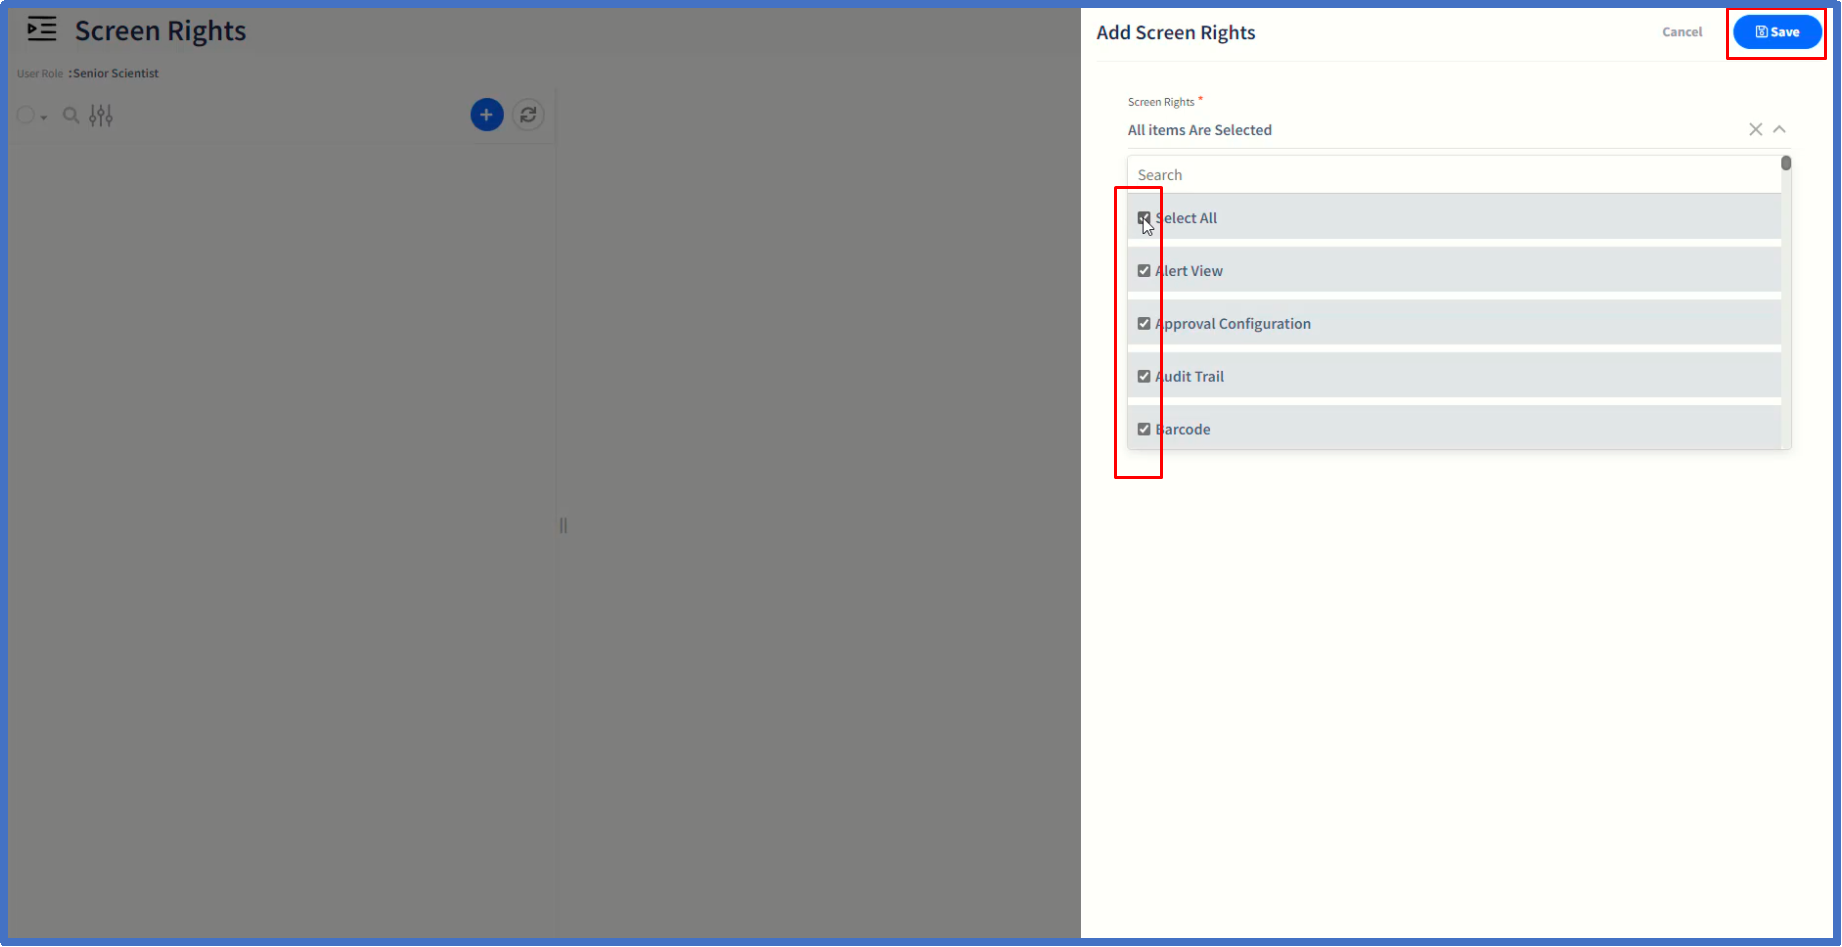
Click on + item which will open up Add Screen Rights dialog window.

Select either one or multiple roles or choose Select all option.
Click on ' Save' button.
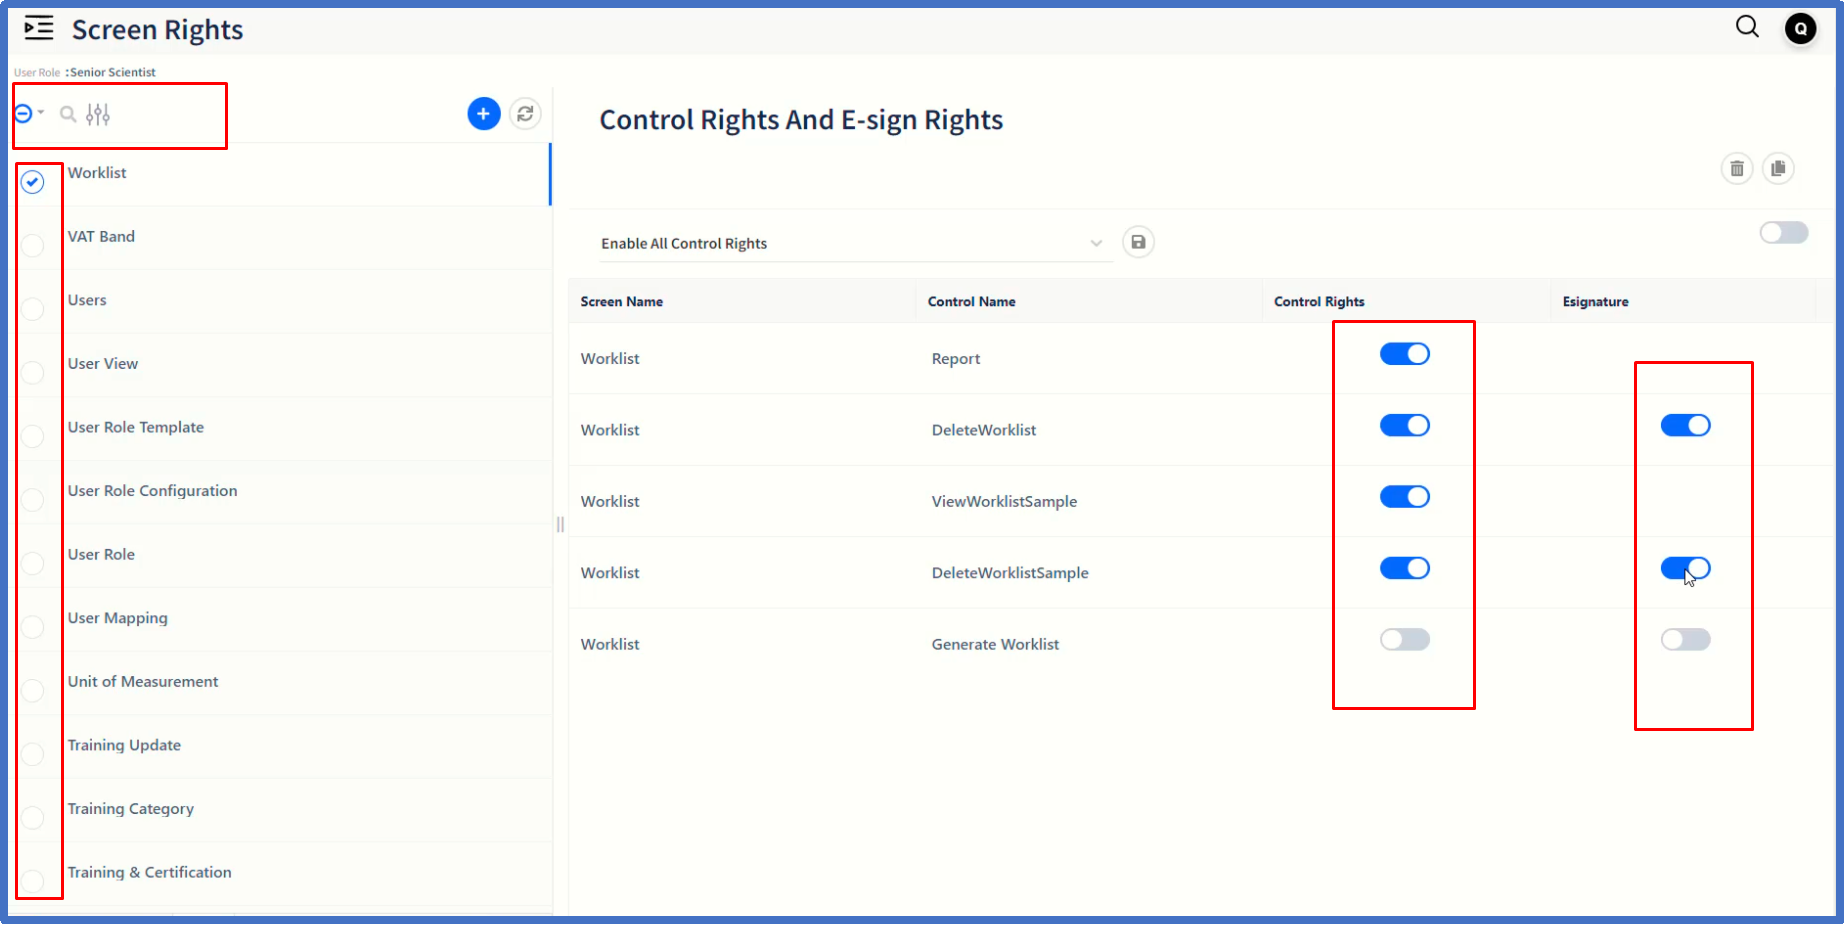
On the left hand panel, the list of selected screens will be displayed for selection.
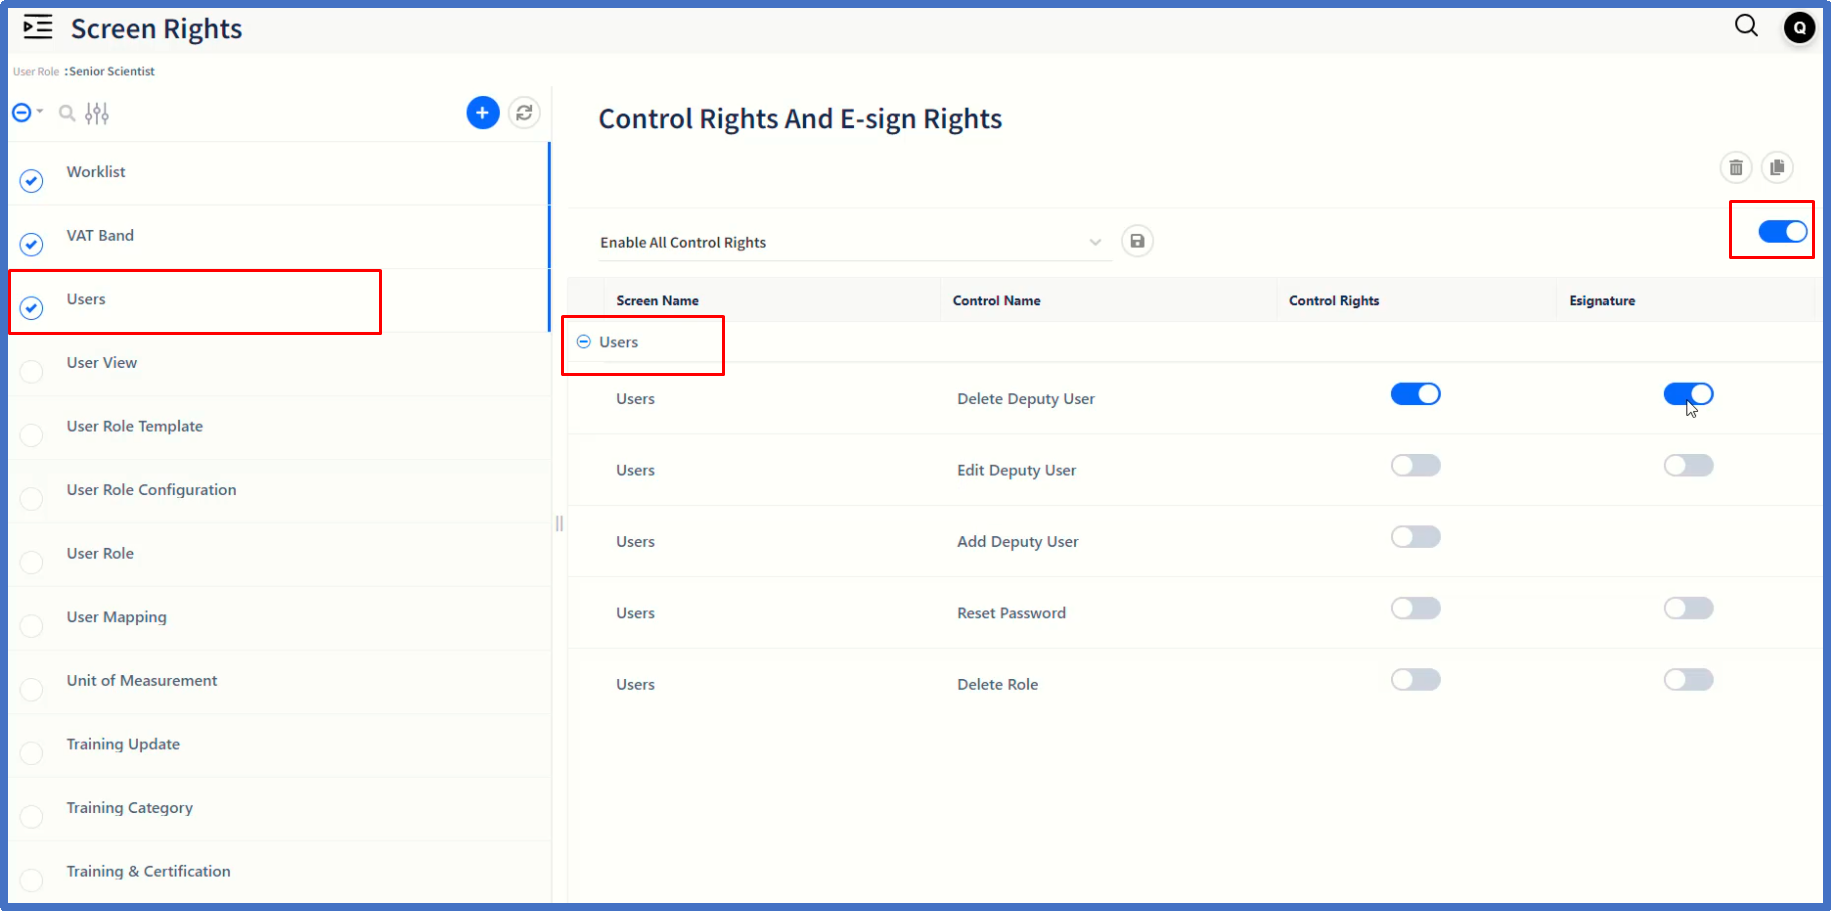
On the right hand panel, the screens and control names will be displayed with option to select or deselect the control rights and e-Signature.
Select or deselect the control rights and or e-signature option for the screens.
There is an option to group screen-wise controls for easy identification and selection.
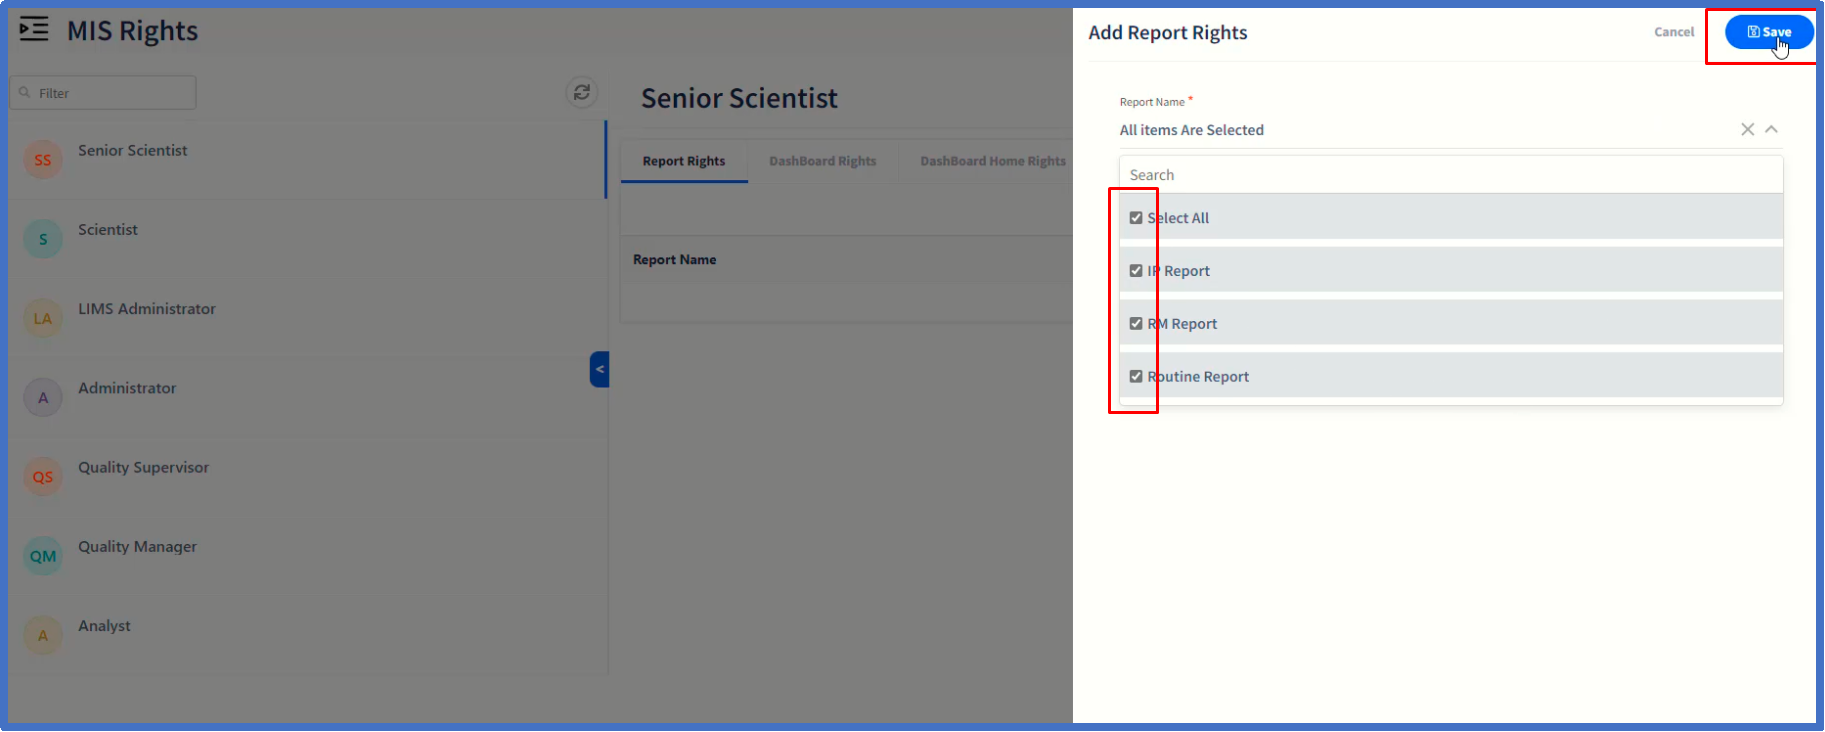
Let us proceed now to MIS rights by clicking the page item under User Management submenu.

Select the user role for which MIS rights needs to be assigned.
On the right hand panel, there are various subtabs such as Report rights, Dashboard Rights, Dashboard Home rights, Alert rights and Alert Home rights.
Choose the tab, click on ' Report Rights' link which will open-up the respective rights dialog window.
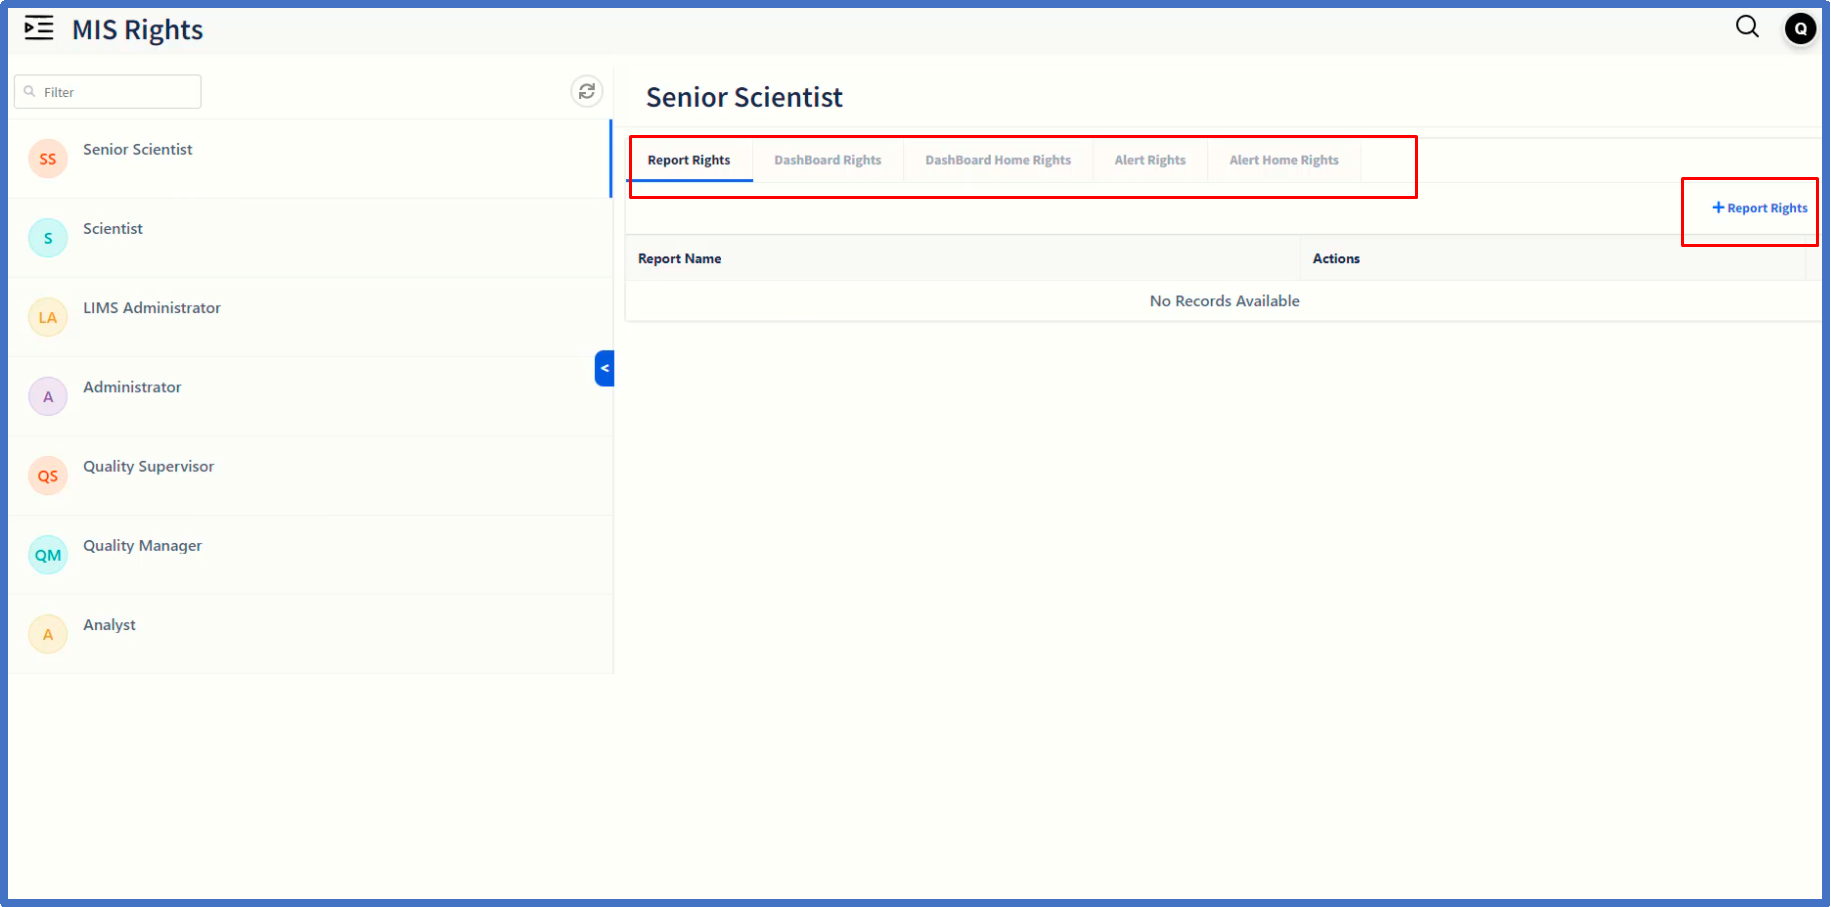
Choose the rights from the list of values and then click on ' Save' button.
Repeat the process for other MIS rights the same way as described.
Having completed MIS rights, let us proceed to User Role configuration by clicking on the same page item.
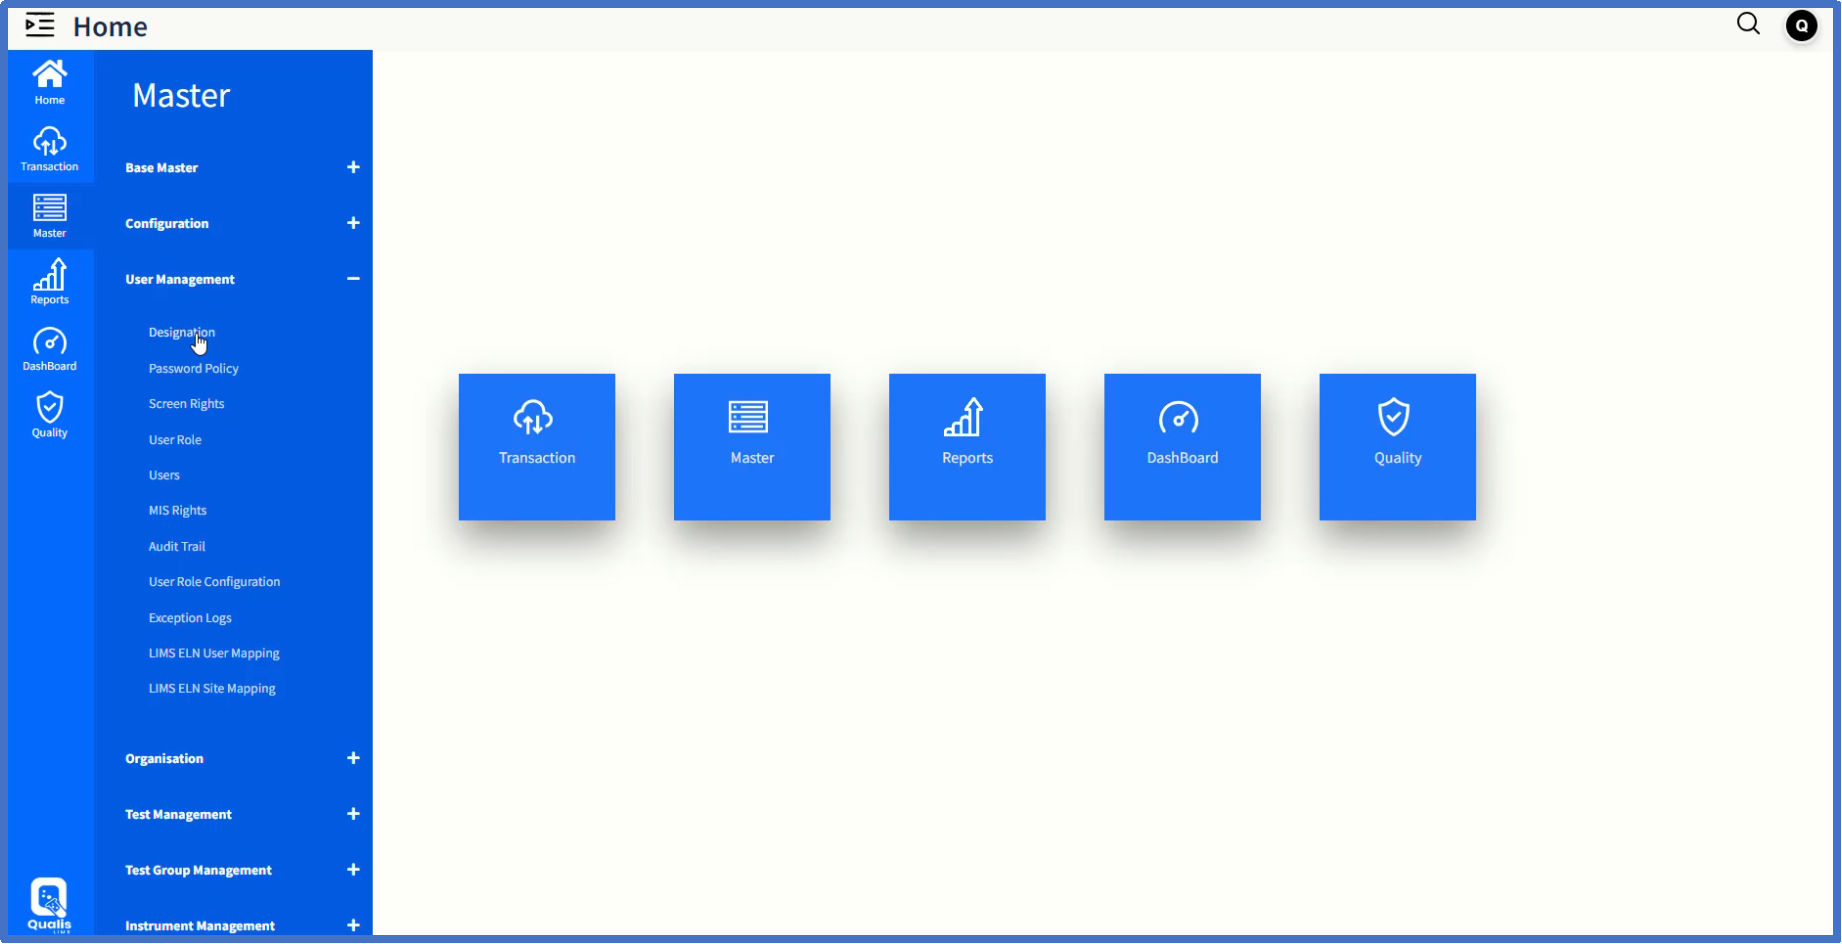
On the user role configuration page, the ability to perform approval, result entry and project-related tasks can be provided for different user roles.
It can be done by either enabling or disabling the options by slider controls.
Please note that there will be only one role that can be assigned with Result Entry Flow.
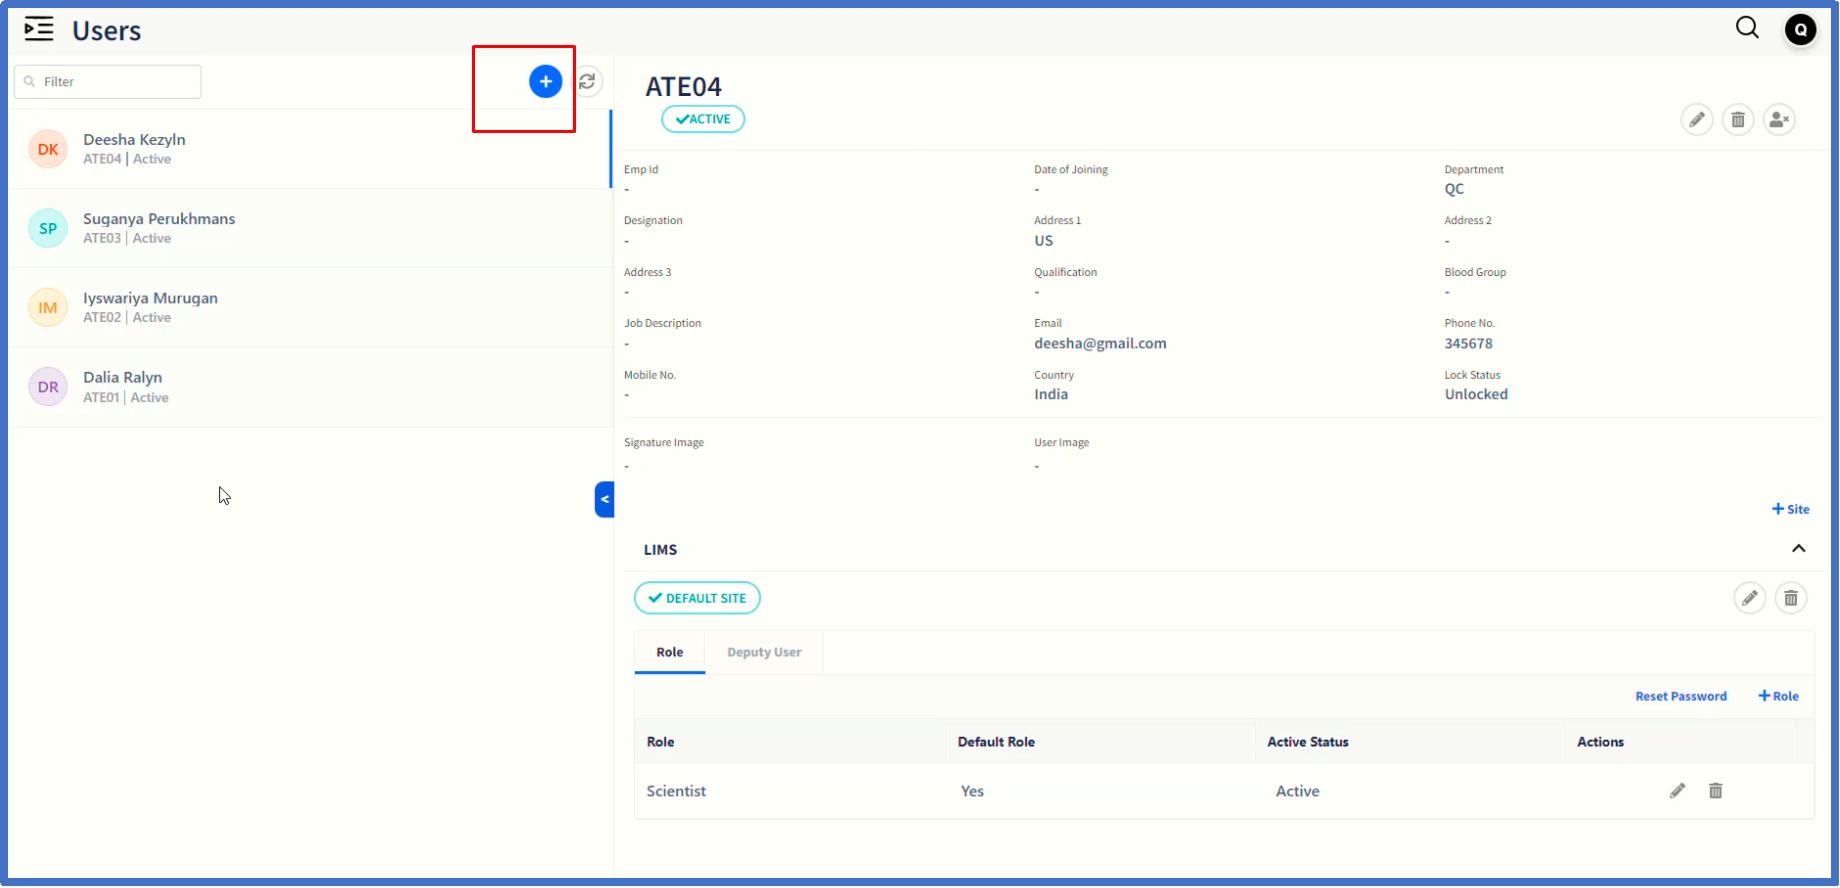
Let us now move on to create users by clicking on ' Users' page item.

The list of users will be displayed on the left hand side panel whereas the details about the users will be displayed on the right hand side panel.
Click on + icon to create a new user.
On the ' Add Users' page, enter valid values in the fields displayed.
There are also options to attach signature and photo image for the users.
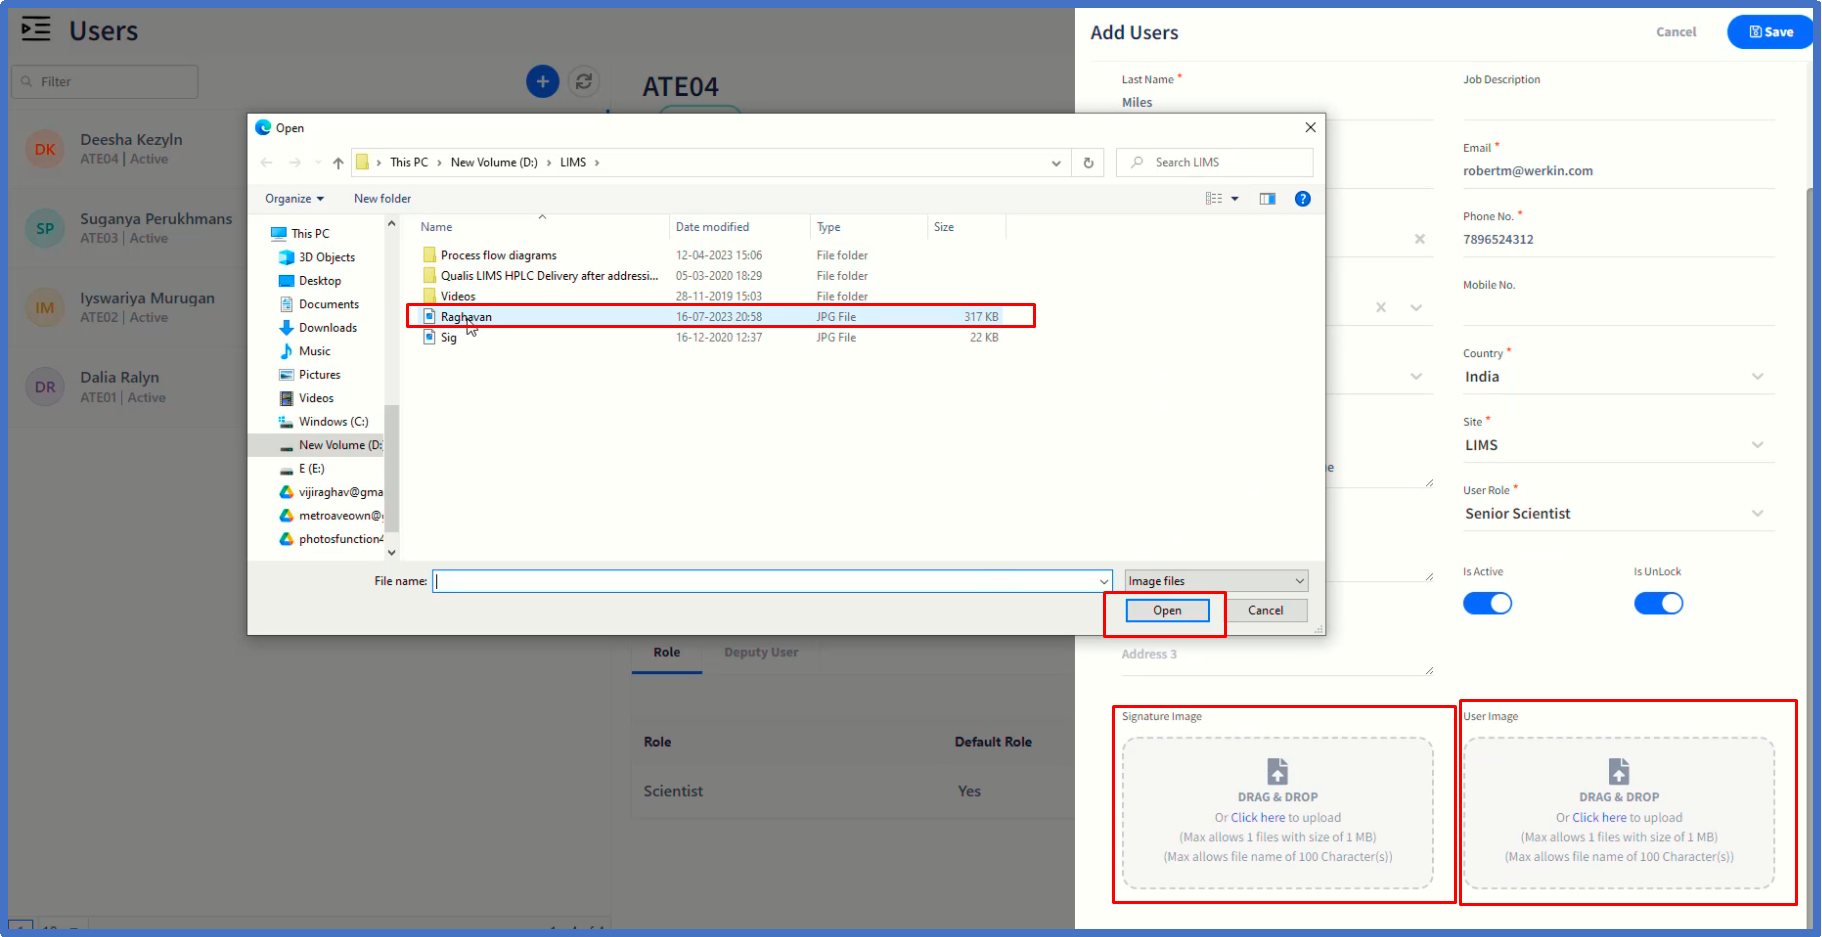
On completing the entry of the values, click on ' Save' button.
The newly-created user details will be displayed on the user home page.
There is an option to add this user to additional sites if required.
There are tabs for role and deputy user configuration.
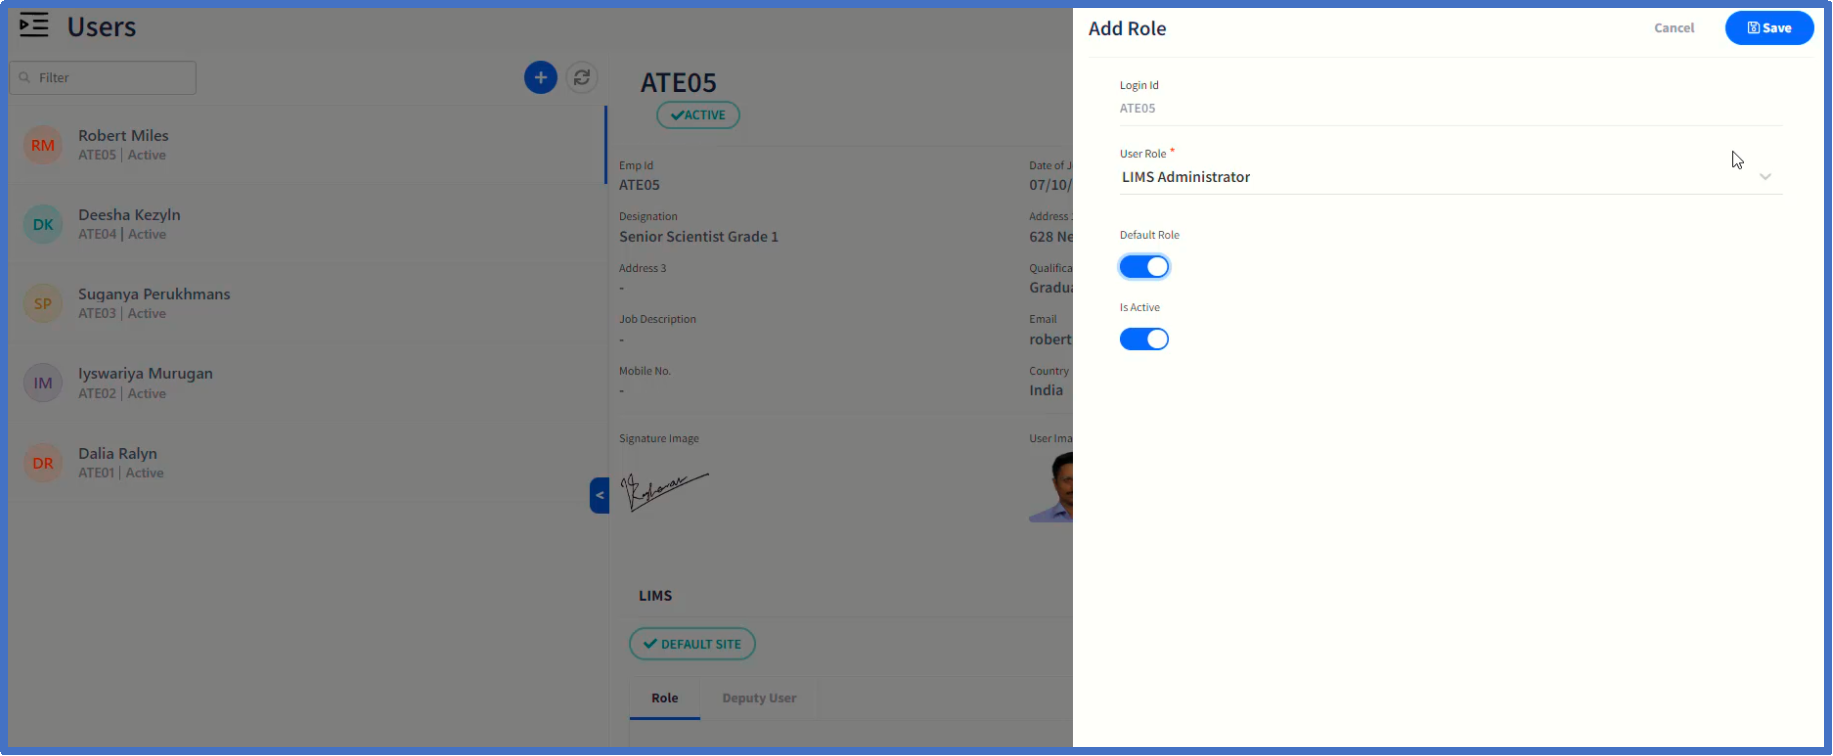
By clicking ' Role' tab, additional roles can be assigned for the user.
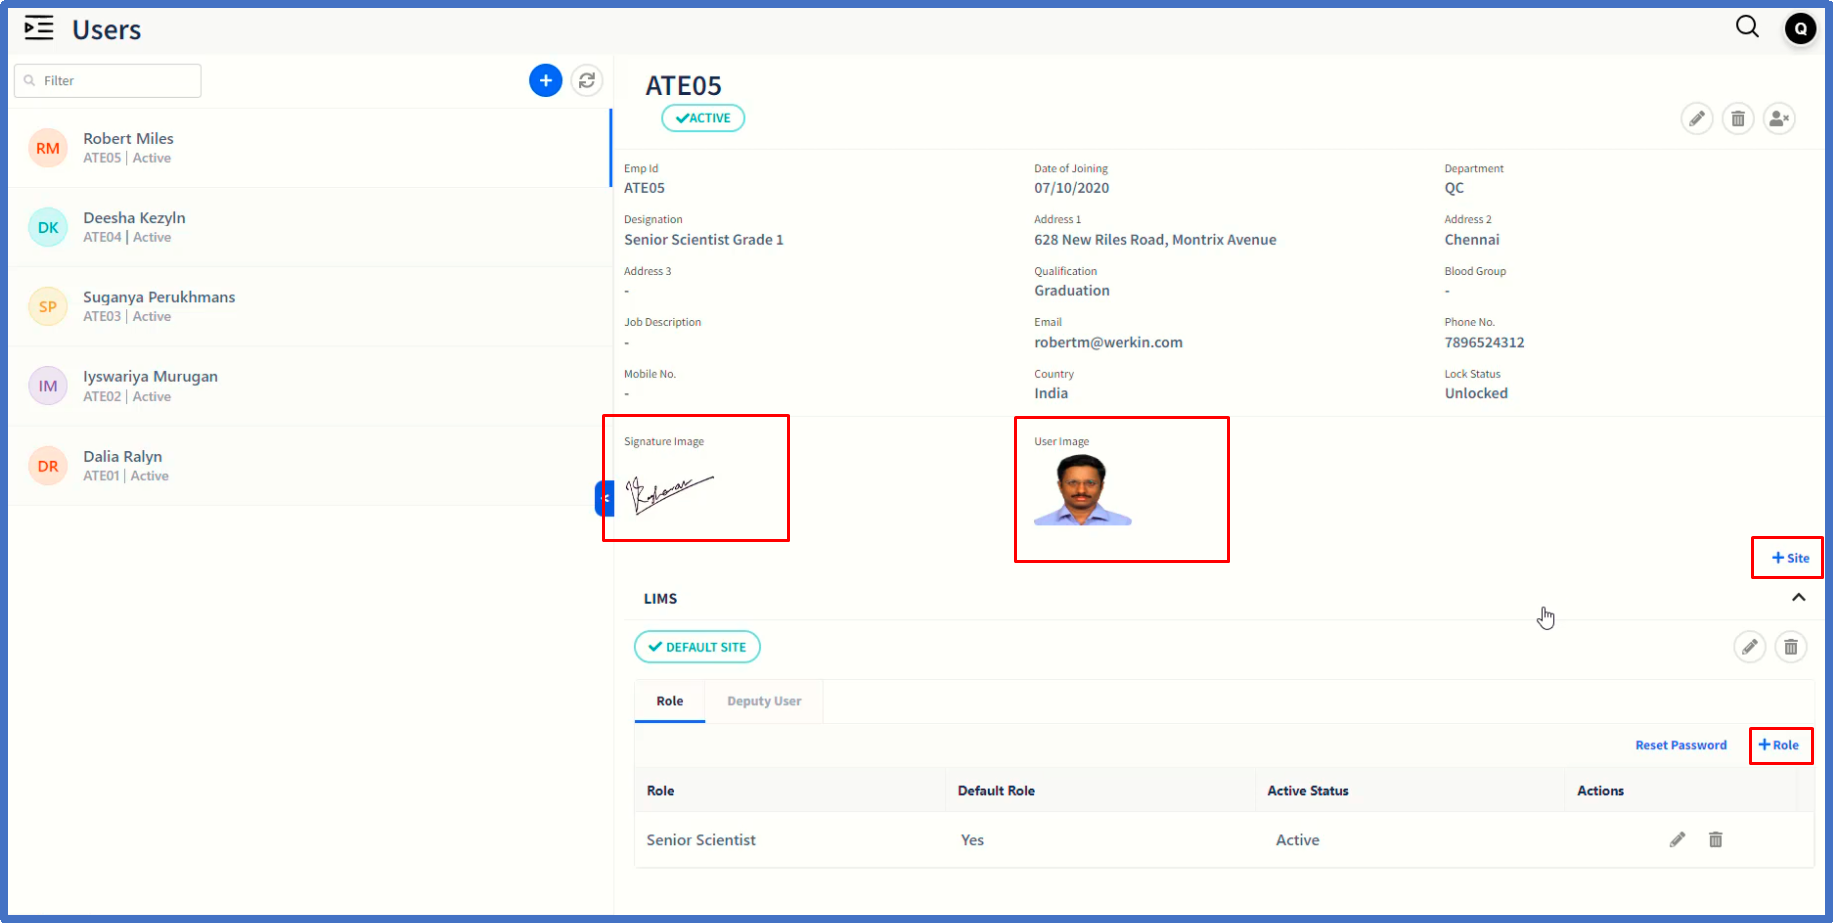

There is also an option to change the Default role for the user by clicking Edit icon.
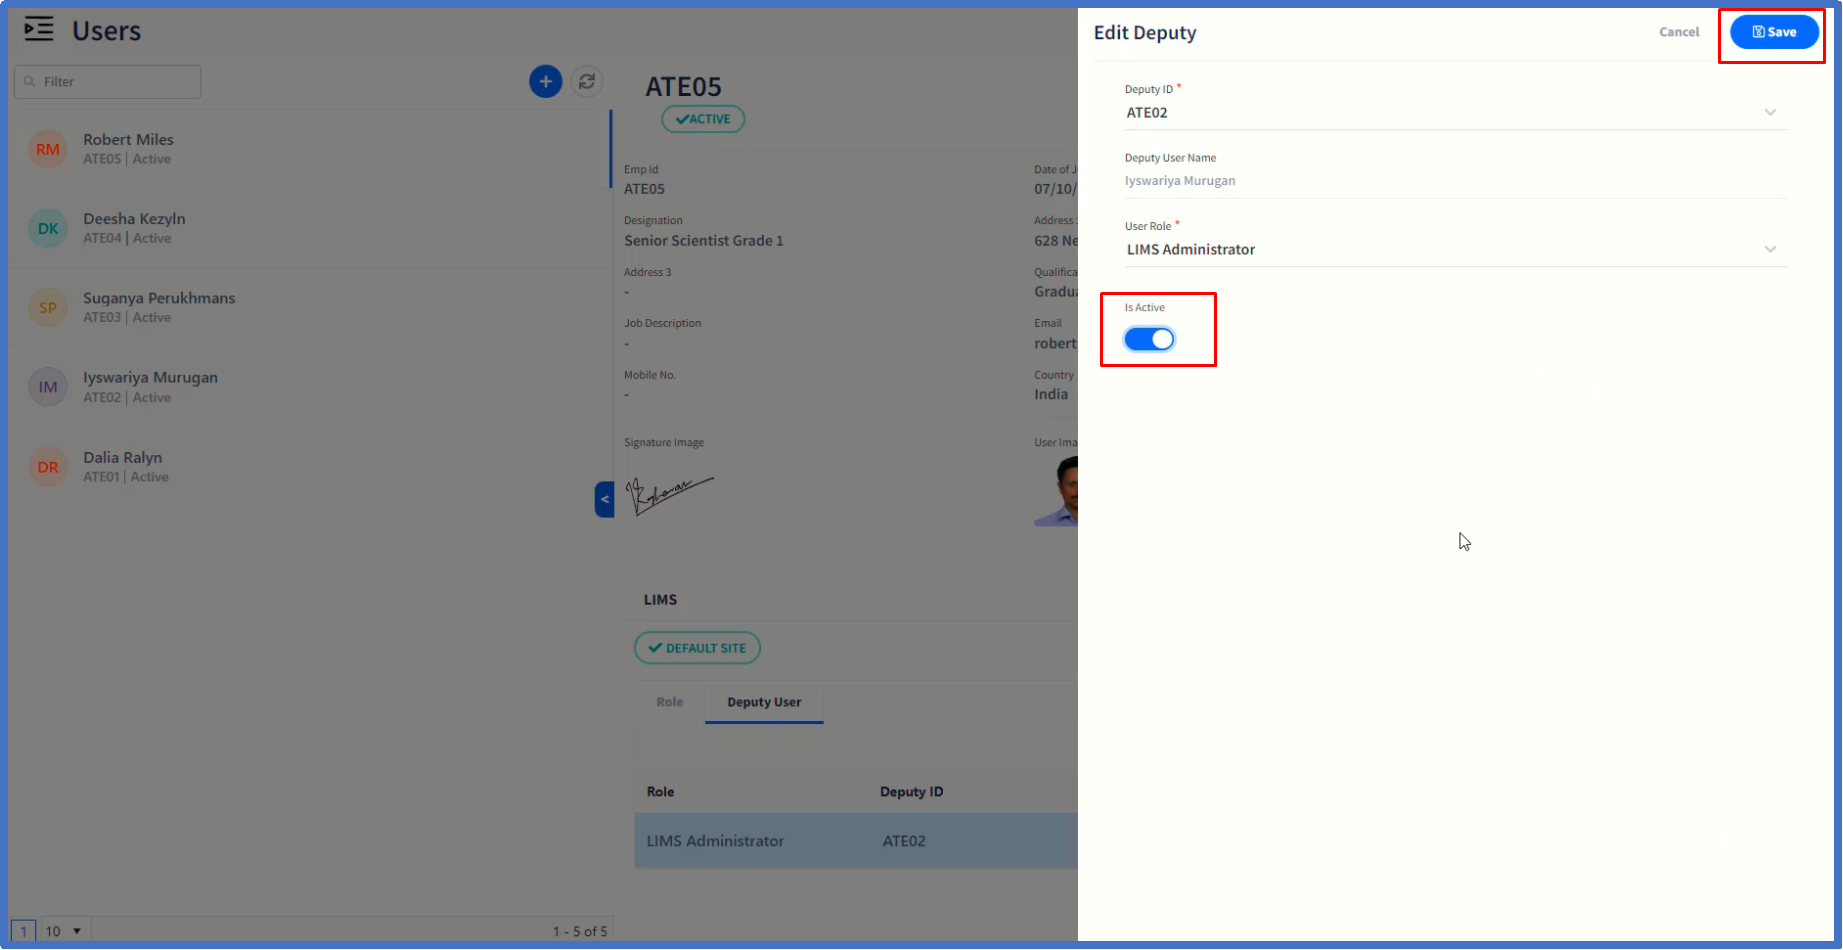
There is a facility to configure a deputy user for this user so that in the absence of the user, the deputy user attached can perform assigned actions such as approvals, etc.
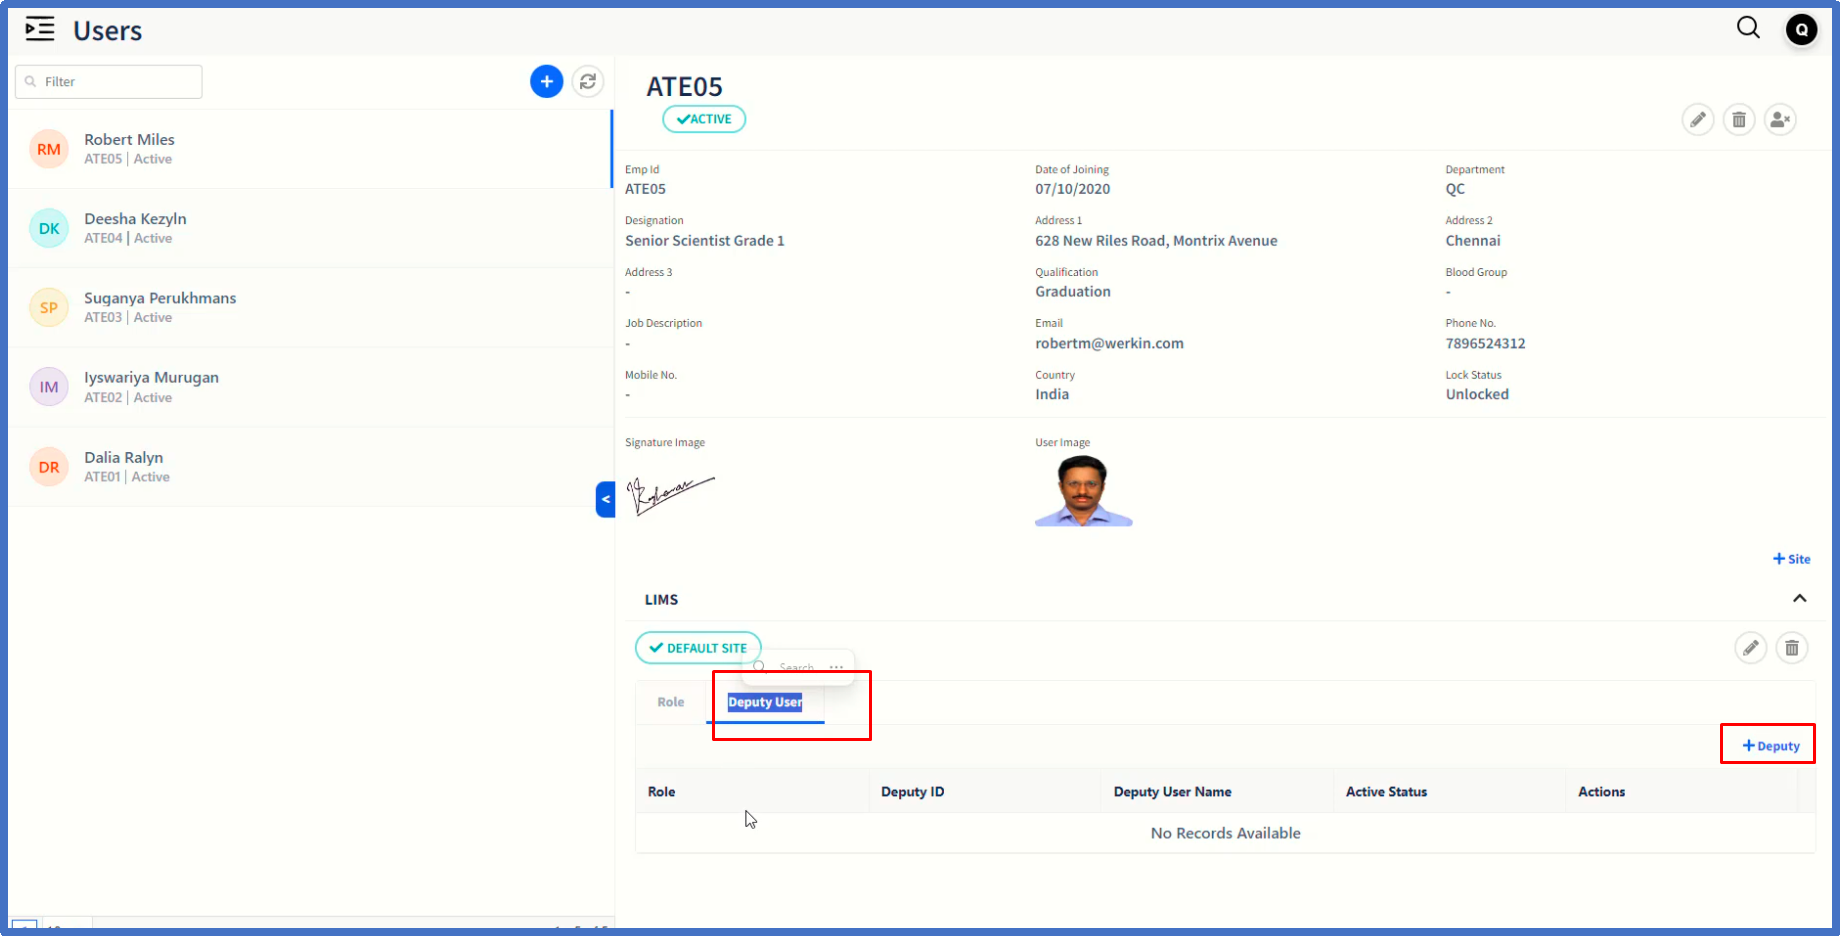
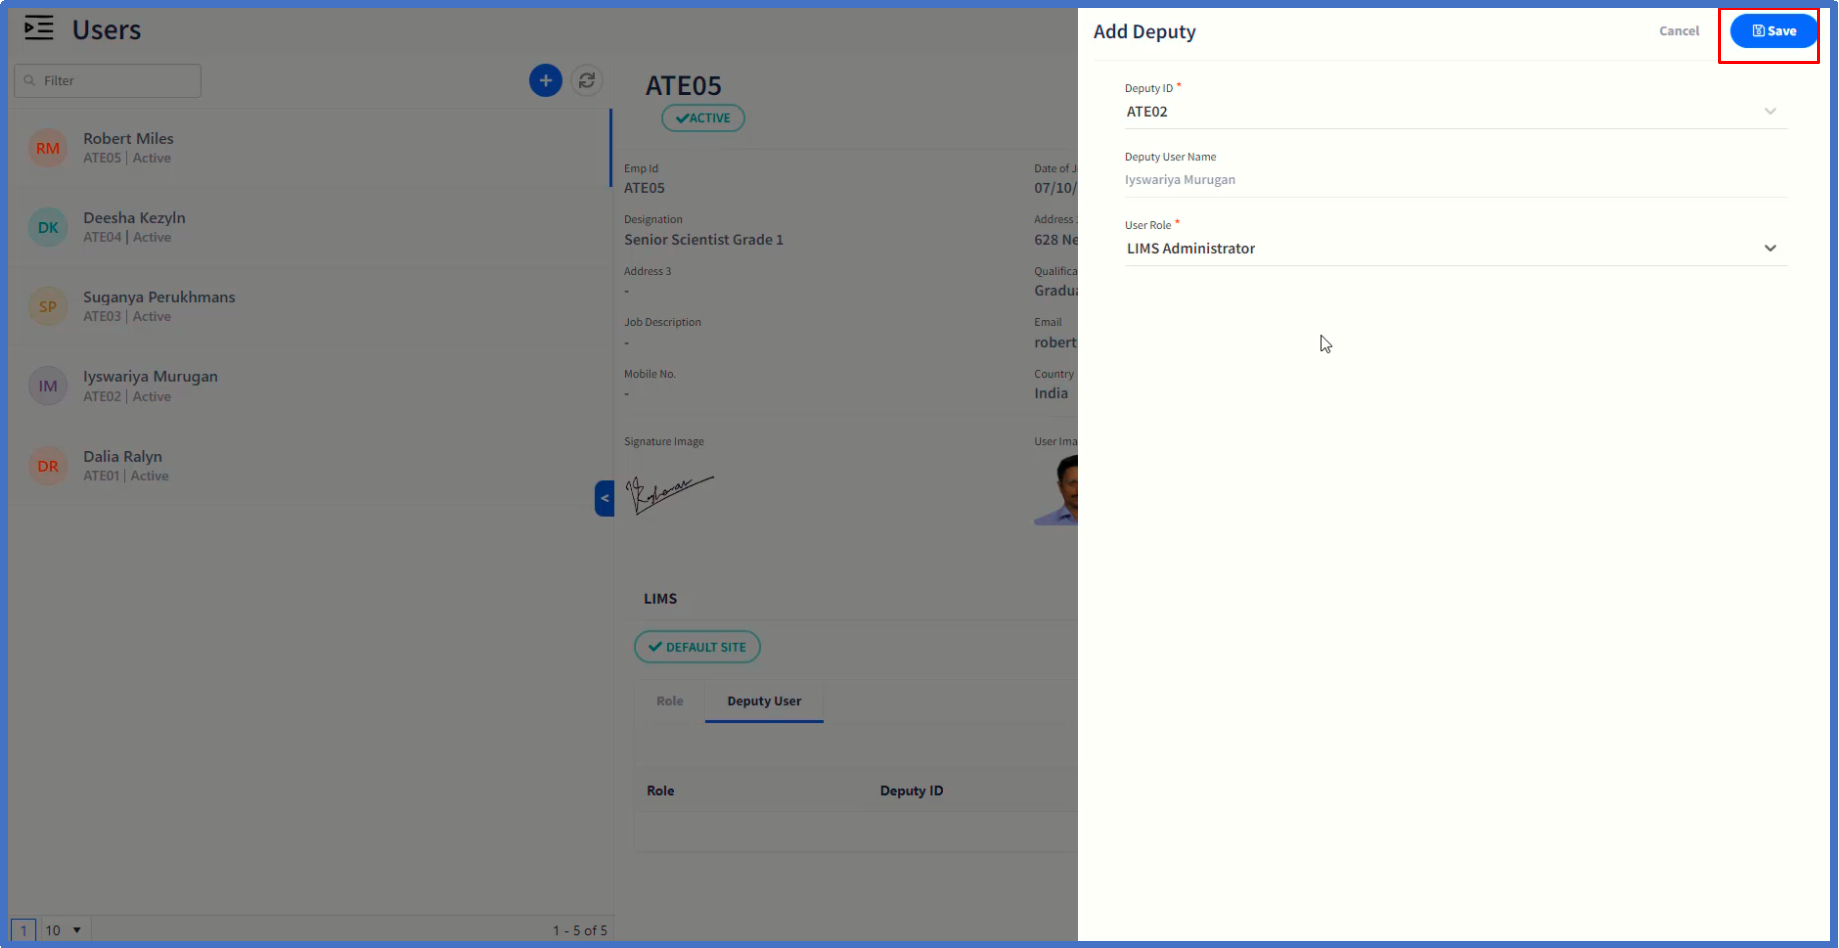
After choosing the option ' Is Active' for the deputy user, the same can be used for performing the tasks originally assigned for the current user.