Based on the template designed in the user role template screen you can define the approval flow stages in Approval Configuration screen. .
1.On the main menu, click  Configuration, and then click Approval Configuration. The Approval Configuration screen appears as shown in the figure:
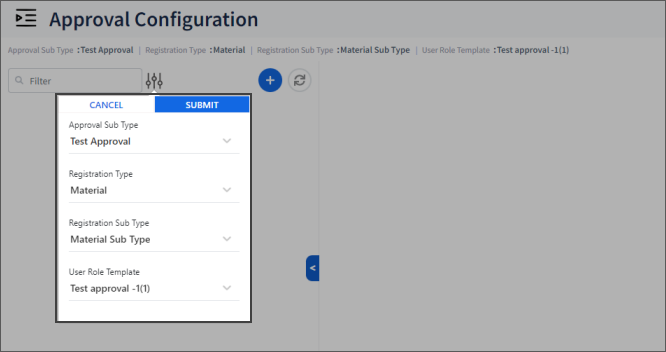
FIGURE: Approval Configuration Screen
2.In the filter  , in the Approval Sub Type field, select the module you want to create workflow. Select Registration Type and Registration Sub Type if prompted.
3.In the User Role Template field select the template. Template that is created and in approved state for the selected registration sub type appears here.e
4.Click SUBMIT. The approval flow for the selected type and sub types appears.
5.Click.  The Add Approval Configuration screen appears as shown in the figure:
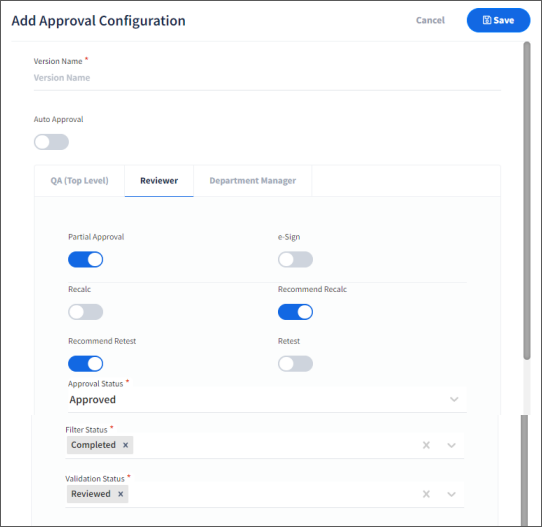
FIGURE: Add Approval Configuration Screen
6.In the Version Name field, type a name for the approval flow version.
7.Click to check the Auto Approval option to auto approve the sample upon accepting the sample in the Registration screen.
The roles available as per the User Role Template will appear as tabs in the approval route.
8.Set the approval flow options as required for the selected type for each role required in approval flow
9.Click to select the e-Sign check field, if e-signature is required to complete the approval stage.
10.In the Approval Status field, click and select the approval status which will be assigned to the sample after completing the approval stage by the selected role.
11.To set the Filter Status details for the selected role in the approval flow, select status values from the list. Selected status values will be available for filtering records for the selected role. Only records with selected status values will be available for the role.
12.To set the Validation Status details for the selected role in the approval flow, select status values from the list. Records with selected status values will be available for taking approval action to the selected role.
13.Repeat the steps for other roles in each tab.
14.Click Save. The approval configuration is saved as a draft as shown in the figure:
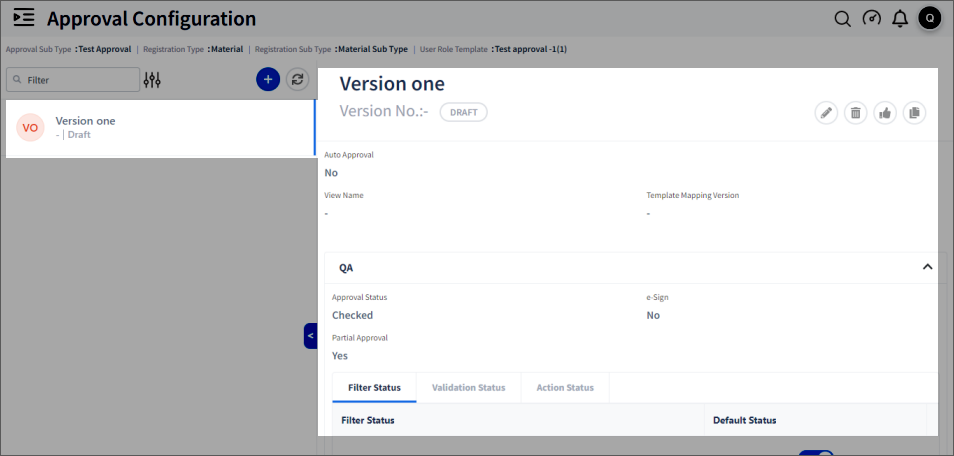
FIGURE: Approval Configuration Added
15.In the draft state, you can edit or delete the configuration.
1.After completing settings for all the roles, click  to approve the Approval Configuration.
Note: If a configuration exists for a particular Sub Type, it will get retired automatically when the new configuration is approved.
The copy option can be used to replicate the Approval Configuration settings from one type to another type.
1.To copy Approval Configuration, in the Approval Configuration screen, select the configuration and then click.  t
t

FIGURE: Copy Approval Configuration Screen
2.In the Version Name field, type name for the version you copy.
In the registration Type field, select the registration type.
4.In the registration Sub Type field, select the registration sub type.
5.Click Save.
6.Now the configuration is copied to the selected type / sub type
