Once the tests are reviewed, the tests comes to the next user as configured in the Approval Configuration screen.
To approve result entry, follow these steps:
1.On the main menu, click ![]() Test approval and then click Test Approval. The Test Approval screen appear.
Test approval and then click Test Approval. The Test Approval screen appear.
2.In the Test Approval screen, click  in the Filter dialog, select From and To date, Sample Type: Product, Registration Type: Batch / Non Batch / Plasma Pool, Registration Sub
Type and Test Status. Click the  to view more fields in the filter. In the Config Version field select the latest template. Select Lab and Test. Select All to select all the test in the sample/component. And then click SUBMIT as shown in the figure:
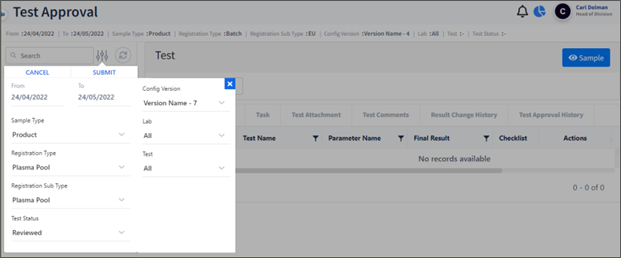
FIGURE: Using Filter
Samples for the given search criteria appears as shown in the figure:
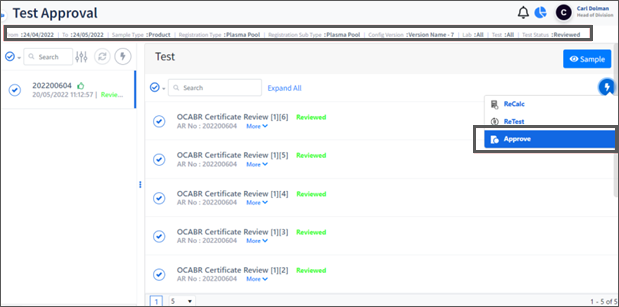
FIGURE: Test Approval Screen Showing Filtered Records
You can review the tests and then do any one of the following:.
3.Select tests to approve, click  and then click Approve as shown in the above figure. The test goes to the Approved state
4.Click to generate report as shown in the figure:
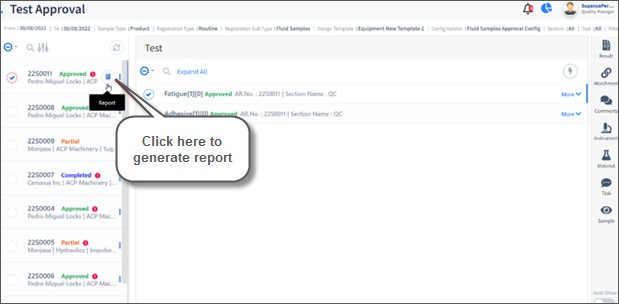
FIGURE: Generating Report
The report is generated and appears as shown in the figure:

FIGURE: Report Generated
