Goods In screen helps the user to capture details of goods that are coming in to the company through courier or any other mode.
To receive goods in storage, follow these steps
1.On the main menu, click Transaction, Sample Receiving and then click Goods In. The Goods In screen appears as shown in the figure::
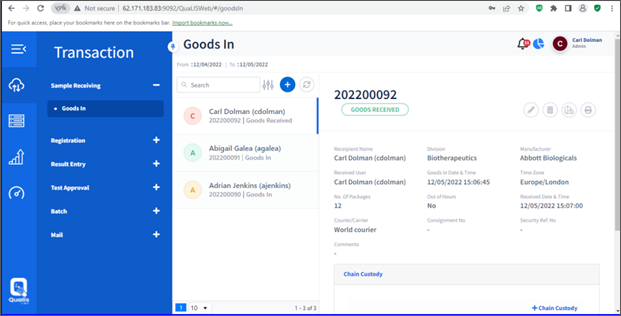
FIGURE: Goods In Screen
To add goods details, follow these steps
2.In the Goods In screen, click.  The Add Goods In screen appears as shown in the figure:
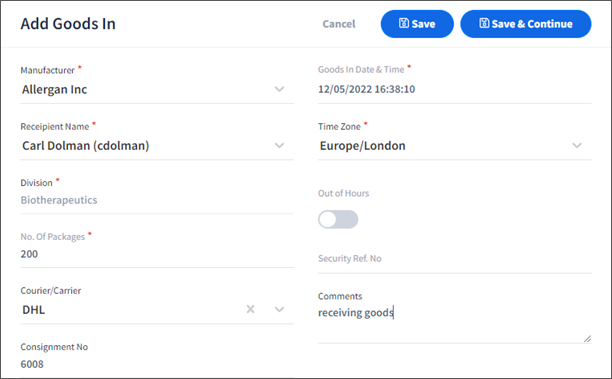
FIGURE: Add Goods In Screen
3.In the Manufacturer Name field, type the manufacturer of the goods.
4.In t he Recipient Name field, select the user who receives the goods. Based on the selected recipient, the Division appears.
5.In the No. Of Packages field, type number of packages receiving..
6.In the Courier/Carrier field, select the courier or carrier name that delivers the goods to the company
7.In the Consignment No field, type the consignment number.
8.If the time of receiving the goods is out of office hours, then click to turn on the Out of Hours option. If the Out of Hours option is turned on, then the Security Ref. No field becomes mandatory. Type the security reference number..
9.In the Comments field, type your comments if any..
10.Click Save. The goods are added and appear in the Goods In screen with status showing as GOODS IN as shown in the figure:
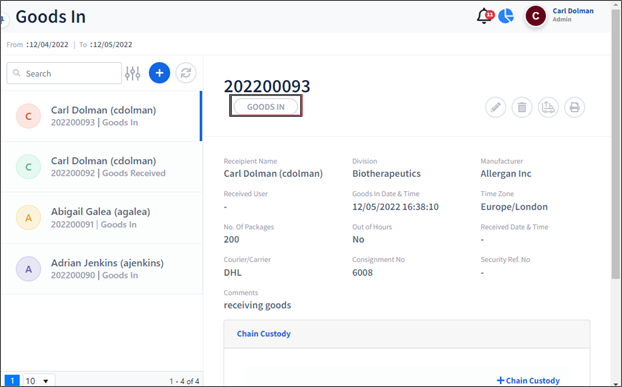
FIGURE: Goods Showing Status as Goods In
The recipient user should log in to their log in to receive goods. To receive goods, follow these steps:.
In the Goods In screen, select a record to receive goods and then click  as shown in the figure:
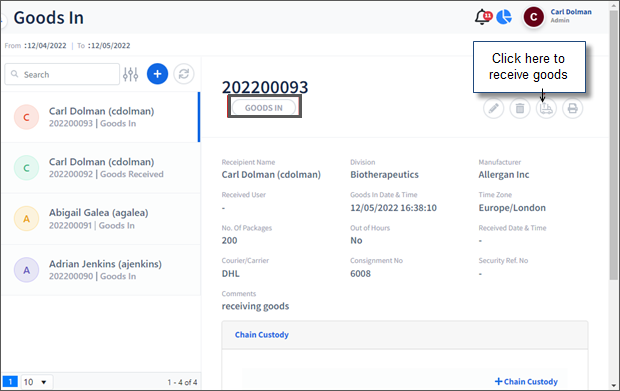
FIGURE: Receiving Goods
The status will turn to GOODS RECEIVED as shown in the figure:
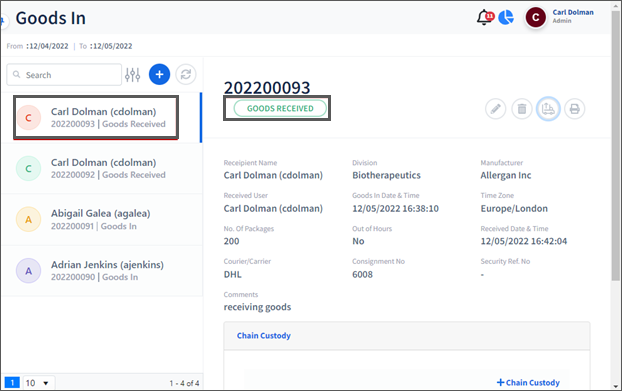
FIGURE: Record in GOODS RECEIVED State.
