Template Design screen is used to design registration form that is used to register a sample in the Registration screen. Template design is created for a selected sample type. You can create versions for templates. You can edit the details until the template is in the DRAFT state. Once approved you cannot edit the details.
The previous one will expire once you approve an new template
Adding a Template
To create a new template, follow these steps:
1.On the main menu, click  Configuration and then click Template Design. The Template Design master screen appears as shown in the figure:
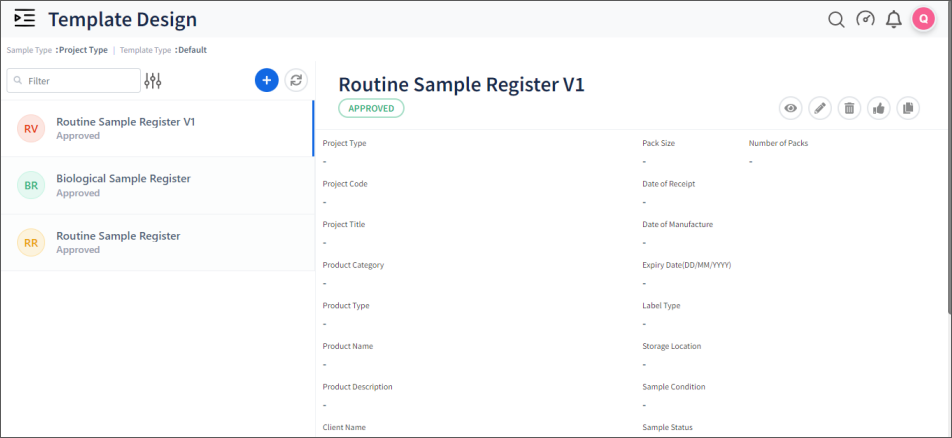
FIGURE: Template Design Master Screen
In the Template Design master screen, you can see the list of templates created. Options to edit and delete templates appear in each record..
2.Click  The filter dialog appears as shown in the figure:
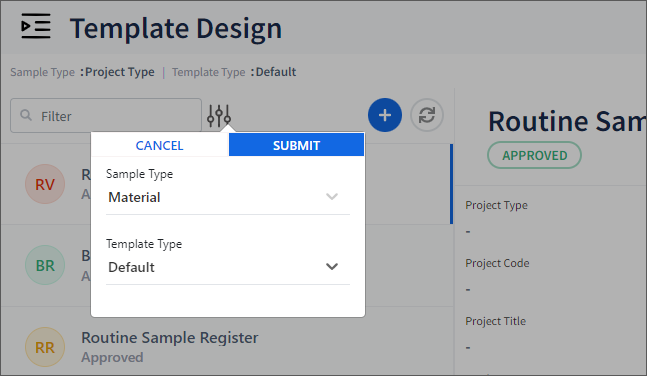
FIGURE: Selecting Sample Type to add Template Design
3.Select the Sample Type & Template Type and then click SUBMIT. The screen appears as shown in the figure:
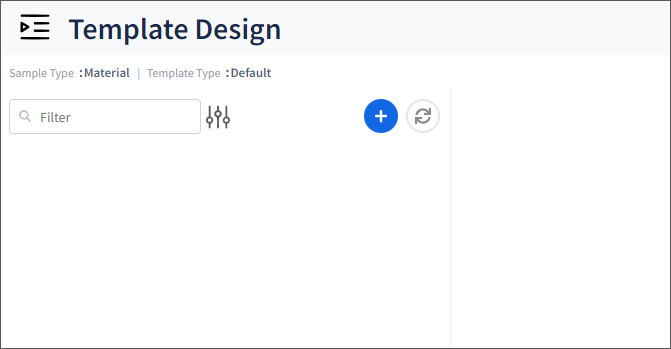
FIGURE: Template Design Screen for the selected Sample Type
If there are templates already added, the list of templates appears.
To add custom fields, follow these steps:
In the Add Template Design screen, click  . The screen appears as shown in the figure
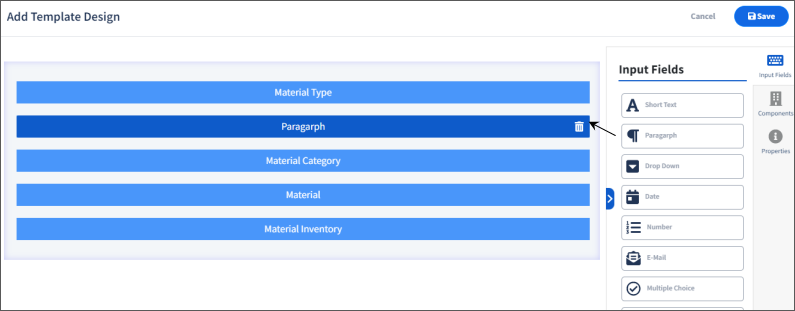
FIGURE: Adding Custom Fields 1
2.Under Input Fields, drag and drop the required fields as shown in the above figure.
3.And then click the dropped field. The Properties dialog for the selected field appears as shown in the figure:
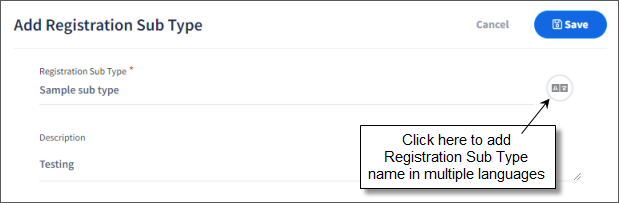
FIGURE: Add Registration Sub Type Dialog
5.In theRegistration Sub TypeName field, type the registration sub type name.
6.Click  to add Registration Sub Type name in multiple languages. The multilingual options appears as shown in the figure:
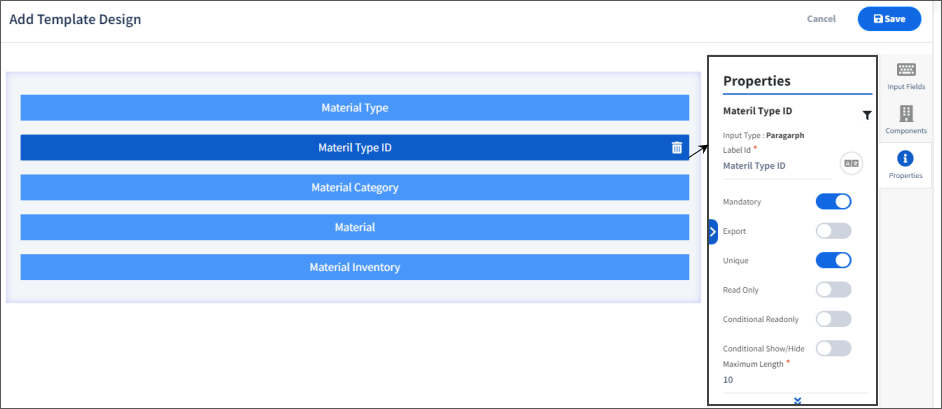
FIGURE: Adding Custom Fields 2
4.In the Label ID field, type the label for the field.
5.Click to enable other options likeMandatory / Export / Unique / ReadOnly / Conditional ReadOnly /Conditional Show/Hide etc.
6.In the Maximum Length field, type the maximum number of characters the field shall hold.
7.Add details for all the custom fields added and then click Save. The Template dialog prompts for the template name as shown in the figure:

FIGURE: Saving the Template
8.In the Template Name field, type a name for the template and then click SubmitThe template is saved and appears in the Template Design screen in the DRAFT state as shown in the figure:
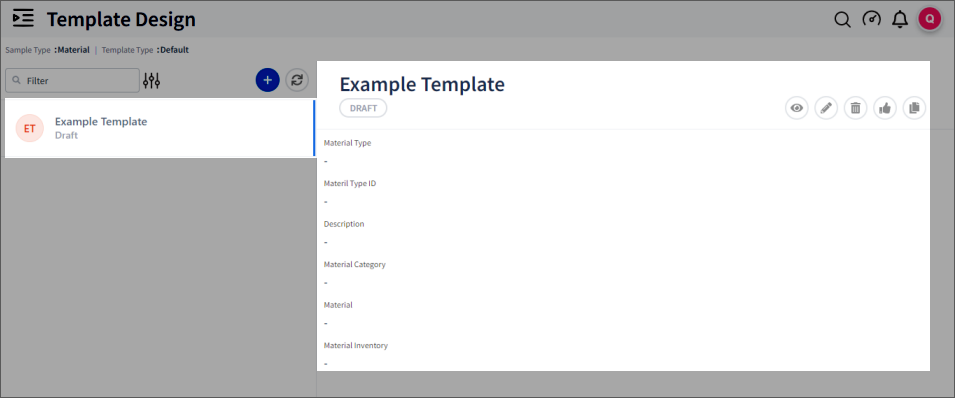
FIGURE: Template Design Added
1.Click  to preview the template design as shown in the figure:

FIGURE: Template Design Preview
1.Click  to edit the record. The Edit Template Design dialog appears as shown in the figure:
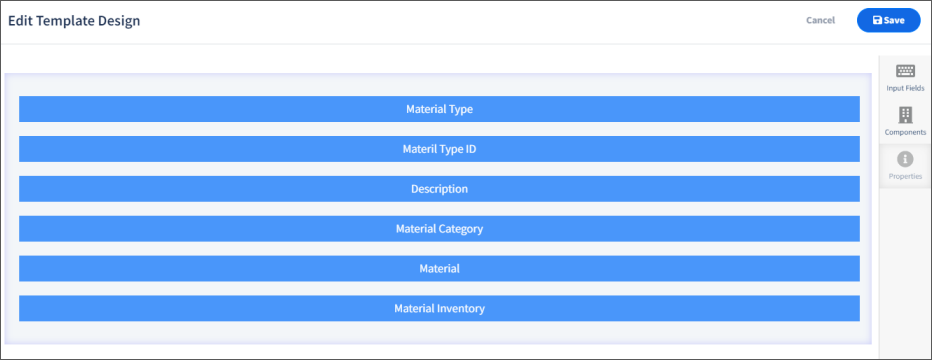
FIGURE: Edit Template Design Dialog
2.Do required changes and then click Save.
1.Click  to delete the Design Template that is in the DRAFT state. The confirmation dialog appears as shown in the figure:
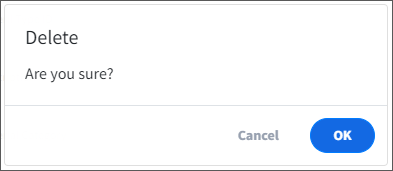
FIGURE: Delete Design Template Dialog.
1.Click OK to delete the template.
1.Click  to approve the template. The template is approved and appears as shown in the figure:
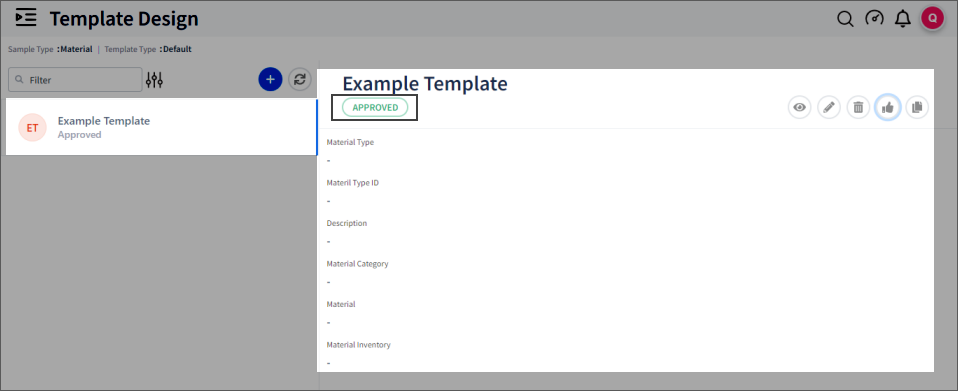
FIGURE: Template Design Approved
1.Click  to approve copy the template. The Copy Template dialog appears as shown in the figure:
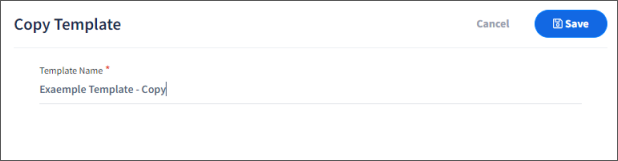
FIGURE: View Transaction Flow
1.Click to edit the record. The Edit Version dialog appears as shown in the figure:
FIGURE: Copy Template Dialog
2.In the Template Name field, type name for the template and then click Save. The copied template appears as shown in the figure:.
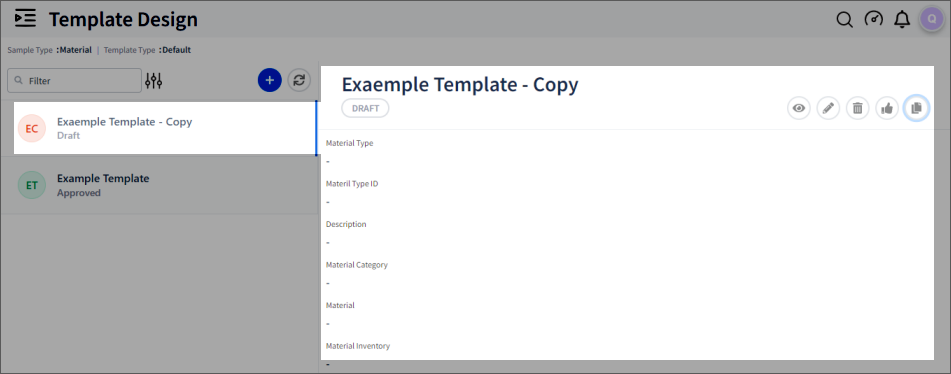
FIGURE: Template Design Copied
3.Click.In the Edit screen, do required changes and then save the template.
