Computers that are connected to the instruments are called clients. Client computers pull data from the instruments. Client master enables you to add client machines to SDMS. When you add a client you can map instruments to the client. You can also add a new instrument to the client if required.
1.On the main menu, click,  and then click Base Masters. The Base Masters screen appears. Click Client to go to the Client master tab. The Client Master tab appears as shown in the figure:
The Client Master tab enables you to do the following:
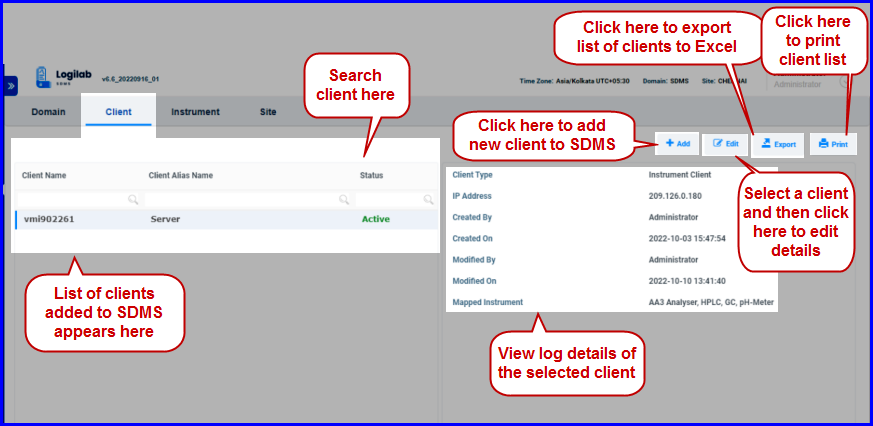
FIGURE: Client Master Tab
To add a client to the Client Master, follow these steps:
1.In the Client Master tab, click  . The Add Client dialog appears as shown in the figure:
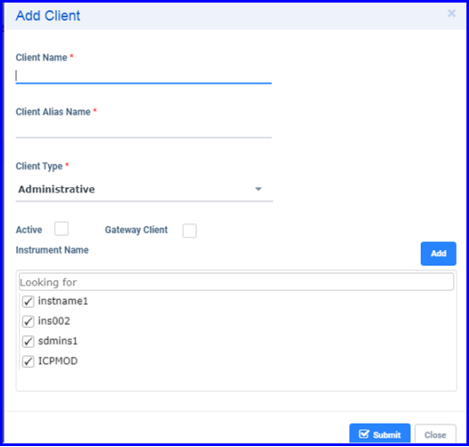
FIGURE: 21 - Add Client Screen
2.In the Client Name box, type the name of the client machine to add.
3.In the Client Alias Name box, type the alias name for the client..
Files highlighted in red are retired files.
4.From the Client Type box, select the type of the client. Different Client Types in SDMS has different purpose. And the list is as follows:
5.Click to check the Active check box to make the client active.
6.Click to check the Gateway Client check box to make the client gateway client.
7.In the Instrument Name box, if there are instruments then, click to select instruments from the list to map them to the client. .
Note: If the instrument is already mapped to some other client, then you will not be able to map that instrument.
8.Alternatively, you can click to add an instrument to the client. To see how to add an instrument, click here.
8.Alternatively, you can click  to add an instrument to the client. To see how to add an instrument, click here..
9.Click Save
To edit client details, follow these steps:
1.On the main menu, click, and then click Base Masters. The Base Masters screen appears. Click Client to go to the client master tab. The Client Master tab appears.
2.In the Client Master tab, click to select the client from the list you want to edit and then click  . The Edit Client screen appears as shown in the figure:
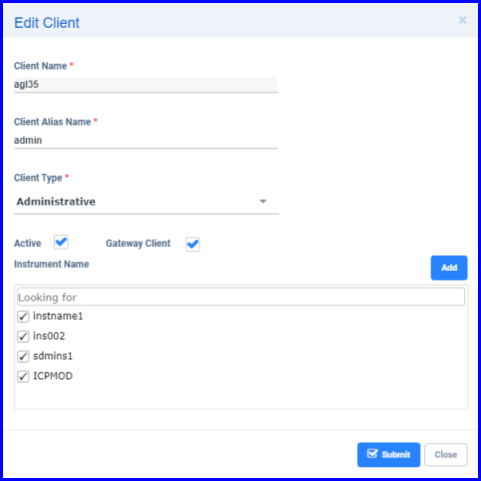
FIGURE:Edit Client Screen
3.Do the required changes to the client details and then click Save to save the changes.
To export Client Master to Microsoft Excel, follow these steps:
1.On the main menu, click, and then click Base Masters. The Base Masters screen appears. Click Client to go to the client master tab. The Client Master tab appears
In the Client Master tab, click The file Save As dialog appears.
3.In the Save As dialog locate the folder where you want to store the Excel file and then in the File Name box, type a name for the exported file.
4.Click Save. List of clients in the Client master is exported to Excel as shown in the figure:
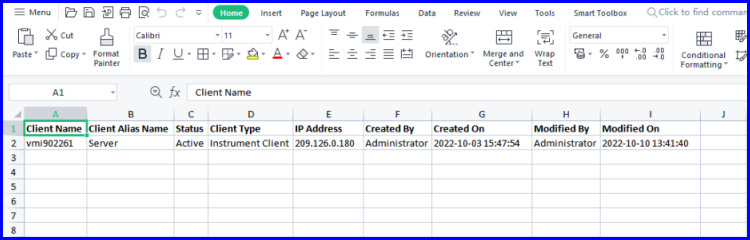
FIGURE:– Export Client Master
To print Client Master, follow these steps:
1.On the main menu, click, and then click Base Masters. The Base Masters screen appears. Click Client to go to the Client master tab. The Client Master tab appears..
2.In the Client Mastertab, click.  The Print screen appears as shown in the figure:
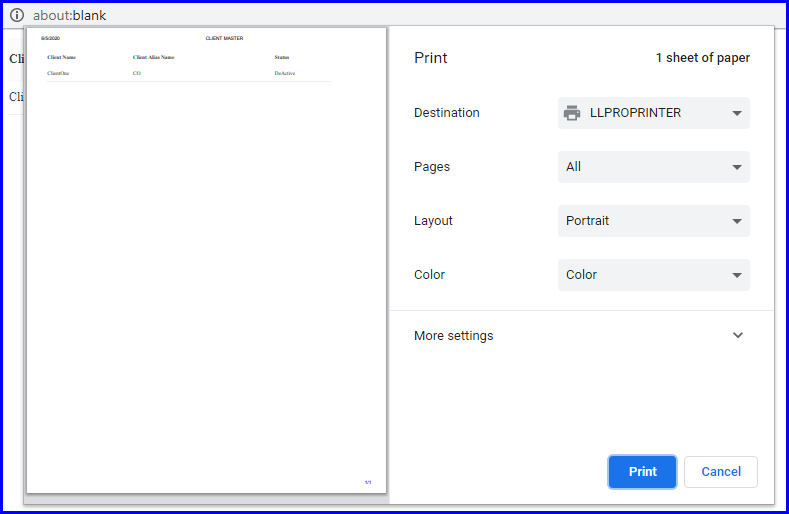
FIGURE:- Print Client Master Dialog
3.In the Print dialog, you can see the print preview of the client master on the right side.
4.Click Print to print the client list.
