Logilab SDMS - User Management
1 User Management
The User Management screen enables you to create and manage user groups and users. You can create user group and then group/create users under user groups.
Manage User interface helps you to do the following tasks:
- Create new user group
- Set access rights to user groups
- Create new user
1.1 Create user Group
- On the main menu click , and then click
 User Management. The User Group screen appears as shown in the figure:
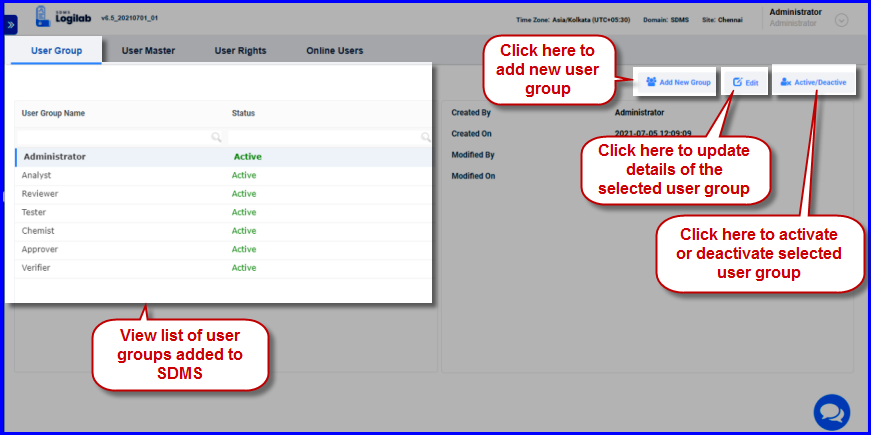
FIGURE: 85 - User Management – User Master Screenb
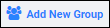
- In the User Grouptab, click.
 The Add New Group dialog appears as shown in the figure:
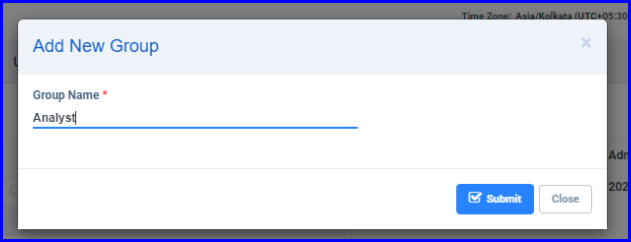
FIGURE: 86 - Add New Group Dialog
- In the Group Namebox, type the name of the user group you want to create and then click Save. You can see the new user group created and appear in the user group list.
1.1.1 Edit user group
- To edit the user group, select the user group from the list and then click Edit. In the Edit User Groupdialog, edit user group name and then click Save.
1.1.2 Activate or deactivate user group:
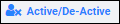
- To activate or deactivate an user group, select the user group from the list and then click .
 You will see a confirmation message saying “Do you want to Activate / Deactivate User Group? Click Ok. The user group will be activated / deactivated.
1.2 Creating new user
To create/add a new user, follow these steps:
- On the main menu click, and then click User Management. In the User Management screen, click User Master. The User Mastertab appear as shown in the figure:
FIGURE:- User Management - User Master Screen
- In the User Masterscreen, in the Group Name box select the user group you want to create user. And then click.
 The add user dialog appears as shown in the figure:
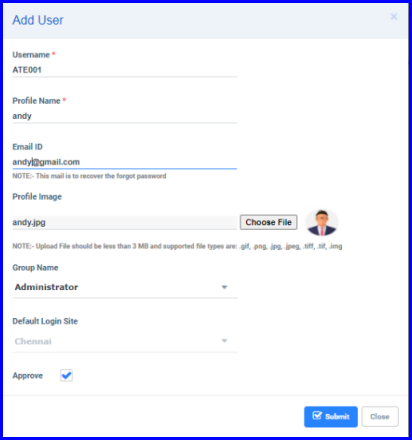
FIGURE:- Add User Dialog
- In the User Namefield, type the user name that you want to create for the user to login to SDMS.
- In the Profile Namefield, type the designation of the user.
- In the Email ID field, type the user email id that can be used to recover forgot password.
- In the Profile Imagefield, click Choose File and select the profile photo of the user.
- From the Group Namefield, select the user group where you want to group this user.
- You can set the Default Login Sitein the edit user screen.
- Click Approveto approve the user. You can also approve user later.
- Click Submit.
1.3 Other Options in the User Master Screen
1.3.1 Edit User
- On the main menu click , and then click
 User Management. In the User Management screen, click User Master.
 - In the User Mastertab select the user you want to edit and then click . The Edit Userdialog
 appears as shown in the figure:
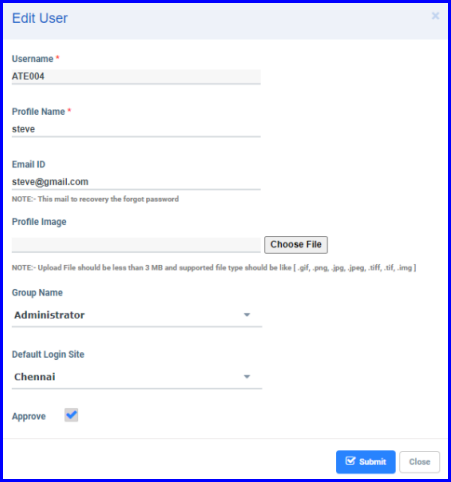
FIGURE: 89 - Edit User Dialog
- In the Default Login Site field, select the site the user can login by default. In the Login screen the Site field will be automatically filled if the Default Login Site field is set here.
Note: You cannot edit Username and Approve fields.
- Do required changes and then click Submit to save the changes.
1.3.2 Retire User Account
If a user account is no longer required, you can retire the user account. To do so, follow these steps:
Warning: An user account once retired cannot be activated again.
- In the User Master tab, select the user you want to retire and then click

- An Audit Trailscreen appears for authentication. Type your password, reason and comments appropriately and then click Submit.
Note: The user account is retired. Hence, you cannot activate, edit or approve the user account.
1.3.3 Reset Password
In the User Master tab, select the user account and then click.  The user is allowed to reset the password on their next login.
1.3.4 Unlock
User account will be locked after three consecutive invalid password entry attempts. Select the locked user account and then click to unlock the user account.
1.3.5 Active/Deactive
- You can temporarily deactivate a user account for some reasons. To do so, follow these steps:
- In the User Mastertab, select the user you want to deactivate and then click
- An audit trail screen appears for authentication. Type your password, reason and comments appropriately and then click Submit.
Note: The user account is deactivated. Hence, the user account cannot be used un till it is activated again.
- To activate user account, select the user you want to activate and then click .
- An audit trail screen appears for authentication. Type your password, reason and comments appropriately and then click Submit.
1.3.6 Approve
While creating a user account, if it is not approved then the user account has to be approved to
use it. In the Manage User tab, select the unapproved user account and then click. 
1.3.7 Import ADS
Import ADS option helps you to import user accounts from a Domain. To do so, follow these steps.
- In the User Mastertab, click.
 The screen appears as shown in the figure:
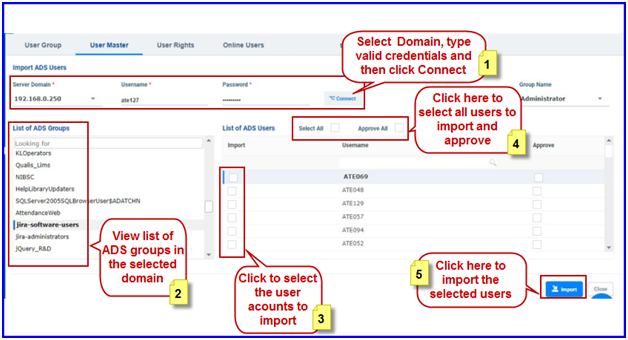
FIGURE:– User Master - Import ADS screen
Follow the onscreen instructions to import users from a Domain.
1.3.8 Export
On the Manage User screen click .  The list of user accounts will be exported to an EXCEL sheet.
1.3.9 Import
- On the Manage Userscreen click. The Import Users dialog appears as shown in the figure:
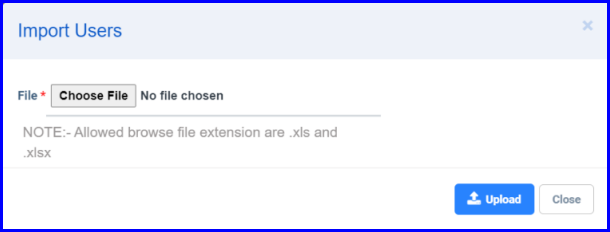
FIGURE:- Import Users Dialog
- Click Choose Fileand locate the EXCEL file to import and then click Upload.
1.4 Set access rights to user groups
To define access rights to the user groups, follow these steps:
- On the main menu click , and then click User Management.
- In the User Managementscreen, click to select the User Rights The User Rights tab appears as shown in the figure:
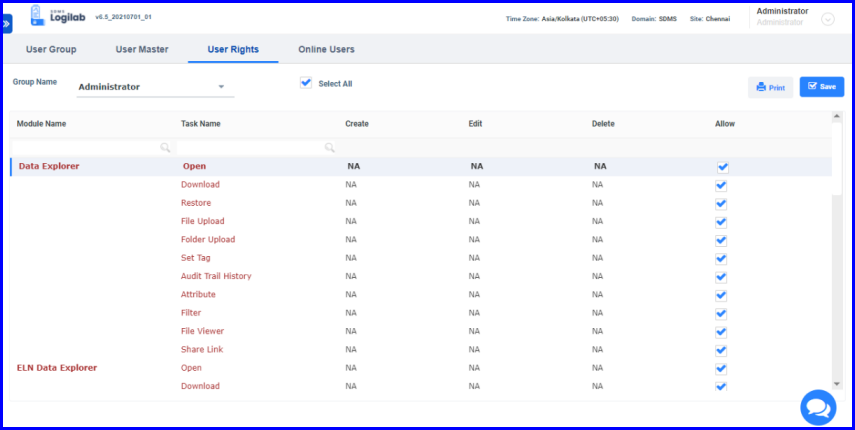
FIGURE:- User Management – User Rights Screen
In the User Rights tab you can see the list of modules and tasks in SDMS. And for each task you can define create, edit and delete rights for the selected user group.
- From the Group Name box, select the user group you want to define rights.
- Click Create / Edit / Delete for the tasks in the modules that are applicable for the user group. You can also click Allow to grant access to the applicable Control Right.
- Click Save .
- Click Print to print the user rights details if required.
1.5 Online Users
Online Users tab helps to view list of users currently logged in to the SDMS application. You can also chat with online users using the chat facility.
To view list of online users in SDMS application, follow these steps:
- On the main menu click , and then click User Management.
- In the User Managementscreen, click to select the Online Users The Online Users tab appears as shown in the figure:

FIGURE: - User Management – Online Users Tab
- Select a user from the list and then click Chat. The Chat screen appears as shown in the figure:
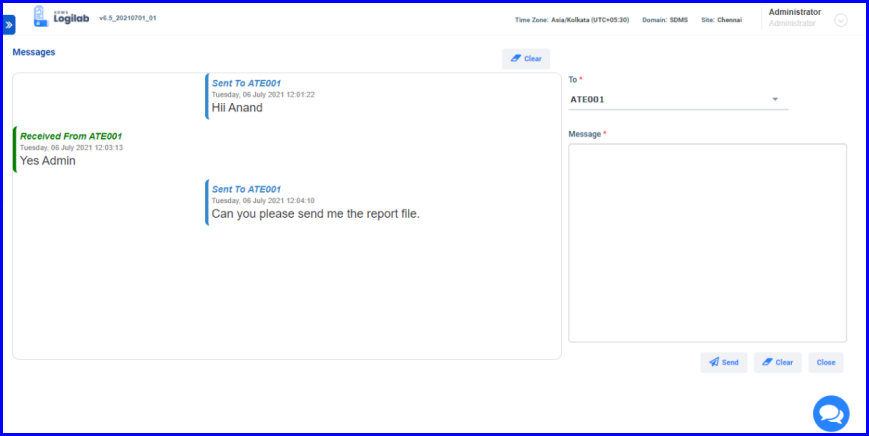
FIGURE:- Online User – Chat Screen
- In the Messagebox, type your message and then click Send. You can also receive messages from other online users and view the same on the left side under Messages as shown in the above figure.
- Click Clear that appears on the top of the chat screento clear the chat history and the cleared chat history cannot be restored.
- Click Clear that appears below the Messagebox to clear the message you just typed in the Message
1.6 Setting up Password Polic
To setup password policy, follow these steps:
- On the main menu click, and then click Password Policy. The Password Policy screen appears as shown in the figure:
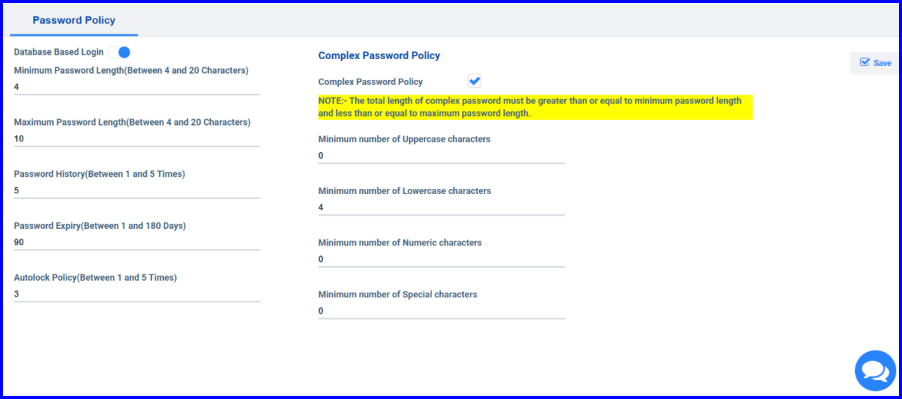
FIGURE:- Password Policy Screen
You can set up password policy for database based logins and domain based logins.
- By default you can setup password policy to Database Based Logins.
- Setup basic rules for the password such as Minimum Password Length, MaximumPassword Length, Password History , Password Expiryduration and Auto Lock Policy.
- To setup complex password policy, click to select the Complex Password Policycheck box.
- Set up values for complex policies such as: Minimum number of capital characters, Minimum number of small characters, Minimum number of numeric characters, and Minimum number of special characters.
- Click Save.
1.7 Set Scheduler rights to user groups
Note: scheduler Rights screen will be available only when the scheduler rights is enabled in the Settings>> preferences screen.
To define access rights to the user groups, follow these steps:
- On the main menu click, and then click User Management.
- In the User Managementscreen, click to select the Scheduler Rights The Scheduler Rights tab appears as shown in the figure:
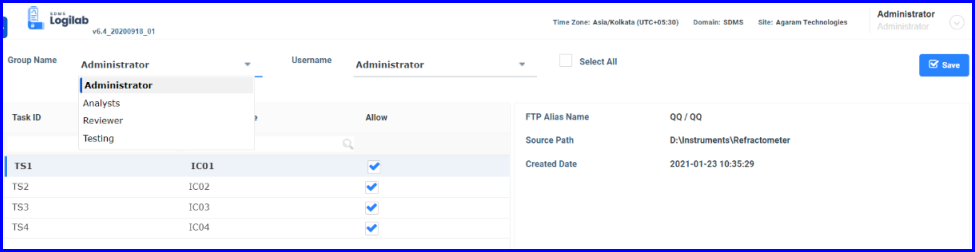
FIGURE:- User Management – Scheduler Rights Screen
You can see list of tasks scheduled in the screen. Select the group name and then the user name and then click to select the check box in the Allow column to set rights to the selected tasks.
- Click Save. You will see a message saying “Scheduler Rights Saved Successfully”.
